Configuring an Elasticsearch Connection
This topic provides instructions for configuring a connection to an Elasticsearch instance in the Anzo console. For information about installing Elasticsearch, see Installing and Configuring Elasticsearch.
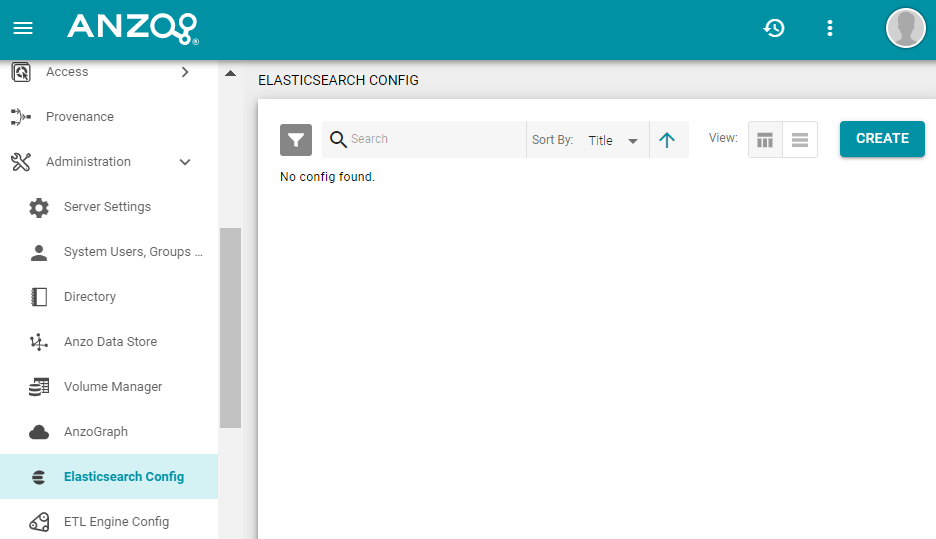
- In the Anzo console, expand the Administration menu and click Elasticsearch Config. Anzo displays the Elasticsearch Config screen, which lists any existing Elasticsearch connections. For example:

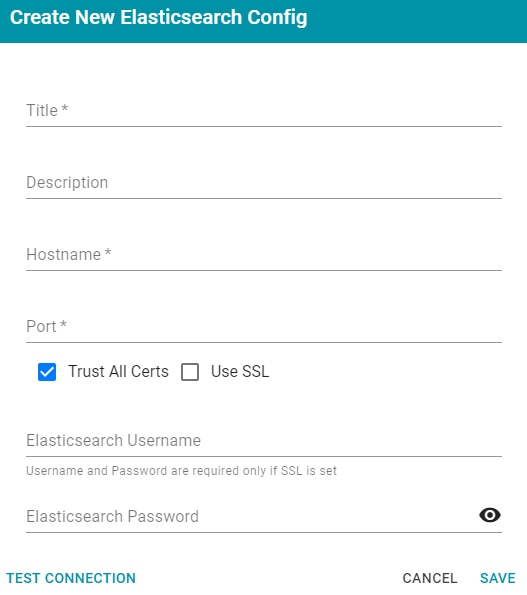
- On the Elasticsearch Config screen, click the Create button. Anzo opens the Create New Elasticsearch Config dialog box.

- On the Create New Elasticsearch Config screen, provide the following details about the Elasticsearch instance:
- Title: Type a name for this Elasticsearch connection.
- Description: Optional description for this connection.
- Hostname: Specify the IP address or hostname of the Elasticsearch server.
- Port: Specify the port to use for the Elasticsearch connection. The default Elasticsearch port is 9200.
- Trust All Certs: Indicates whether Anzo should trust the Elasticsearch certificates for this connection. Cambridge Semantics recommends that you accept the default value of enabled.
- Use SSL: If this Elasticsearch instance is configured for SSL authentication, select the Use SSL checkbox.
- Elasticsearch Username: If Use SSL is specified, type the user name to use to connect to Elasticsearch.
- Elasticsearch Password: If Use SSL is specified, type the password for the user name that you specified.
- Click Test Connection to check if Anzo can connect to Elasticsearch. If the connection fails, make sure that Elasticsearch is running and that you entered the correct connection details.
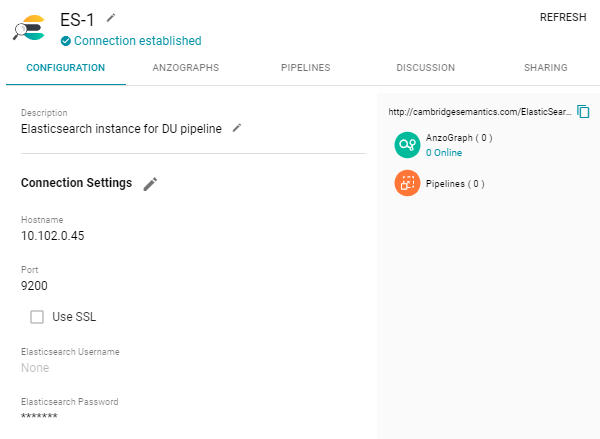
- Anzo displays a Connection Successful dialog box. Click OK to close the dialog, and then click Save to save the new connection. Anzo saves the connection and displays the Configuration overview screen. For example:

You can adjust configuration details as needed. For instructions on creating an unstructured pipeline, see Onboarding Unstructured Data.