Calculating Values
Anzo provides many standard and advanced functions that you can use to compute the values that are displayed on a dashboard. When selecting properties and paths for lenses and filters, you can add calculations by selecting functions from a list or by writing your own formula. Hi-Res Analytics enables you to save your formulas as computed properties that can be reused on other dashboards, lenses, and filters.
This section provides instructions for using functions and formulas to calculate displayed values, saving formulas as computed properties, and reusing computed properties.
Computations in Filters and Lenses
When you apply formulas to properties in filters, Anzo performs the calculation across all of the values that exist for the selected property and then groups the results into the list of values that the calculations return. For multiple value properties, all values for that property are included in the calculations.
When you apply formulas to properties in lenses, the calculation results depend on the data type of the dashboard or lens. If the property belongs to a class that allows multiple values, Anzo performs the calculation on each set of multiple values and returns the results as one record in the lens. If the class includes single value properties, the calculation is performed separately for each single value.
Applying Functions and Formulas to Properties
Follow these instructions to use a function or formula to compute the values in a lens or filter.
- Create a new lens or filter or open the Designer for an existing lens or filter.
- In the drop-down list for selecting properties or fields, select the property or path for which you want to compute the values. For example:
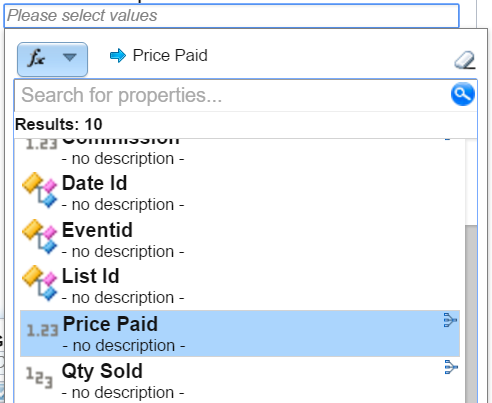
- Click the function button (
 ) to display the list of standard functions. The list varies depending on the data type of the selected property.
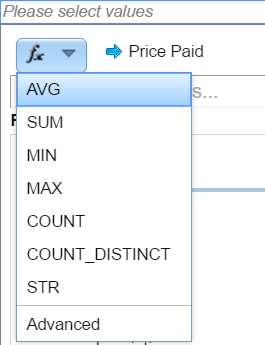
- Click a function to apply it to the property that you chose. For information about each of the available functions, see Supported Functions and Formulas.
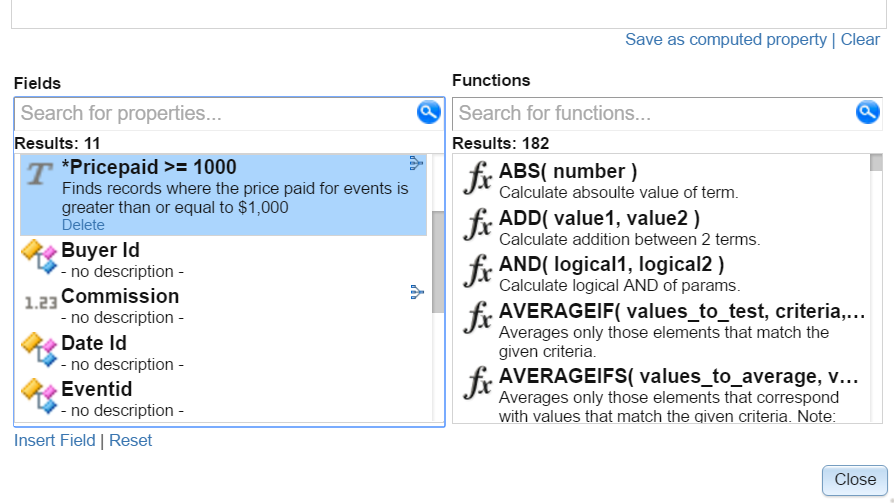
- To choose a more advanced function or type a formula, click Advanced. The Calculated Value dialog box opens and enables you to choose additional properties and functions as well as type your own calculation.
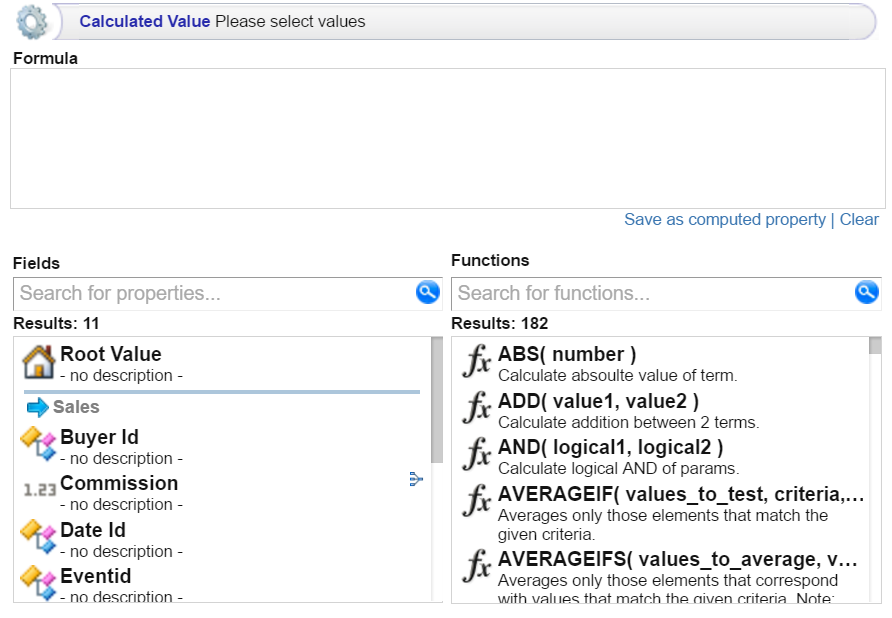
Tip: To create an advanced formula, it might help to get started by viewing the functions listed in the Functions column on the right side of the screen. Each function includes the syntax to use for creating a formula that uses that function.
- In the Functions column, double-click a function to add it to the Formula field at the top of the dialog box. For information about each of the available functions, see Supported Functions and Formulas.
- Place your cursor in the Formula where you want to insert the property to perform the calculation on (for example, inside the parentheses) and then double-click the property in the Fields column. If the syntax for the function includes characters such as commas, type the characters in the appropriate location in the formula. You can click the Clear link on the bottom right of the Formula field any time to clear that field and start over.
- When you are finished writing a formula, you have two options:
- If you want to use the formula now without saving it for later use, click Close to close the Calculated Value dialog box. Then complete the lens or filter configuration.
- If you want save the formula for reuse, click the Save as computed property link and follow the instructions below in Saving Formulas for Reuse.
Saving Formulas for Reuse
Follow these instructions to save a formula as a computed property that you can use in other lenses and filters that target the same class of data.
- When you have finished writing a formula in the Calculated Value dialog box, click the Save as computed property link below the Formula field. The Save formula as computed property dialog box opens.
- In the Title field, type a name for the new computed property.
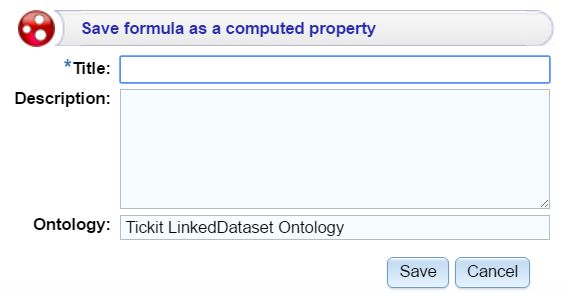
- Type a description of the new property in the Description field.
- If necessary, click in the Ontology field to choose another ontology to save the property in. If you want to save this property in multiple ontologies, you can click the Save as computed property link again after saving the property in the current ontology.
- Click Save. Anzo saves the new property and labels it with an asterisk (*). The property becomes available in the Fields column in the Calculated Value dialog box.
- Click Close to close the dialog box.
Reusing Computed Properties
When an ontology contains computed properties, any other dashboards, lenses, and filters that use that ontology can also use the computed properties as long as they also use the same data type or class of data that the computed property is saved in.
To use a computed property:
- Open the Designer for the filter or lens where you want to apply the computed property.
- Click in the Fields or Column Value Expression field to open the property selection drop-down list. The drop-down list includes any computed properties that are available for use with the selected data type. Computed properties are labeled with an asterisk (*).
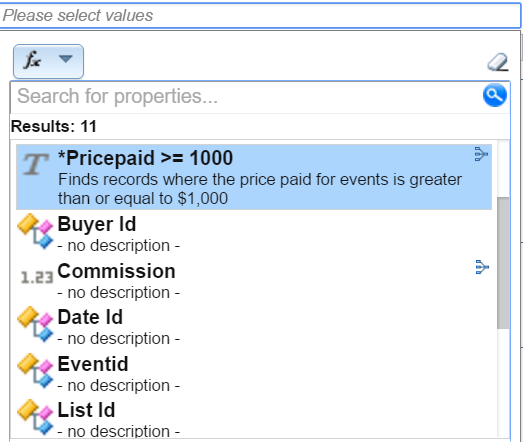
- To use the property as-is, select the property and then close the drop-down list.
- If you want to make changes to the formula and save it as a different computed property, select the property and then click the function button (
 ) to open the Calculated Value dialog box. Follow the instructions in Calculating Values above to edit the formula and then save a new computed property.