Creating a Data on Demand Endpoint
This topic provides instructions for creating a data on demand endpoint for a graphmart. For information about accessing endpoints, see Accessing Data on Demand Endpoints.
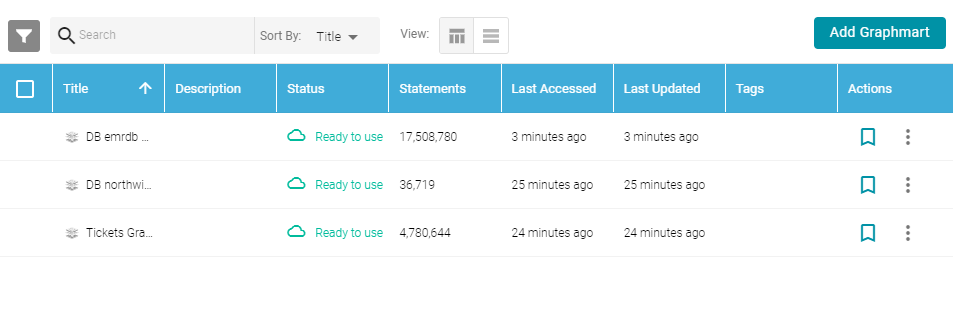
- In the Anzo application, expand the Blend menu and click Graphmarts. Anzo displays a list of the existing graphmarts. For example:
- On the Graphmarts screen, click the name of the graphmart for which you want to enable the data on demand service.
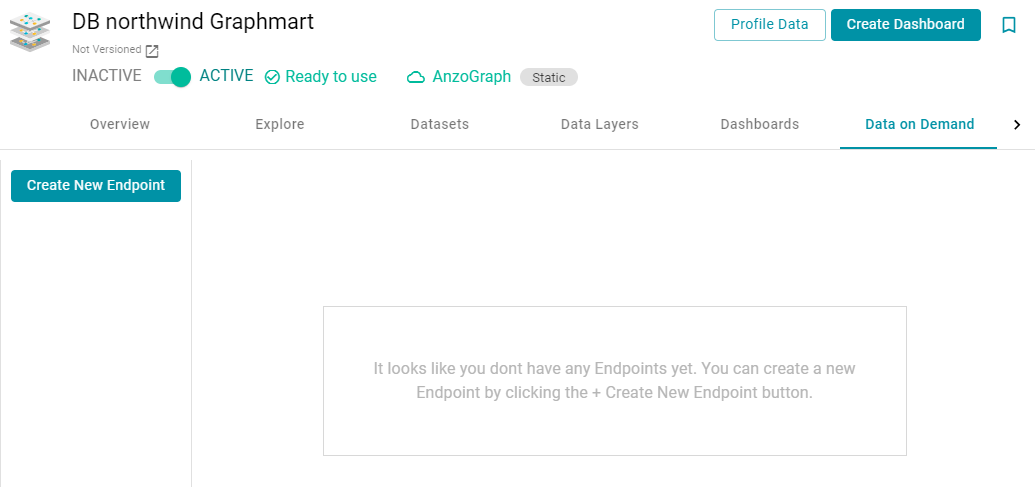
- Click the Data on Demand tab. Anzo displays the Data on Demand screen, which lists any existing endpoints. For example:
- On the Data on Demand screen, click the Create New Endpoint button. Anzo displays the Create New Endpoint screen.
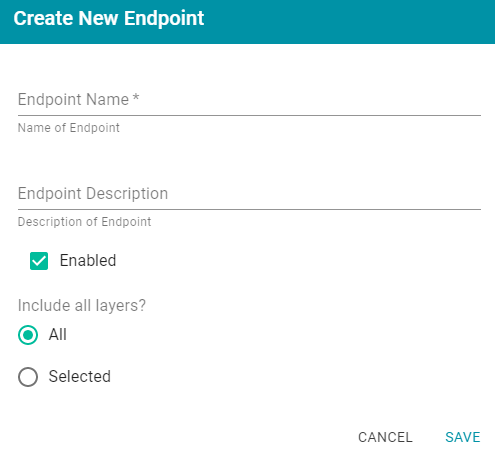
- Type a name for the endpoint in the Endpoint Name field and an optional description in the Endpoint Description field. Make sure that the endpoint name is unique.
- By default the Enabled option is selected, indicating that the endpoint will be enabled when the configuration is saved. If you want to disable the endpoint, clear the Enabled check box.
If a request is sent to a disabled endpoint, Anzo displays a 503: Service Unavailable error with a message indicating that the endpoint is disabled. For example, "Unable to process request. The endpoint 'ExpandGM/TestEndPoint' is DISABLED."
- By default the Include all layers option is set to All, indicating that all of the data layers in the graphmart will be available from the endpoint. If you do not want to enable all layers, click the Selected radio button. After you save the new endpoint, you can edit the configuration to specify which data layers to include.
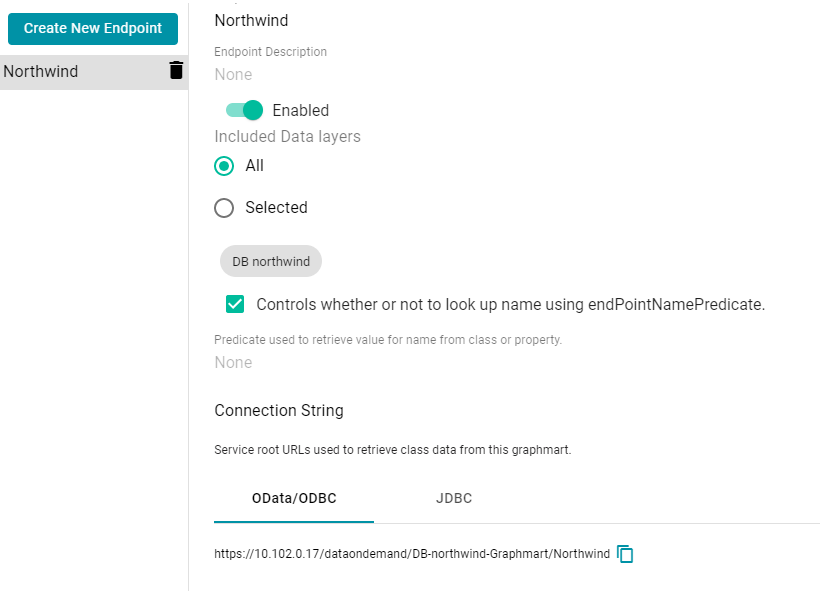
- Click Save. Anzo saves the configuration and adds the endpoint to the list of endpoints on the Data on Demand screen. Click the endpoint name to view the configuration details. For example:
- If you chose to include Selected layers instead of All layers, click the Edit Selections link under the Selected radio button. The Select Data Layers screen is displayed.
- On the Select Data Layers screen, select the checkbox next to each layer that you want to include. Then click Save Selections to save the change.
- If you want to specify the predicate value to use for the class and property display names for the endpoint, such as the rdfs:label or dc:description for the entity, select the Controls whether or not to look up name using endPointNamePredicate option. Then specify the predicate to obtain the values from in the Predicate used to retrieve value for name from class or property field.
Specify a predicate from the related data model, such as
http://www.w3.org/2000/01/rdf-schema#labelto use each entity's Label value orhttp://purl.org/dc/elements/1.1/descriptionto use each entity's Description value.If the Controls whether or not to look up name using endPointNamePredicate option is disabled, Anzo displays each entity's local name. If the Controls whether or not to look up name using endPointNamePredicate option is enabled but the Predicate used to retrieve value for name from class or property field is empty, Anzo automatically uses the value in the rdfs:label (http://www.w3.org/2000/01/rdf-schema#label) predicate.
- Once configured and enabled, this Data on Demand endpoint is ready for access via OData, ODBC, or JDBC. At the bottom of the screen, retrieve the OData/ODBC and JDBC service URLs that you can use to access the endpoint's data from applications.
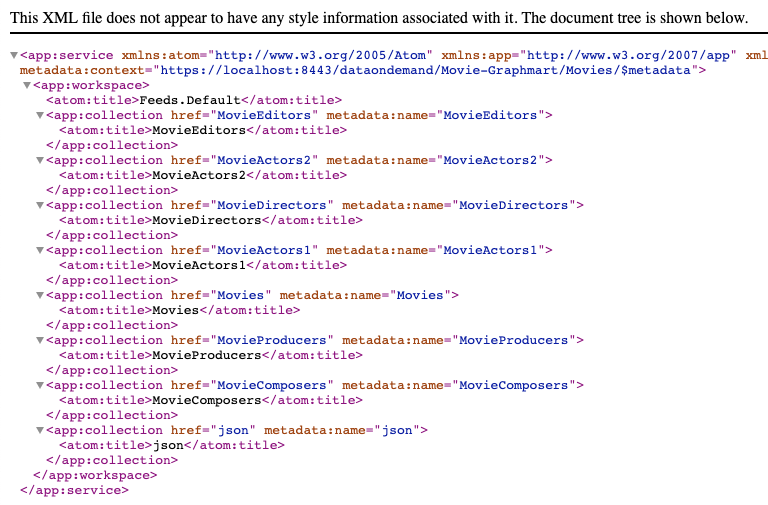
To test whether the endpoint is active, you can copy the OData ODBC service URL and paste it into a web browser. If the endpoint is active, the browser shows an XML feed of the schema data. For example:
The Data on Demand endpoint is now available to access.
The endpoint is accessible only when it is Enabled and the associated graphmart is Active.
For information about accessing endpoints programmatically, see Accessing an Endpoint Programmatically. For information about accessing endpoints with third-party analytics tools, see Accessing an Endpoint from an Application. For information about the supported OData operators, output format, and query examples, see OData Reference.