Adding a Validation Step
Follow the instructions below to add a step that validates the data in a data layer.
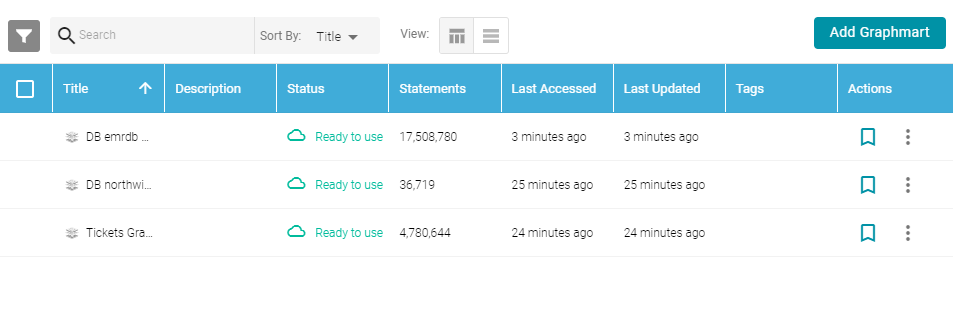
- In the Anzo application, expand the Blend menu and click Graphmarts. Anzo displays a list of the existing graphmarts. For example:
- On the Graphmarts screen, click the name of the graphmart that you want to change.
- Click the Data Layers tab. Anzo displays the existing data layers.
- Click the menu icon (
 ) on the layer for which you want to create a step, and then select Add Step/View. Anzo opens the Add step dialog box.
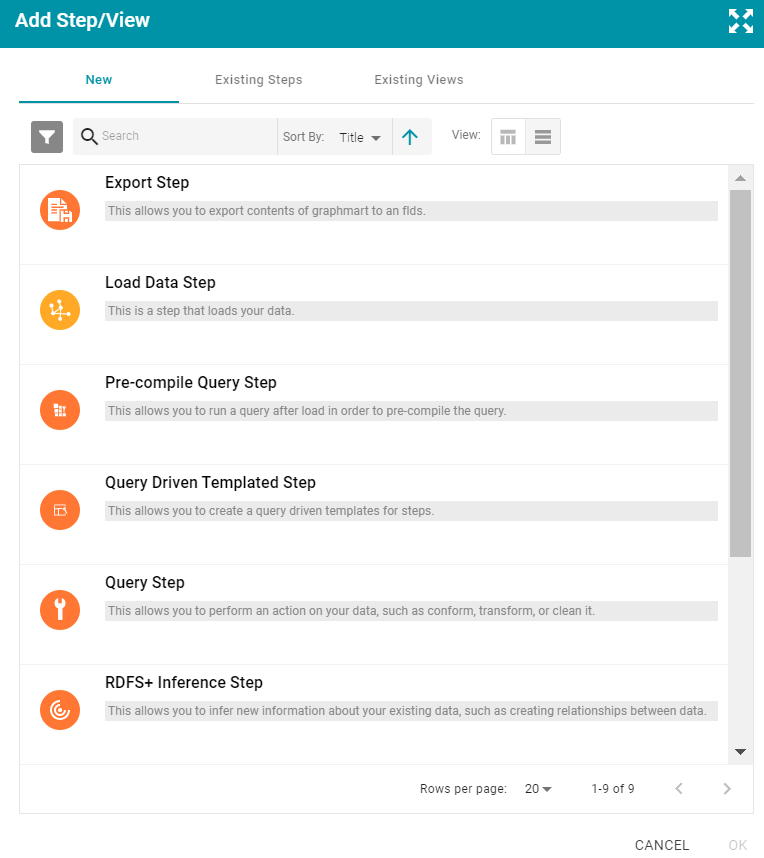
- Follow one of the options in this step, depending on whether you want to create a step from scratch or clone an existing validation step for reuse:
- Select Validation Step, and then click OK. Anzo opens the Create validation step screen. Proceed to the next step.
- If you want to clone an existing step and add it to this layer, click the Existing Steps tab and follow these steps:
- Select the validation step that you want to clone and click OK. Anzo displays the Clone dialog box, which asks if you want to copy the permissions from the existing step.
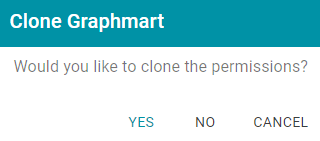
- On the Clone dialog box, click Yes to copy the permission configuration from the existing step or click No to copy the step without the permission configuration.
Anzo clones the step, adds the copy to the layer, and returns to the Data Layers screen.
- On the Data Layers screen, click the menu icon () on the cloned step and select Edit. Anzo opens the Edit load data step screen. Proceed to the next step.
- Select the validation step that you want to clone and click OK. Anzo displays the Clone dialog box, which asks if you want to copy the permissions from the existing step.
- Select Validation Step, and then click OK. Anzo opens the Create validation step screen. Proceed to the next step.
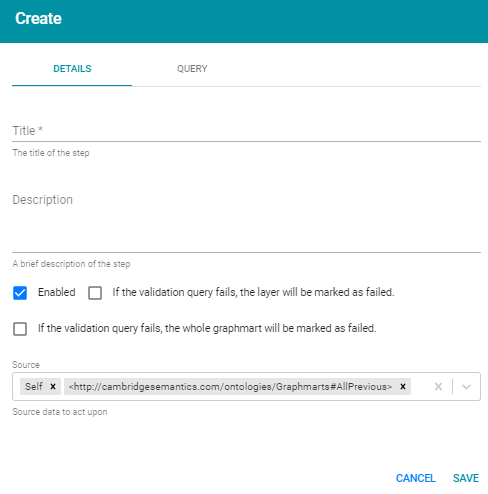
- Under Details, type a name for the step in the Title field and add an optional description in the Description field.
- By default the Enabled option is selected, indicating that the step is enabled and will run when the layer is loaded. If you want to disable the step so that it is not processed, clear the Enabled check box.
- Specify what action, if any, you want Anzo to take if this validation step fails. The step includes the following two settings that control how Anzo treats the layer or graphmart if the validation fails:
- If the validation query fails, the layer will be marked as failed: Select this option if you want Anzo to abort the load of the data layer if this step fails. The graphmart and other successful data layers continue to load.
- If the validation query fails, the whole graphmart will be marked as failed: Select this option if you want Anzo to abort the load of the entire graphmart if this validation step fails.
If you want Anzo to proceed to load the data layer if the validation step fails, leave both options blank.
- Click the Query tab to compose the query that this step will run. Anzo displays the Query screen.

The tab tab includes the syntax for writing a SPARQL ASK query, which is useful for determining whether a certain pattern exists in the data. ASK queries return "true" or "false" to indicate whether a solution exists. The template includes a source graph parameter (
${fromSources}). Using the configured Source data options from the Details tab, Anzo automatically populates the query with the appropriate source graph URIs when the query runs. - Edit the template text as needed, and then click Save to save the validation query and add the step to the data layer. Anzo adds the step as the last step in the layer. If you want to change the order of the steps, click the black bar on the left side of a step and drag it up or down.