Configuring Dataset Categories
Anzo's Category manager provides a way to define metadata about a data set that can be used to classify or catalog the data. Categories describe the properties in a data set but are independent of the instance data. When categories are configured for a data set in the catalog, they are displayed as choices in the list of quick filters that are available when sorting data sets. This topic provides instructions for configuring data set categories.
Before you can configure categories for a data set, the Category setting must be enabled for the classes in the data model for that data set. If necessary, open the model for editing and select the Category checkbox for each class that you want to list as a category. For example:
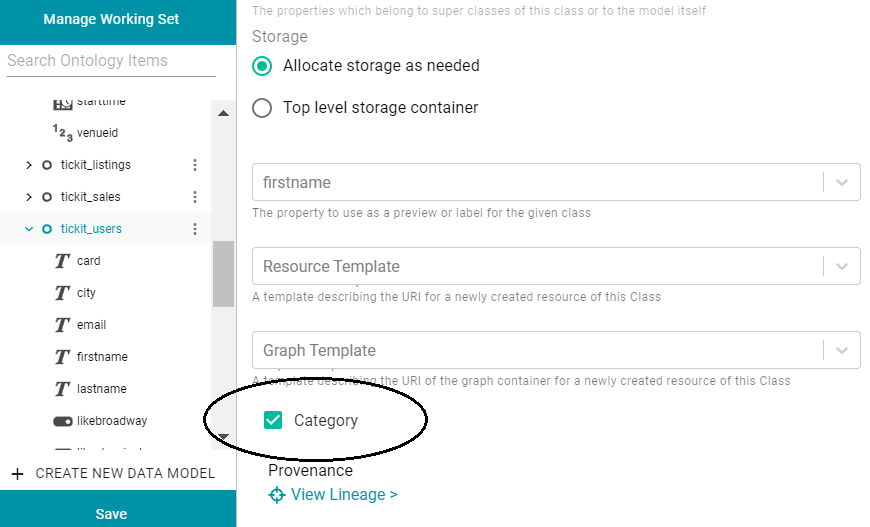
Make sure that you save the model changes. You do not need to re-ingest the data source. The Category tab for that data set becomes available once the model is saved. For more information about changing a model, see Editing a Model.
Follow the steps below to configure categories.
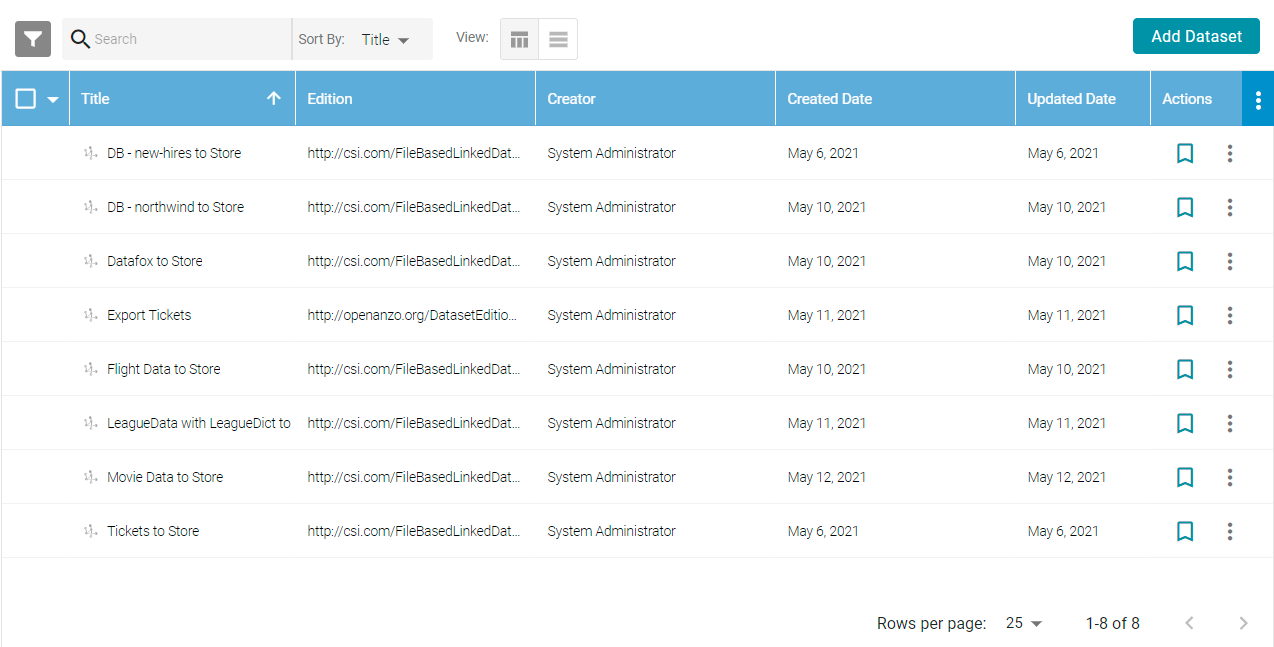
- In the Anzo application, expand the Blend menu and click Datasets. Anzo displays the Datasets screen, which lists the catalog of Datasets. For example:
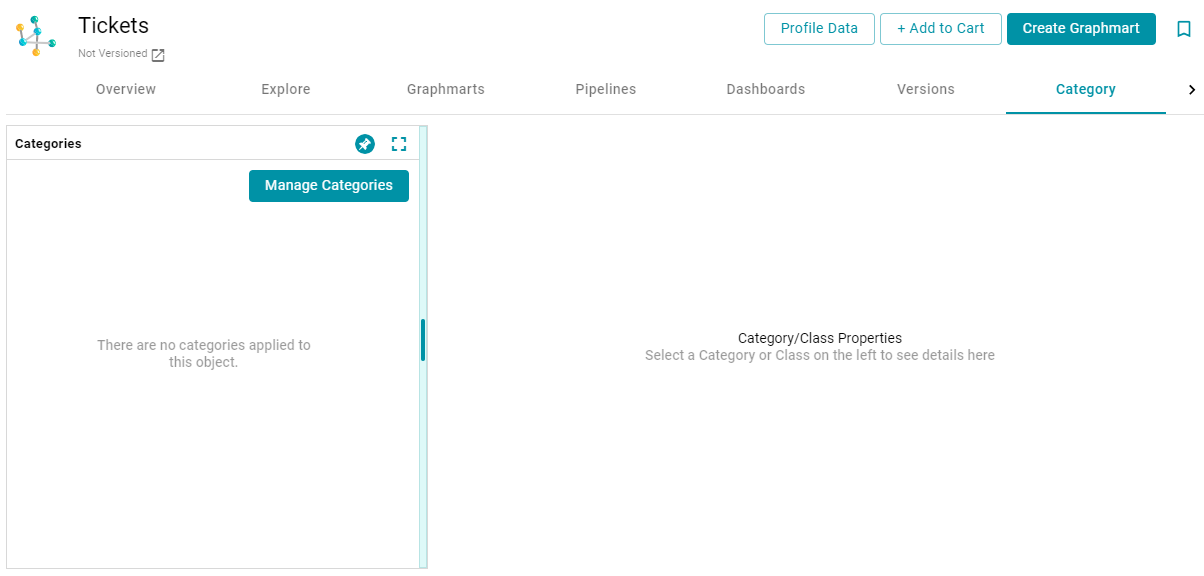
- Click the data set for which you want to configure categories. Then click the Category tab. For example:
- Click the Manage Categories button. The Manage Categories dialog box is displayed, which lists each of the classes that are designated as categories in the data model. For example:
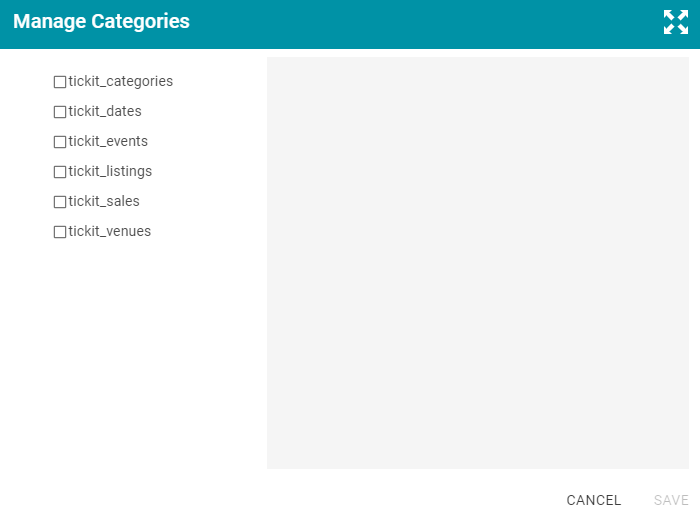
- On the left side of the screen, select the checkbox next to each class that you want to display as a category. When you select a class, the properties for that class are displayed on the right side of the screen. For example:
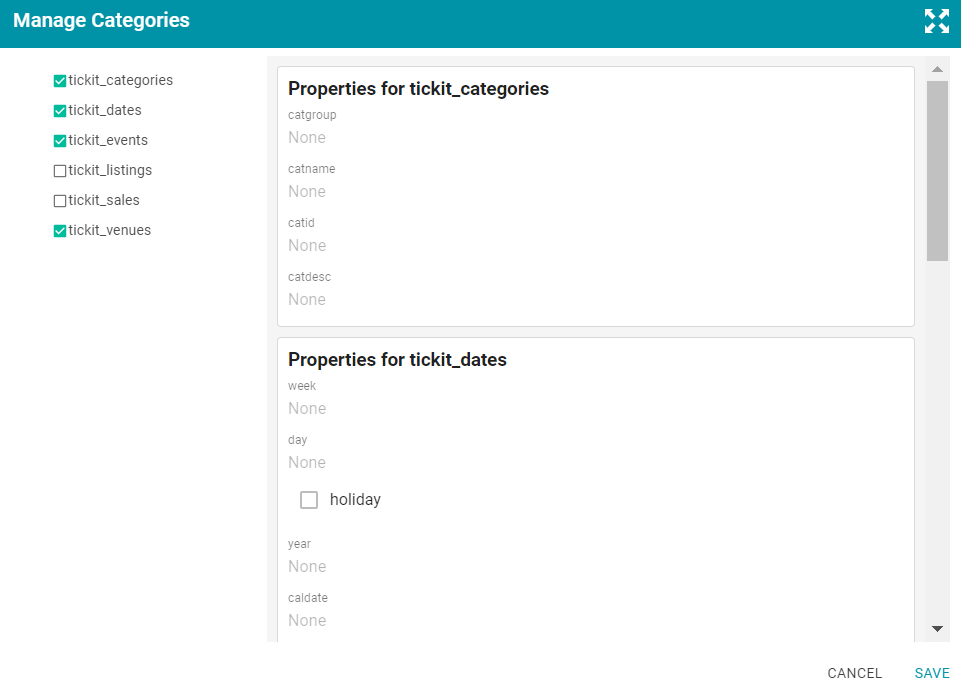
- In the list of properties for each class, you can edit the values to categorize the data for that property. For example, if you know that the data set has date values that fall in a specific date range, you can specify that range in a date-related property, such as the "year" property in the image above. To add a description for a property, click the value field under the property to make the field editable. The characters that are supported depend on the data type of the property. Click the checkmark icon (
 ) to save the change. Repeat this step for any of the properties that you want to describe.
 - When you have finished adding values, click Save to save the configuration and close the Manage Categories dialog box. Categories can be modified any time from the Category tab.
Categories are displayed as quick filters in the Filters panel that is available when sorting the data set list on the Datasets screen. Open the Filters panel by clicking the filter icon (![]() ) in the top left corner of the screen. For example:
) in the top left corner of the screen. For example:
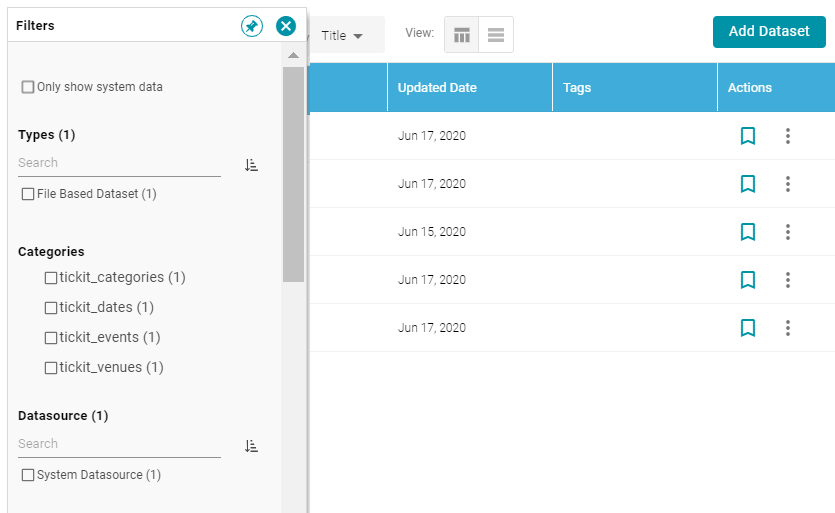
When a category is selected, the properties for that class are also displayed in the Filters panel.