Creating a Parquet Data Source and Ingesting the Data
Follow the instructions below to create a Parquet Data Source and ingest the data.
You can onboard one file or multiple files with the identical format per Parquet Data Source.
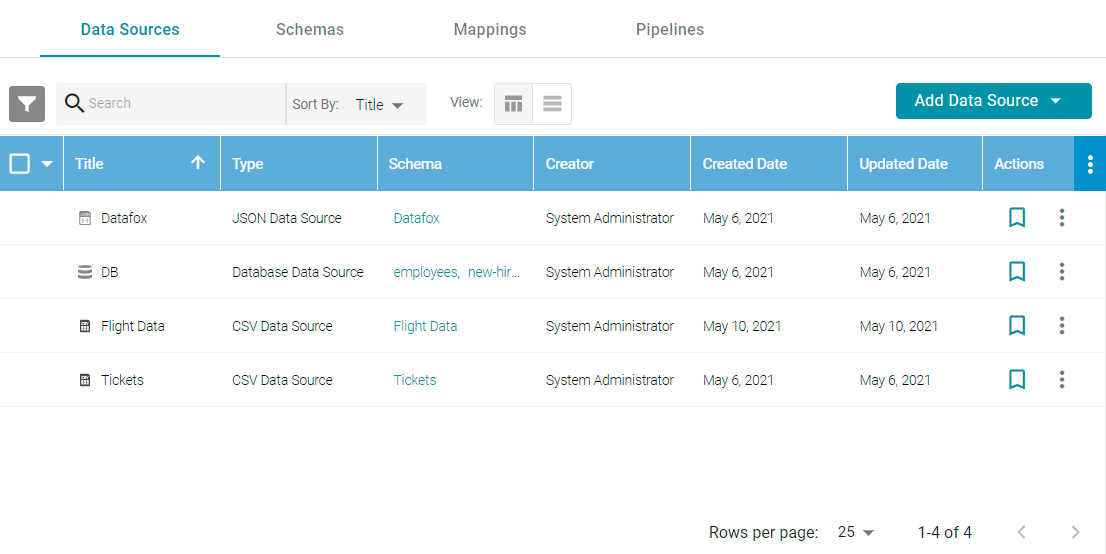
- In the Anzo application, expand the Onboard menu and click Structured Data. Anzo displays the Data Sources screen, which lists any existing Data Sources. For example:
- Click the Add Data Source button and select File Data Source > Parquet Data Source. Anzo opens the Create Parquet Data Source screen.
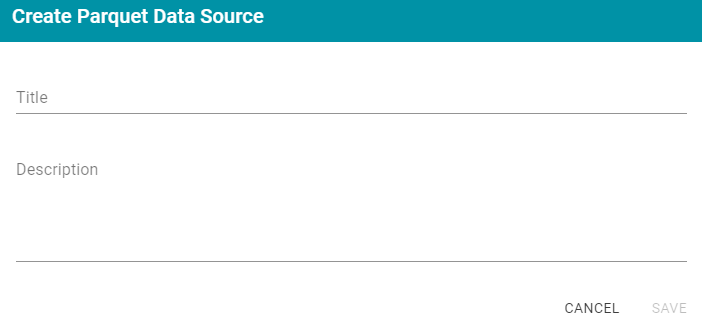
- Specify a name for the data source in the Title field, and type an optional description in the Description field. Then click Save. Anzo saves the source and displays the Overview tab. For example:
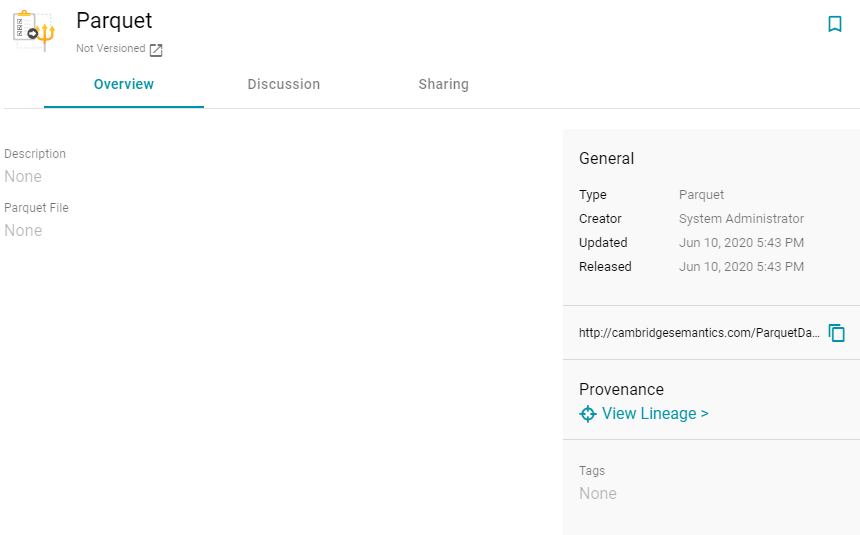
- On the Overview tab, click in the Parquet File field to make the value editable. Then click Browse to open the File Location dialog box and select the file to import.
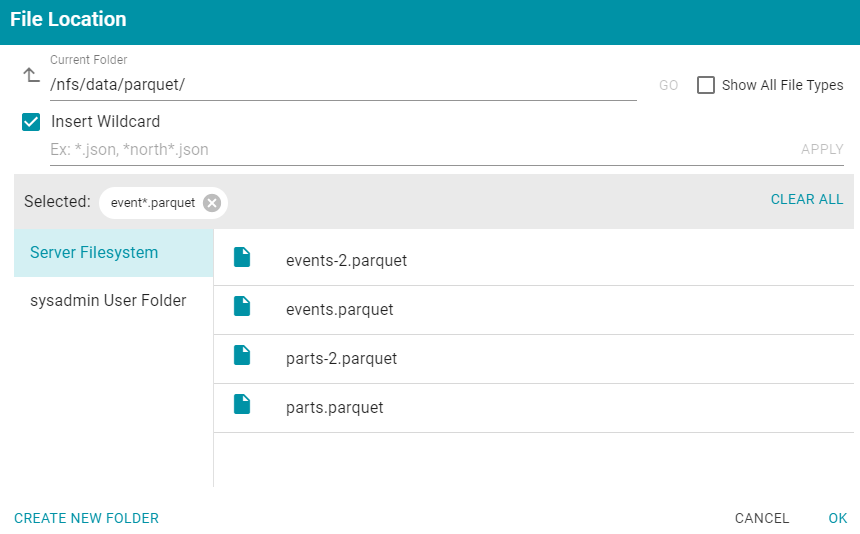
- In the File Location dialog box on the left side of the screen, select the file store for the Parquet file. On the right side of the screen, navigate to the directory that contains the file to import. The screen displays the list of files in the directory. For example:

- Select the file that you want to import. If you have multiple files with the identical format you can select the Insert Wildcard option. Then type a string using asterisks as wildcard characters to find the files with similar names. Files that match the specified string will be imported as one file and will result in one job being created in the pipeline to ingest all of the files that are selected by the specified string. You can specify up to 16,000 files using a wildcard. After typing a string, click Apply to include that string in the Selected list.
The image below shows a directory with multiple Parquet files. The events.parquet and events-2.parquet file have the identical format and can be imported as one file. The Insert Wildcard option is selected, and event*.parquet is specified to identify the two files.
- After selecting the file, click OK to close the File Location dialog box. Then click the checkmark icon (
 ) to save the change to the Parquet File field. Anzo imports the data and automatically generates a Data Model. To view the Model, you can click the Related Model link. For example:
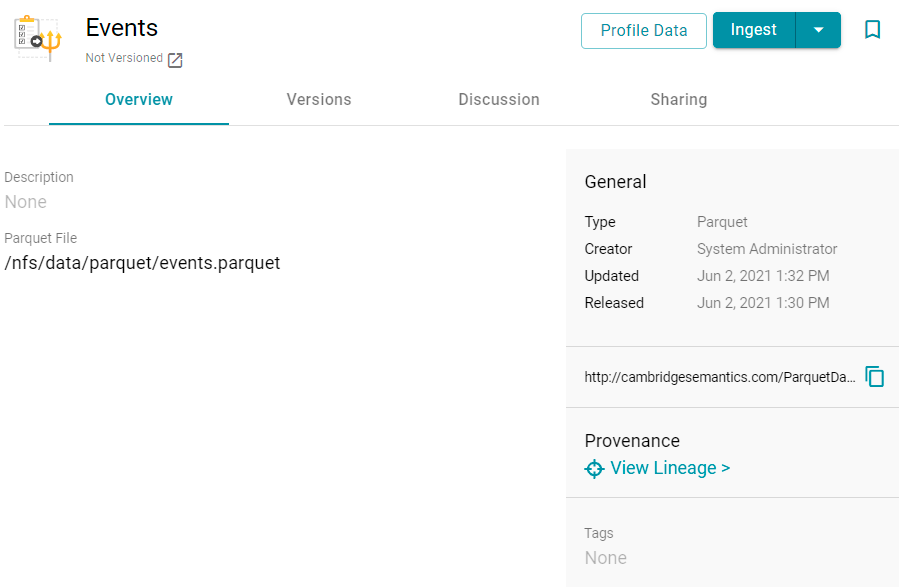
- To onboard the data to Anzo, click the Ingest button at the top of the screen. Anzo opens the Ingest dialog box and automatically populates the Data Source Connection value. If there is only one configured Data Store, the Anzo Data Store value is also auto-populated. In addition, if the default ETL Engine is configured for the system, the Auto Map Engine Config field is also populated (see Configure the Default ETL Engine). For example, in the image below the Anzo Data Store field is not populated because there are multiple available choices. The ETL Engine field is populated because the Local Sparkler Engine is configured as the default ETL Engine:
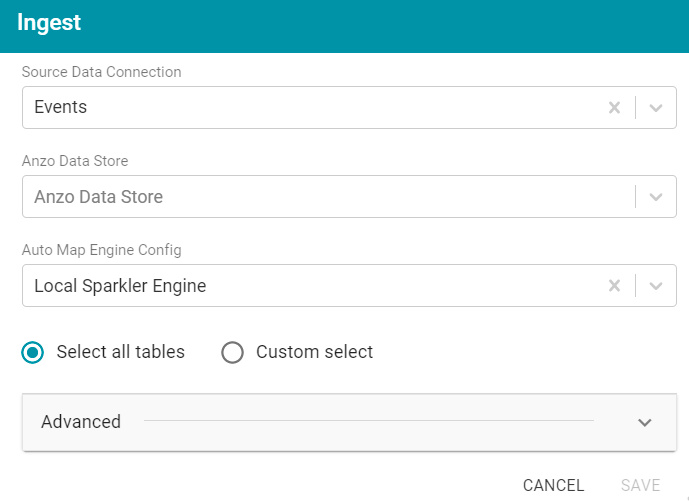
- If necessary, click the Anzo Data Store field and select the data store for this pipeline.
- If necessary, click the Auto Map Engine Config field and select the ETL engine to use.
- By default, the Select all tables radio button is selected to ingest the data for all tables in the source. If you do not want to add all tables, click the Custom select radio button and then select each of the tables to add.
- By default, the Ingest workflow is configured to generate a new Model in addition to the Mappings and jobs that are needed to onboard the data. You can click Save to save the configuration and proceed with the Model and Pipeline generation. If you want customize the URI that is generated for the new Model or the class and property URIs in the model, you can click Advanced to expand the screen and view the following options:
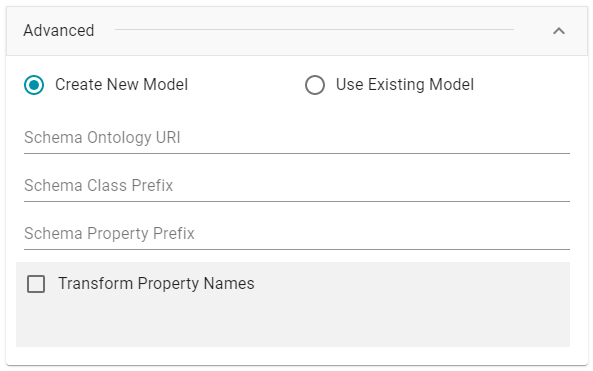
The list below describes the options:
- Schema Ontology URI: The URI for the Model. When this field is blank, Anzo generates the Model URI with the following format:
http://cambridgesemantics.com/ont/autogen/xx/<schema_name>
Where xx is a hash snippet based on the model's globally unique identifier (GUID). If you want to specify a different format, you can type that URI into the Schema Ontology URI field. For example, a URI such as
http://mycompany.com.ontology/moviesresults in a model URI ofhttp://mycompany.com.ontology/movies.Make sure that Schema Ontology URI is unique. If the URI is not unique, this Model will overwrite any existing Model that uses this URI.
- Schema Class Prefix: The URI prefix format to use for classes in the Model. When this field is blank, Anzo generates class URIs using the following format:
http://cambridgesemantics.com/ont/autogen/xx/<schema_name>#<class_name>
Where xx is a hash snippet based on the model's GUID. If you want to specify a different format for class URIs, type the prefix to use in this field. For example, a prefix such as
http://mycompany.com.ontology/classresults in class URIs likehttp://mycompany.com.ontology/class#<class_name>.Since you are specifying a prefix format, and the class name will be appended to the prefix, it is permissible to set Schema Class Prefix to the same value across schemas.
- Schema Property Prefix: The URI prefix format to use for properties in the Model. When this field is blank, Anzo generates property URIs using the following format:
http://cambridgesemantics.com/ont/autogen/xx/<schema_name>#<class_name>_<property_name>
Where xx is a hash snippet based on the model's GUID. If you want to specify a different format for property URIs, type the prefix to use in this field. you can type that URI into the Schema Property Prefix field. For example, a prefix such as
http://mycompany.com.ontology/propertyresults in property URIs likehttp://mycompany.com.ontology/property#<class_name>_<property_name>.Since you are specifying a prefix format, and the property name will be appended to the prefix, it is permissible to set Schema Property Prefix to the same value across schemas.
- Transform Property Names: Transforms property names to upper or lower case letters. To transform names, select the Transform Property Names checkbox. Then select the To lowercase radio button if you want to convert property names to lowercase or select the To UPPERCASE radio button if you want to convert property names to uppercase.
- Schema Ontology URI: The URI for the Model. When this field is blank, Anzo generates the Model URI with the following format:
- Click Save if you changed advanced options. Anzo creates a Pipeline and generates the Model and Mappings according to the options you specified.
- In the main navigation menu under Onboard, click Structured Data. Then click the Pipelines tab.
- Click the name of the new pipeline. Anzo displays the pipeline overview screen. For example:

- Click the Publish All button to run the ETL jobs in this pipeline.
When the Pipeline finishes, this run of the Pipeline becomes the Managed Edition. The Managed Edition always contains the latest successfully published data for all of the jobs in the Pipeline. If one or more of the jobs failed, those jobs are excluded from the Edition. If you publish the failed jobs at a later date or you create and publish additional jobs in the Pipeline, the data from those jobs is also added to the Managed Edition. For more information about Editions, see Managing Dataset Editions.
The new Dataset also becomes available in the Dataset catalog. From the catalog, you can generate graph Data Profiles and create Graphmarts. See Blending Data for next steps.