Setting Class Instance URI Patterns
When you open a data model in the Model editor, there is a Resource Template setting for each of the classes in the model. A Resource Template defines the Uniform Resource Identifier (URI) pattern that Anzo should follow when ingesting data and generating the URIs for the instances of each class.
When using the Ingest workflow (with Anzo-generated models, mappings, and pipelines), if a Resource Template is not defined for the classes in a model, Anzo generates class URIs by following this pattern:
<uri_prefix>/<class_name>/<primary_key>
Anzo uses the URI prefix of http://csi.com/, appends the name of the table (class), and adds the primary key value for each instance of the table. For example, the following URI is generated for an instance of a class called MovieActors2. The primary key for the MovieActors2 table is ActorID, so the ActorID value is appended to the URI.
<http://csi.com/MovieActors2/31211756>
For property URIs, the default URI prefix is http://cambridgesemantics.com/. The value is controlled by the URI Prefix option in system settings. See Configure URI Prefix and SPARQL Options for more information.
Defining a Resource Template for the classes in your models helps link and relate data by using URI patterns that express the meaning of the data and combine similar concepts. Additionally, simpler and more meaningful URIs are easier to read and therefore easier to write in queries.
If you ingest movie data from multiple sources and each source assigns a movie ID as the primary key, the same movie title will likely be associated with multiple IDs. If the auto-generated URI pattern for the Movies class is http://csi.com/Movies/<movie_ID>, then all of the data for the same movie title will not be joined by the same class instance URI. In this case, defining a resource template that uses the movie title as the uniqueness condition rather than the ID would automatically join movie data from different sources.
Follow the steps below to configure resource templates for each of the classes in a data model. For automatic ingestion workflows, configure resource templates after Anzo generates the model, mappings, and pipeline and before the pipeline is published. To configure resource templates for pipelines that have been published, edit the model and then re-publish the pipeline to update the instance data.
Keep the following points in mind when defining class instance URI patterns:
- Avoid joining data that should not be joined. For example, using a property such as YearProduced in a movies Resource Template would group all movies from a given year as a single instance.
- Resource Templates with multiple components must have all components present. If a component is missing, Anzo generates random strings for missing Resource Template components.
- Resource templates do not work across different classes. You must define resource templates on individual classes.
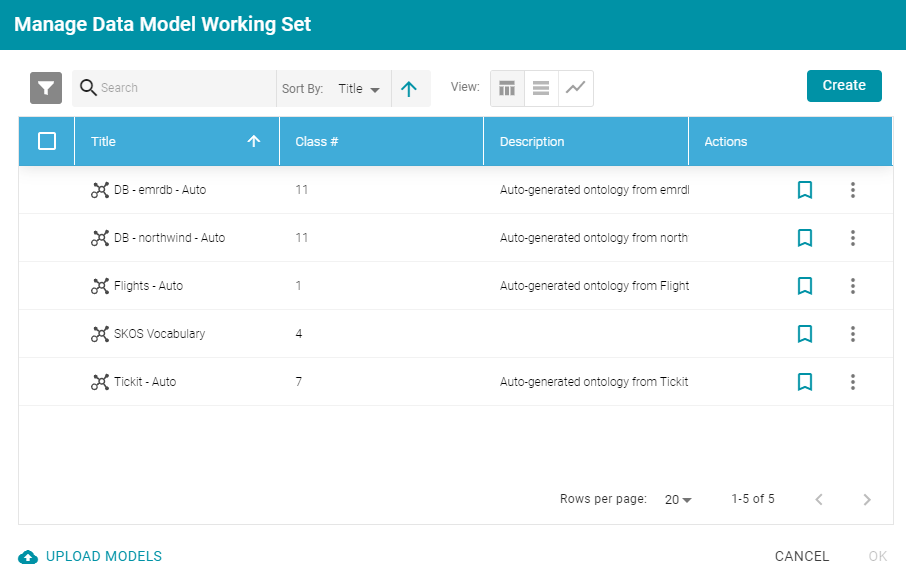
- In the Anzo application, click Model. Anzo displays the Manage Data Model Working Set screen. For example:
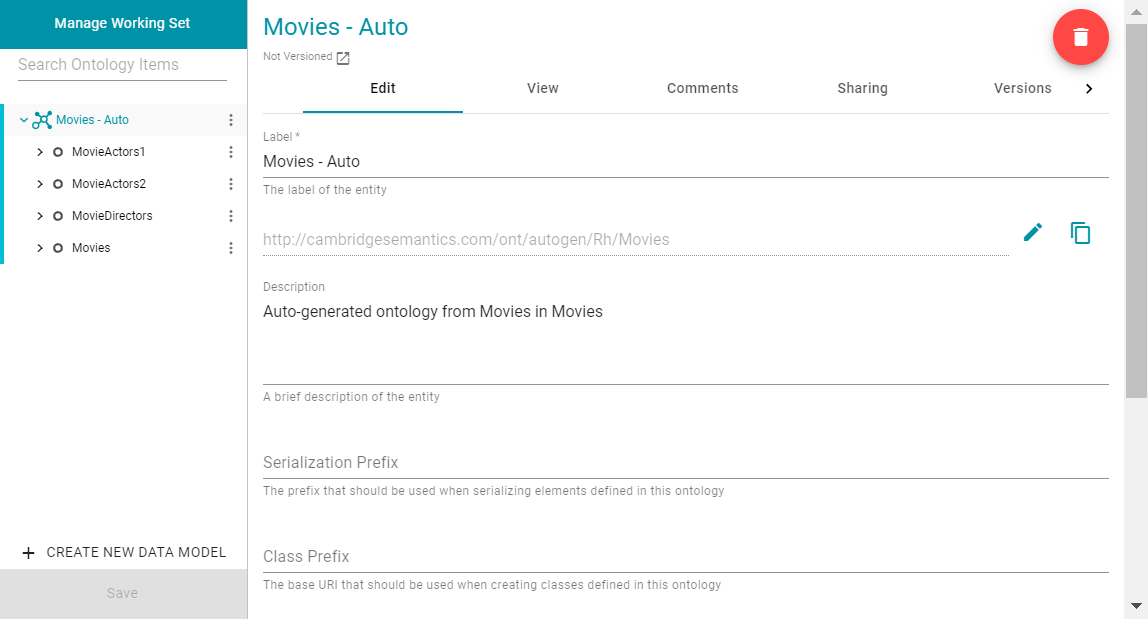
- On the Manage Working Set screen, select the checkbox next to the model (or models) that you want to add to the working set for editing. Then click OK. Anzo opens the selected model in the editor. For example:
- Select a class in the model to display the settings for that class. Then scroll down to the Resource Template field. For example, the image below shows the Resource Template field for the selected MovieActors1 class.
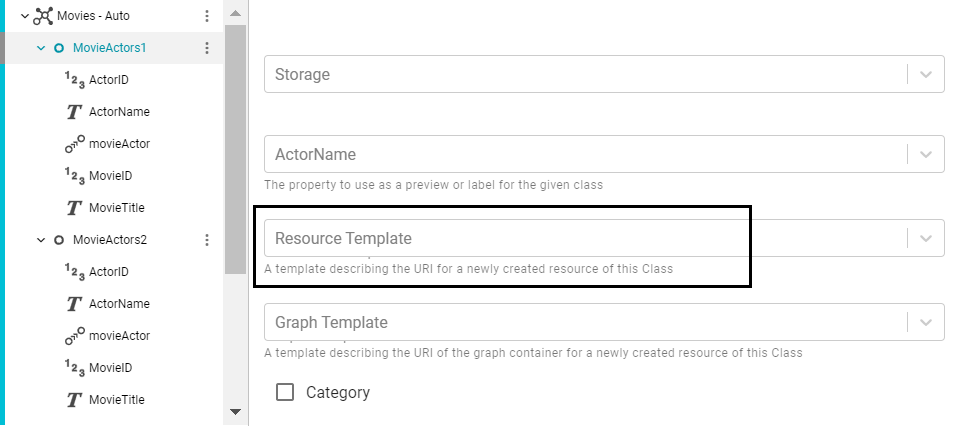
- Click the Resource Template field and specify the URI pattern to use for instances of this class. First, type a base value in the field and press Enter to add the value to the field. For example, for MovieActors1 in the step above: http://cambridgesemantics.com/Movie/Actor.

Then click the field again and select a property in the class that defines the class, i.e., contains unique values. For example, in the MovieActors1 class, ActorID provides unique values.

- Click Save to save the change, and then select another class for which to set a Resource Template. Repeat the step above for each class in the model.