Configuring a Validation Step
This topic provides guidance on configuring a Validation Step to use for validating the data in a Data Layer. The sections below describe each of the tabs and configuration options that are available when you create or edit a Validation Step.
Details
The Details tab includes options such as the name of the Step, the validation source, and the source data to validate.
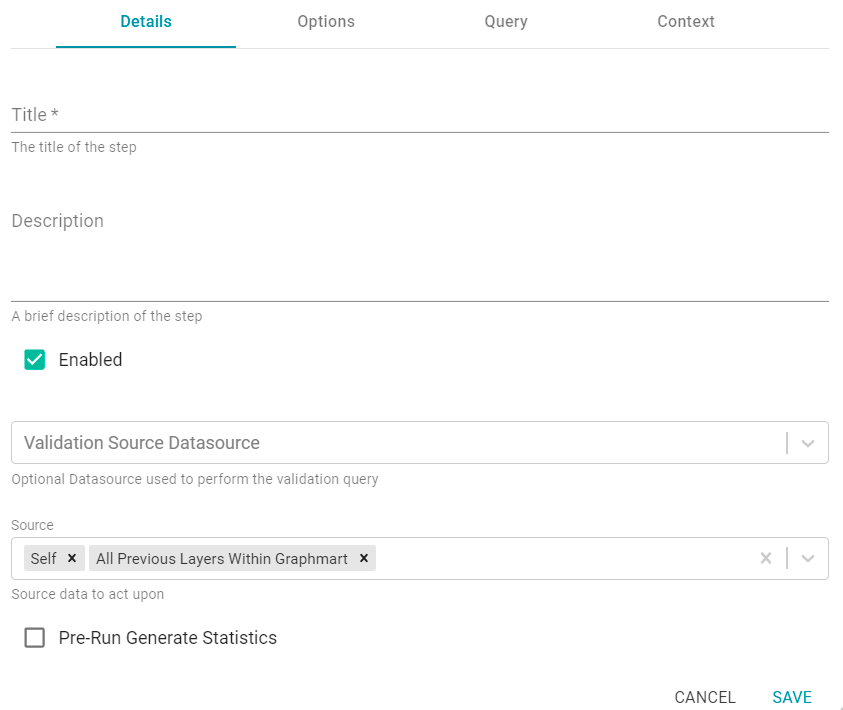
Title
The required name of the Step.
Description
And optional description of the Step.
Enabled
When creating a new Step, the Enabled option is selected by default, indicating that the Step is enabled and will run when the Data Layer is loaded or refreshed. If you want to disable the Step so that it is not processed, clear the Enabled checkbox.
Validation Source Datasource
This optional field enables you to select a Data Source to use to perform the validation against if you do not want the query to run against the Graphmart data in AnzoGraph. When Validation Source Datasource is unset, the validation is performed against the Graphmart data in AnzoGraph.
Source
The Source is the source data that this Step should act upon. Steps can build upon the data generated by Steps in other Data Layers or can be self-contained, applying changes that relate only to the data defined in the Layer that contains this Step. You can select any number of the following options:
- Self: This option is selected by default and means that the validation runs against only the data that is generated in the Layer this Step belongs to.
- All Previous Layers Within Graphmart: This option means that the validation runs against the data that is generated by all of the Layers in the Graphmart that precede the Layer this step is in.
- Previous Layer Within Graphmart: This option means that the validation runs against only the data that is generated by the one Layer that precedes the Layer this Step is in.
- Layer Name: The Source drop-down list also includes options for specific Layer names. You can choose a specific Layer to run the validation against that Layer only.
Pre-Run Generate Statistics
This option controls whether to initiate AnzoGraph's internal statistics gathering queries before running this Step. The statistics gathering helps ensure that the AnzoGraph query planner generates ideal query execution plans for queries that are run against the Graphmart.
Options
The Options tab includes the settings that specify the type of check to perform on the data as well as instructions for what to do if the validation fails. If you want to set up an Execution Condition in a Data Layer or Step, configure the Options tab to define the Condition Variable to use in the Execution Condition.
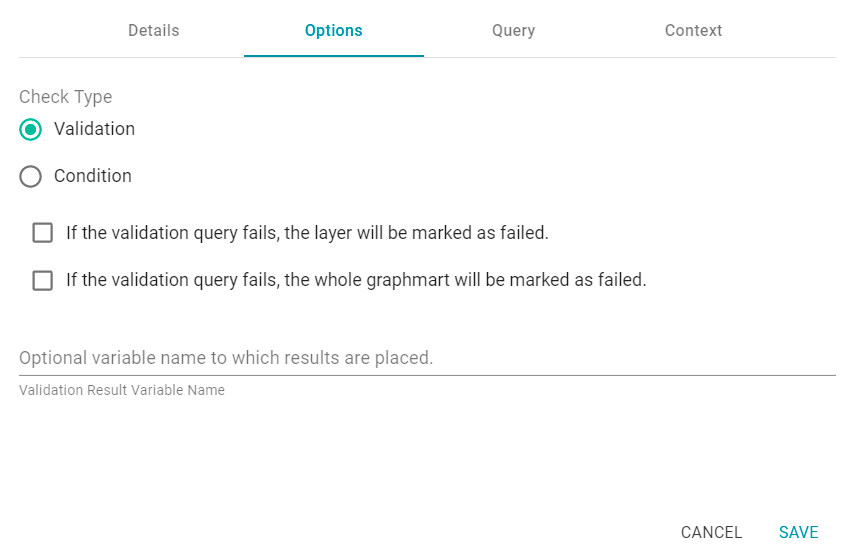
Check Type
This setting configures the Step as either a Validation or a Condition. A Validation check validates the data according to the defined Query and can be configured to take action depending on whether the validation passes or fails. A Condition check takes the results of the Query and associates it with the specified variable. That variable can then be used for setting up an Execution Condition on the Data Layer or Step level. A Variable Name can also be associated with a Validation check. Select the appropriate radio button to define the Check Type.
If the validation query fails, the layer will be marked as failed
This setting is presented if the Check Type is Validation. Select this option if you want Anzo to abort the load of the Data Layer if this Step fails. The Graphmart and other successful Data Layers continue to load.
If the validation query fails, the whole graphmart will be marked as failed
This setting is presented if the Check Type is Validation. Select this option if you want Anzo to abort the load of the entire Graphmart if this Step fails.
If you want Anzo to load the Data Layer if this Step fails, leave both If the validation query fails... settings blank.
Validation Result Variable Name
This option specifies the variable name that you want to use to store the result from the Query. This variable becomes available as a choice when configuring an Execution Condition for a Data Layer or Step.
Query
The Query tab contains the query that you want the Step to run.
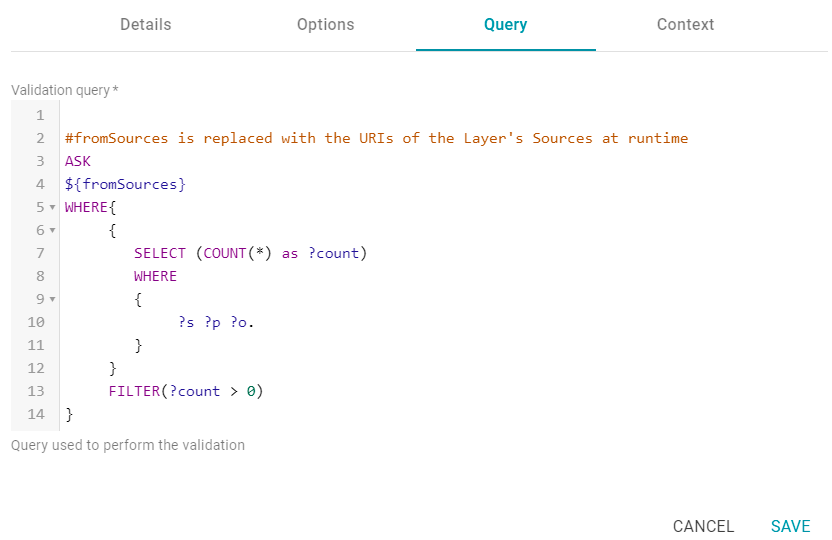
The tab includes the syntax for writing a SPARQL ASK query, which is useful for determining whether a certain pattern exists in the data. ASK queries return "true" or "false" to indicate whether a solution exists. The template includes a source graph parameter (${fromSources}). Using the configured Source data options from the Details tab, Anzo automatically populates the query with the appropriate source graph URIs when the query runs.
Context
When you use the Graph Data Interface (GDI) for Data Virtualization, you may connect to Data Sources that require input of sensitive connection and authorization information such as keys, tokens, and user credentials. The Context tab gives you the option to configure a Context to store the sensitive information as key-value pairs. Queries can then reference the keys from the Context so that the sensitive details are abstracted from any requests that are sent to the Data Source.
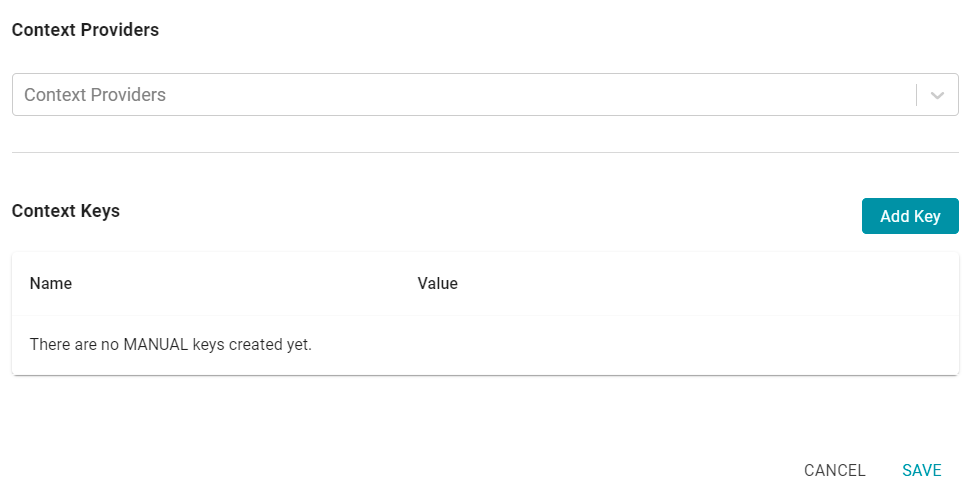
Context Providers
Connections in Anzo implement the Context Provider interface. For example, File Store connections, Anzo Data Store connections, and Data Source connections provide contexts (in the form of JSON objects) that contain key-value pairs which define connection details such as URLs, database names, usernames and passwords, tokens, etc. These contexts are passed to the Data Source when a request is made against that source. To use one of the Anzo-generated Context Providers that was created for a pre-existing connection, select that provider from the drop-down list.
If you specify a Context Provider, the key-value pairs from the selected provider are not populated in the Context Key list on the screen. However, the keys are used automatically when a query is run against that provider.
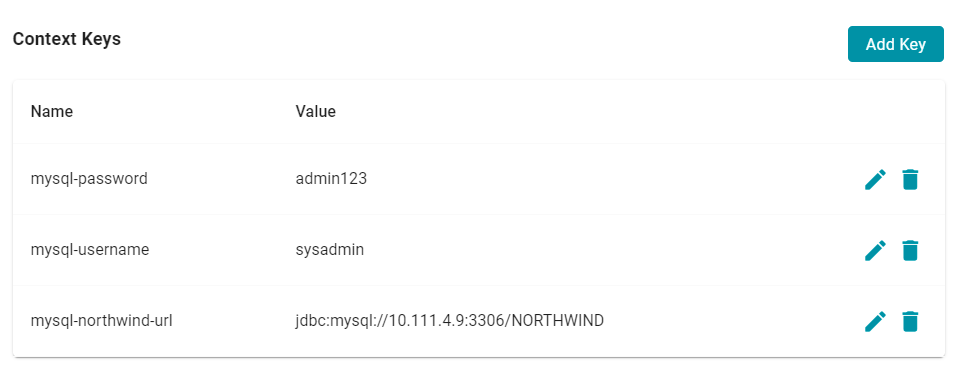
Context Keys
Context Keys are user-defined key-value pairs that are not associated with a particular Context Provider. To add a key and define its value, click the Add Key button. Then specify the Key Name and Key Value in the Create Context Key dialog box. Click Create to add the key-value pair to the Context.
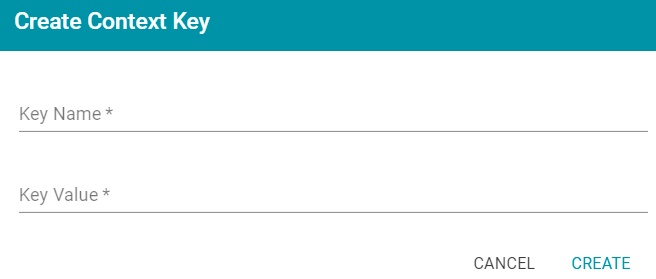
The image below, for example, creates URL, username, and password Context Keys.
The format that you use for referencing a Context Key in a query depends on the type of AnzoGraph plugin or extension that is being called by the query. Generally, Contexts are only used in Steps that contain Graph Data Interface (GDI) queries. When referencing Context Keys in GDI queries, use the following format:
{{@<context_key_name>}}