Write Information Back Into Alternative Sources (Write Back Step)
The Write Back Step type allows you to write an update query against Graph Lakehouse, but use a different datasource as the target of the update, writing information back into another datasource or activation metrics graphs, or calling a semantic service with data from the query. Instead of just updating the data in the graphmart, you can target your system journal or a semantic service as the target of this step's update query.
For example, you can query the layers and write information back into the journal with the purpose of storing custom statistics or other custom logic, augmenting the metrics with specific statistics about the data inserted as part of the graphmart. You can also do the opposite: query an alternative datasource and insert data into the layer.
For this step type, you are required to specify a service user, i.e., the user for which the update will occur on the target datasource.
Writing back within this step is currently limited to writing to the graphmart, ontology, or dataset graphs.
Follow the steps below to create a Write Back Step.
- Go to the graphmart for which you want to add a step and then expand its Data Layers list.
-
In the Data Layers list, find the layer that you want to add the step to. Click the menu icon (
 ) for that layer and select Add Step/View. For example:
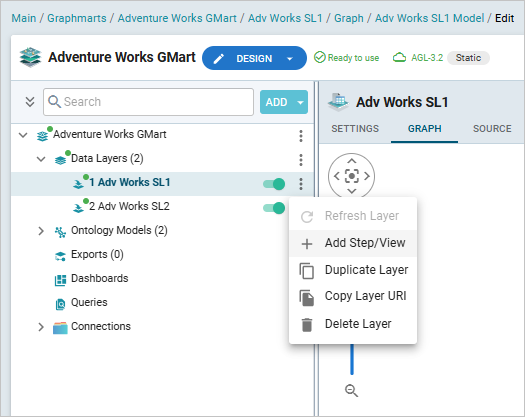
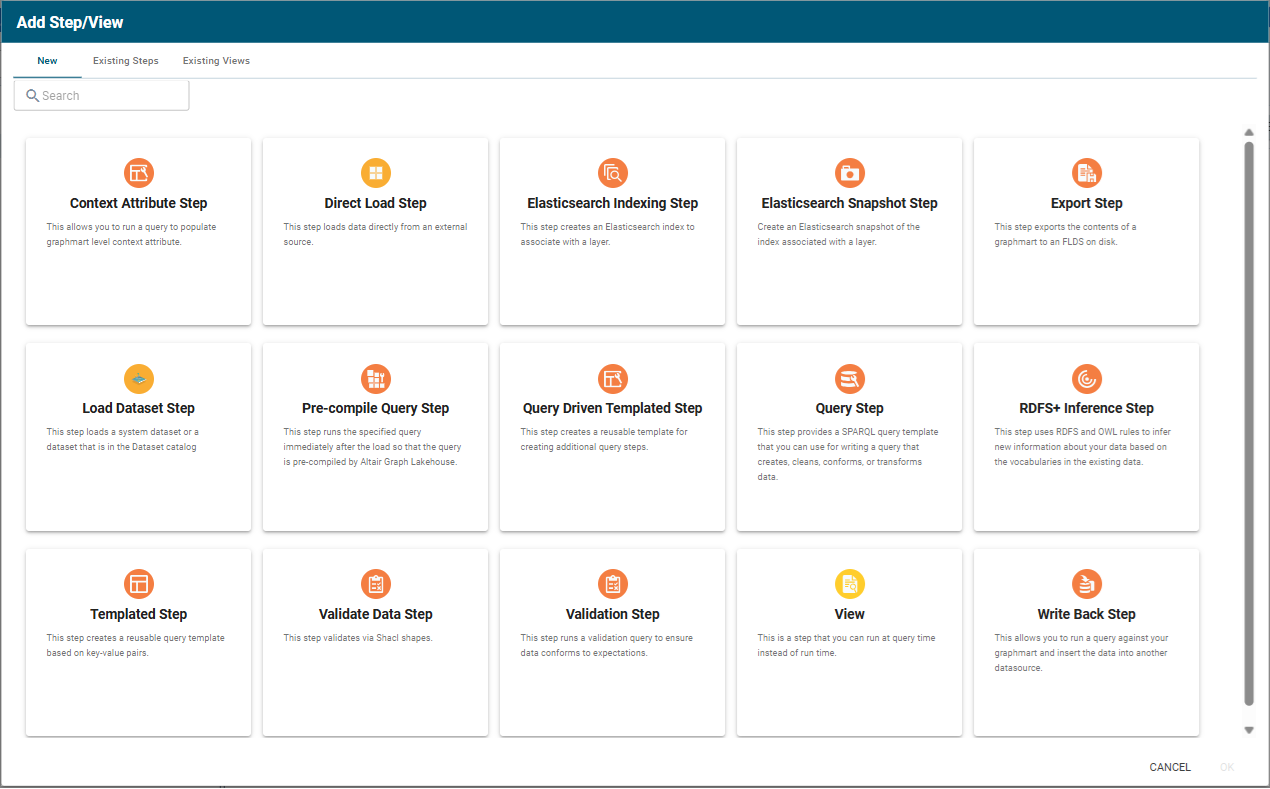
The Add Step/View dialog box is displayed with the New tab selected.
-
To create a new Write Back step, select Write Back Step and then click OK. If you want to clone an existing step, click the Existing Steps tab, select the step that you want to clone, and then click OK. The Create Write Back Step dialog opens.
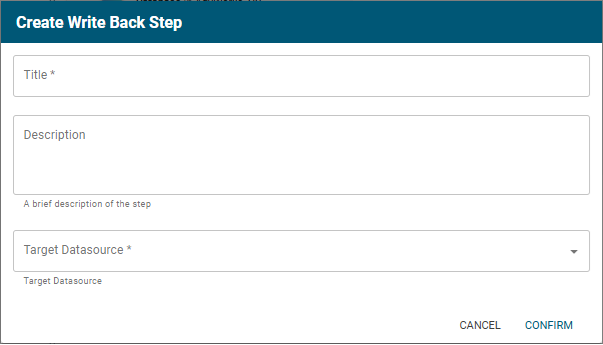
- Specify a name for the step in the Title field and include an optional description in the Description field. Select the target datasource in the Target Datasource field. Click Confirm. Graph Studio creates or clones the step and displays the Details tab:

- On the Details tab, configure the following options as needed:
- Title: The required name of the step.
- Description: An optional short description of the step.
- Enabled: When creating a new step, the Enabled option is selected by default, indicating that the step is enabled and will run when the layer is loaded or refreshed. If you want to disable the step so that it is not processed, clear the Enabled checkbox.
- Source: The source data that this step should act upon. Steps can build upon the data generated by steps in other layers or can be self-contained, applying changes that relate only to the data defined in the layer that contains this step. You can select any number of the following options:
- Self: This option is selected by default and means that the step runs against the data that is in the parent layer.
- All Previous Layers Within Graphmart: This option means that the step runs against the data in all of the successful layers that precede the layer this step is in. Any failed layers are ignored.
- Previous Layer Within Graphmart: This option means that the query runs against the data that is in the one layer that precedes the layer this step is in.
- Layer Name: The Source drop-down list also includes options for layer names. You can choose a specific layer to act upon the data in that layer.
- Target Datasource: The datasource that the results are written to. For the target, you can choose a system journal, a semantic service, another datasource.
- Writeback to Activation Metrics: Write back statements to the Activation Metrics graph.
- Ontology Models: Select the associated ontology model from the list of available models.
- Pre-Run Generate Statistics: This option controls whether to initiate Graph Lakehouse's internal statistics gathering queries before running the query to pre-compile. The statistics gathering helps ensure that the Graph Lakehouse query planner generates ideal query execution plans for queries that are run against the graphmart.
- Pre-Vacuum: This option controls whether to vacuum the source layers before running the step. Select this option to clean up outdated or obsolete data in the source layers, reclaim unused space and improve query performance.
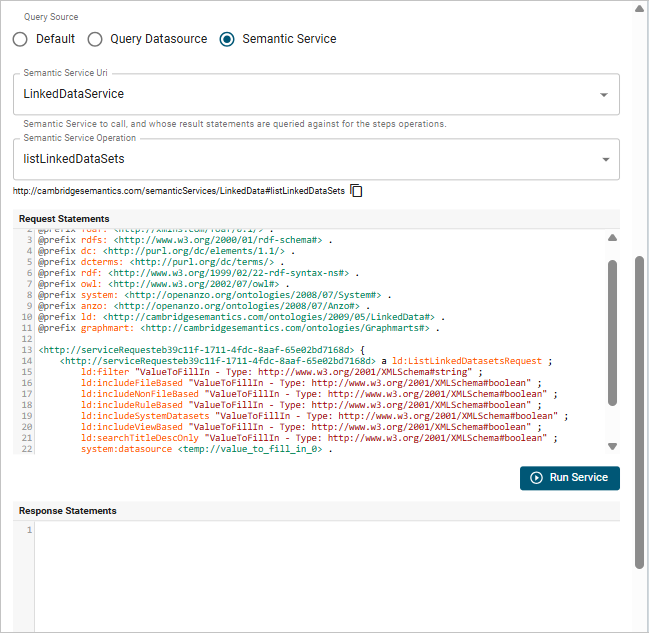
- Query Source: The source data that the query defined in the Context Attribute Query tab should act upon. Select one of the following options:
- Default: The current graphmart is the default query source.
- Query Datasource: An optional datasource used to perform the query. Selecting this option enables the Query Source Datasource field allowing you to select the desired source from a list (other datasources, journals, Lakehouse servers).
- Semantic Service: Specify a Semantic Service to call, and whose result statements are queried against for the steps operations. Selecting this option and specifying a service enables additional fields:
- Semantic Service Operation: Select the operation from the list of operations defined for the specified Semantic Service.
- Request Statements: The request statements that the semantic service will send out. Once you specify the statements, click the Run Service button to perform a dry run to see what the results would be, if necessary.
Response Statements: The statements returned from running the semantic service specified above. The query defined in the Context Attribute tab is going to run against these response statements.
Example:
- Note: If you choose Query Datasource or Semantic Service, make sure a service user is defined, since running this as sysadmin is not allowed.
- When you have finished configuring the Details tab, click the Query tab. This tab defines the query that this step should run.
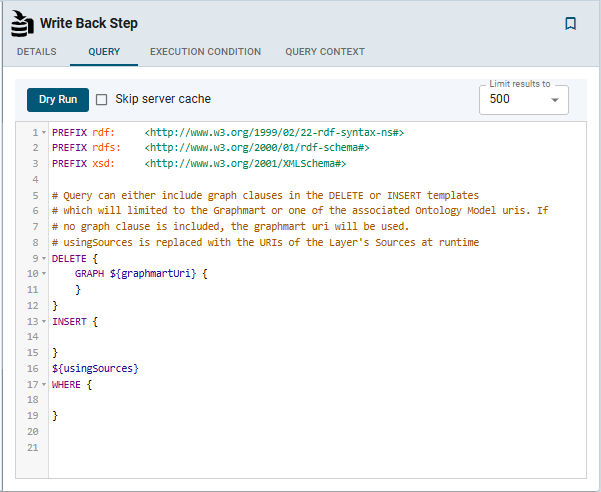
- Edit the provided template to compose the DELETE and INSERT statements the step should run. For information about SPARQL queries, see the W3C SPARQL 1.1 Query Language specification.
You can click the Dry Run button to perform practice runs to see results without having to refresh the graphmart or layer.
If your query connects to a source that requires input of connection and authorization information, Altair recommends that you do not include the connection and authorization values directly in the query. Instead, replace those values with Context Variables from a Query Context. You can access Context Providers for each data source from the step's Query Context tab. For detailed information about query contexts and referencing variables in a query, see Using Query Contexts.
- Click Save to save the step configuration.
Once the Details tab is configured, the step can be run. For information about setting up an execution condition that uses this step, see Defining Execution Conditions.