Creating a Dataset Pipeline
This topic provides instructions for creating a new Dataset Pipeline to ingest data into Anzo. Dataset pipelines produce a new data set in the Dataset catalog and a file-based linked data set (FLDS) on the file store. This type of pipeline is created any time you ingest data by clicking the Ingest button for a data source.
- In the Anzo application, expand the Onboard menu and click Structured Data. Then click the Pipelines tab. Anzo displays the Pipelines screen, which lists the existing pipelines. For example:

- Click the Add Pipeline button at the top of the screen and select Dataset Pipeline. Anzo displays the Create Dataset Project screen.

- Type a name for the pipeline in the Title field and enter an optional Description.
- If necessary, click the Engine Configuration drop-down list and select the ETL engine for this pipeline.
- If necessary, click the Graph datasource drop-down list and select the Anzo Data Store where you want Anzo to save the RDF files that are generated when jobs in this pipeline are published.
- In the Job Title field, type a name for the first job in the pipeline.
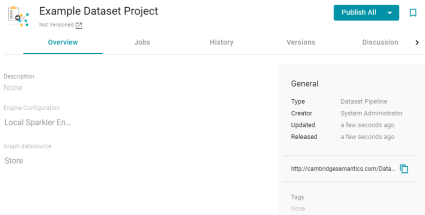
- Click Save to create the pipeline. Anzo displays the pipeline overview screen. For example:
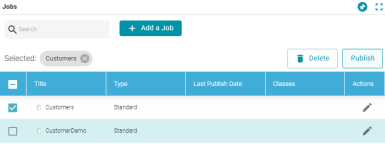
- Click the Jobs tab to configure the jobs that this pipeline will run. Anzo displays the Jobs screen, which lists the job name that you specified when you created the project. For example:
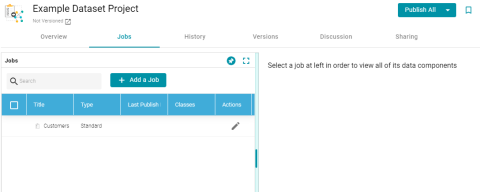
The Jobs pane on the left side of the screen lists the jobs in the project. Since this is a new project, the right side of the screen remains blank. Once this project is published, you can select a job to view the history of data components that the job has created.
- To configure the first job to add the source, mapping, and target, click the edit icon (
 ) in the Actions column for the initial job. Anzo opens the Edit Job dialog box. For example:
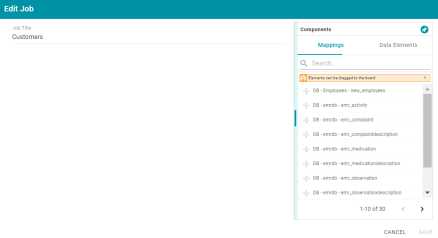
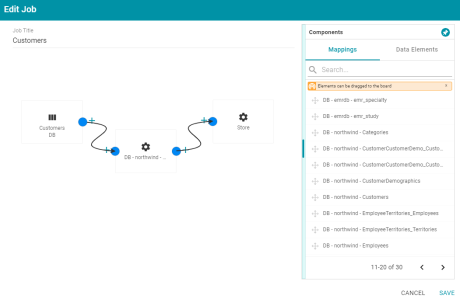
- To configure the job, drag and drop a data source element from the Mappings or Data Elements tab in the Components list onto main part of the screen. For example, in the image below, the DB-northwind-Customers mapping is added to the job canvas:
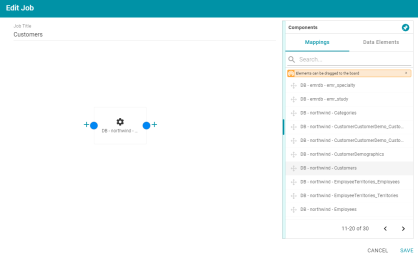
If you drag a mapping onto the job canvas and there is only one source and one target for the mapping, Anzo automatically adds that source and target to the job.
- To finish creating the job by adding any missing elements, click the plus icon on the right or left of an element on the canvas. Anzo suggests elements to add based on the existing element. For example, clicking the plus icon on the target side of the mapping element, presents two target choices:
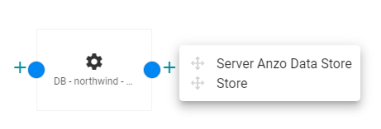
To add one of the options to the job, drag the option from the tooltip onto the canvas. For example:

To delete an element from the canvas, hover over the element and click the trashcan icon (
 ).
). - Complete the job by adding any missing elements. For example:
- Click Save to save the job and return to the Jobs screen.
- If you want to create additional jobs for this project, click the Add a Job button and repeat the steps above to complete the job.
- To run the pipeline and all of the jobs, click the Publish All button at the top of the screen. If you want to run a subset of jobs, click the checkbox next to the job that you want to run, and then click the Publish button at the top of the Jobs list and click Run.
When the pipeline completes, the data components created by the pipeline are displayed on the right side of the screen. The new (or updated) data set becomes available in the Dataset catalog. You can generate metrics on the graph data to start exploring the data. See Generating a Dataset Data Profile for more information. You can also add the new data set to a graphmart and load it to AnzoGraph so that you can access and analyze the data. See Creating a Graphmart for instructions.