Capturing User-Defined Values in Dashboards
You can configure a Table lens in a dashboard to allow users to input values and save those values to a linked dataset (LDS) in a graphmart. This topic provides instructions for configuring a graphmart, LDS, and dashboard to enable and save user-defined input. There are several steps required to configure the environment:
The procedures below must be performed by the sysadmin user or a user with Anzo Administrator permissions. Once the setup is complete, the components can be shared with other users and groups.
- Create a Volume for Storing User Input
- Configure the Graphmart
- Add User Input Properties to the Model
- Create and Configure the Dashboard
- Share the LDS and Add it to the Graphmart
Create a Volume for Storing User Input
When you configure a Table lens to save user-entered values to an LDS, you must choose the volume in which to save the LDS. Cambridge Semantics strongly recommends that you do not write to the system journal (<install_path>/Server/data/journal/anzo.jnl by default). Instead, use a separate volume that is dedicated to storing user-entered values. If necessary, create a new volume before proceeding. See Creating a New Volume for instructions.
Cambridge Semantics also strongly recommends that you create a separate volume for each graphmart that will include user-defined values.
Configure the Graphmart
The first step is to deactivate the graphmart that will contain the user-entered values and disable manual refresh. When manual refresh is disabled, the graphmart is refreshed automatically any time a user updates the LDS by adding values in the dashboard. Follow the steps below to configure the graphmart.
- In the graphmart for which you want to add user-defined text, go to the Overview tab.
- From the Overview tab, deactivate the graphmart if it is online, and then find the Manual Refresh Graphmart setting at the bottom of the screen:

- If Manual Refresh Graphmart is enabled, slide the slider to the left to disable it.
- Activate the graphmart and proceed to the next step to update the model.
Add User Input Properties to the Model
The next step is to update the model that was generated when the data was onboarded. Any new properties that you want to add as columns for text entry in a Table lens need to be added to the model. Follow the steps below to update the Direct Load Step query to add new properties to the model.
- Click the Data Layers tab. Expand the layer that was generated when you created the graphmart and find the Direct Load Step that inserts the data.
You might want to start another session of Anzo so that you can view the layer's model in the Model editor and the graphmart query at the same time.
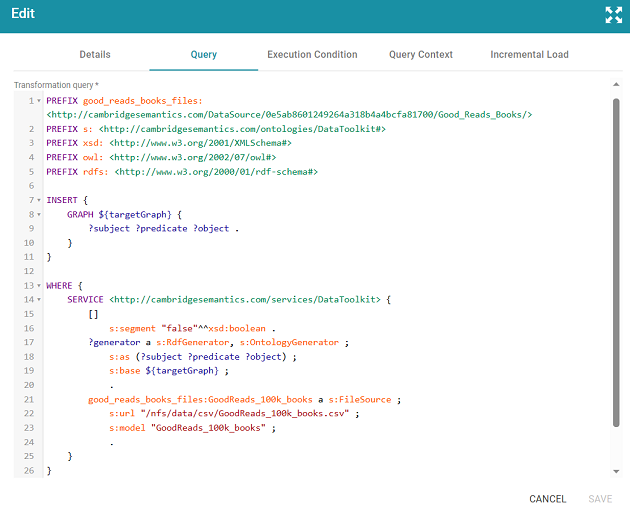
- Open the Direct Load Step for editing and click the Query tab. For example, the image below shows the query that was generated to onboard data about books from a CSV file:
- Make sure the following prefixes are declared in the PREFIX clause at the top of the query. If any are missing, add them to the query:
PREFIX owl: <http://www.w3.org/2002/07/owl#>
PREFIX rdfs: <http://www.w3.org/2000/01/rdf-schema#>
PREFIX xsd: <http://www.w3.org/2001/XMLSchema#>
- Next, add the following GRAPH clause statements under the SERVICE clause:
GRAPH <model_URI> {
  <property_URI> a owl:DatatypeProperty;
    rdfs:comment "comment" ;
    rdfs:label "property_label" ;
    rdfs:domain <class_URI> ;
    rdfs:range <dataype> .
[ <property2_URI> a owl:DatatypeProperty;
    rdfs:comment "comment" ;
    rdfs:label "property2_label" ;
    rdfs:domain <class_URI> ;
    rdfs:range <datatype> . ]
[ ... ]
}
For example, the following query adds one new property to the model that is generated by the Direct Load Step query shown above:
PREFIX good_reads_books_files: <http://cambridgesemantics.com/DataSource/0e5ab8601249264a318b4a4bcfa81700/Good_Reads_Books/> PREFIX s: <http://cambridgesemantics.com/ontologies/DataToolkit#> PREFIX xsd: <http://www.w3.org/2001/XMLSchema#> PREFIX owl: <http://www.w3.org/2002/07/owl#> PREFIX rdfs: <http://www.w3.org/2000/01/rdf-schema#> INSERT { GRAPH ${targetGraph} { ?subject ?predicate ?object . } } WHERE { SERVICE <http://cambridgesemantics.com/services/DataToolkit> { GRAPH <http://cambridgesemantics.com/Layer/698d179498f945a393f8a91ee9f1f611/Model> { <http://cambridgesemantics.com/Layer/698d179498f945a393f8a91ee9f1f611/Model#GoodReads100kBooks.Notes> a owl:DatatypeProperty; rdfs:comment "Notes from users" ; rdfs:label "Notes" ; rdfs:domain <http://cambridgesemantics.com/Layer/698d179498f945a393f8a91ee9f1f611/Model#GoodReads100kBooks> ; rdfs:range xsd:string . } [] s:segment "false"^^xsd:boolean . ?generator a s:RdfGenerator, s:OntologyGenerator ; s:as (?subject ?predicate ?object) ; s:base ${targetGraph} . good_reads_books_files:GoodReads_100k_books a s:FileSource ; s:url "/nfs/data/csv/GoodReads_100k_books.csv" ; s:model "GoodReads_100k_books" . } } - Next, if the class for any of the new properties does not have a primary key defined, you must create a key for that class. If all of the classes you referenced in the query have primary keys, you can continue to the next step. If one or more of the classes do not have primary keys, follow the instructions below:
- Locate in the query the statement block for each class that needs a key defintion. For example, in the query above, there is only one class,
s:model "GoodReads_100k_Books". If you have multiple classes, the query has several blocks, such as this example:...
emrdbsmall:emr_complaint a s:DbSource ; s:using mysql_db:MySQL_DB ; s:table "emrdbsmall.emr_complaint" ; s:model "emr_complaint" . emrdbsmall:emr_patient a s:DbSource ; s:using mysql_db:MySQL_DB ; s:table "emrdbsmall.emr_patient" ; s:model "emr_patient" . emrdbsmall:emr_complaintdescription a s:DbSource ; s:using mysql_db:MySQL_DB ; s:table "emrdbsmall.emr_complaintdescription" ; s:model "emr_complaintdescription" . ... - At the end of the block for the class you want to add a key to, change the period (.) after
s:modelto a semicolon (;). - Next, add the following line below
s:model:s:key ("key_property" [, "key_property2" ] [, ... ]) .Where
key_propertyis the label of the property to use as a key for the class. The property that you choose must have unique values. If there is not a property in the class with unique values, you can specify a combination of properties that would create a unique value. Make sure that the value ofkey_propertymatches the label for that property in the model. For example, for the query in step 4, theIsbnproperty can be used as a unique key for theGoodReads_100k_Booksclass:good_reads_books_files:GoodReads_100k_books a s:FileSource ; s:url "/nfs/data/csv/GoodReads_100k_books.csv" ; s:model "GoodReads_100k_books" ; s:key ("Isbn") .The final, completed query is shown below:
PREFIX good_reads_books_files: <http://cambridgesemantics.com/DataSource/0e5ab8601249264a318b4a4bcfa81700/Good_Reads_Books/>
PREFIX s: <http://cambridgesemantics.com/ontologies/DataToolkit#>
PREFIX xsd: <http://www.w3.org/2001/XMLSchema#>
PREFIX owl: <http://www.w3.org/2002/07/owl#>
PREFIX rdfs: <http://www.w3.org/2000/01/rdf-schema#>
INSERT {
  GRAPH ${targetGraph} {
    ?subject ?predicate ?object .
  }
}
WHERE {
  SERVICE <http://cambridgesemantics.com/services/DataToolkit> {
    GRAPH <http://cambridgesemantics.com/Layer/698d179498f945a393f8a91ee9f1f611/Model> {
      <http://cambridgesemantics.com/Layer/698d179498f945a393f8a91ee9f1f611/Model#GoodReads100kBooks.Notes> a owl:DatatypeProperty;
      rdfs:comment "Notes from users" ;
      rdfs:label "Notes" ;
      rdfs:domain <http://cambridgesemantics.com/Layer/698d179498f945a393f8a91ee9f1f611/Model#GoodReads100kBooks> ;
      rdfs:range xsd:string .
  }
    []
      s:segment "false"^^xsd:boolean .
    ?generator a s:RdfGenerator, s:OntologyGenerator ;
      s:as (?subject ?predicate ?object) ;
      s:base ${targetGraph} .

    good_reads_books_files:GoodReads_100k_books a s:FileSource ;
      s:url "/nfs/data/csv/GoodReads_100k_books.csv" ;
      s:model "GoodReads_100k_books" ;
      s:key ("Isbn") .
  }
}
- Locate in the query the statement block for each class that needs a key defintion. For example, in the query above, there is only one class,
- Save the step and then refresh or reload the graphmart to update the model with the new properties.
Create and Configure the Dashboard
Now that the graphmart is updated, the next step is to create and configure the dashboard that will enable input for the new properties.
- Create a dashboard for the graphmart that was updated in the previous task.
- Add a Table lens to the dashboard. In the lens, add any columns that you would like to see, including columns for the user input properties that you added to the model.
- In the lens Designer, select a column that will allow input and click the Editor link under Column Value Expression (shown in the image below).
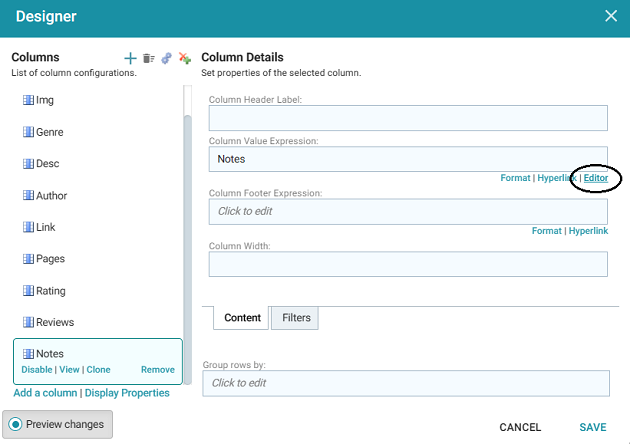
The Column Editor Configuration dialog box is displayed and populated with the name of the chosen property:
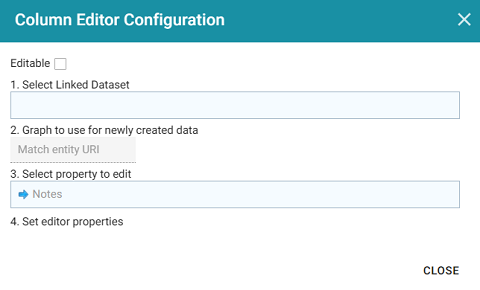
- In the dialog box, select the Editable checkbox. Then click the Select Linked Dataset field and select Create a linked dataset. The New Linked Data Set dialog box is displayed:

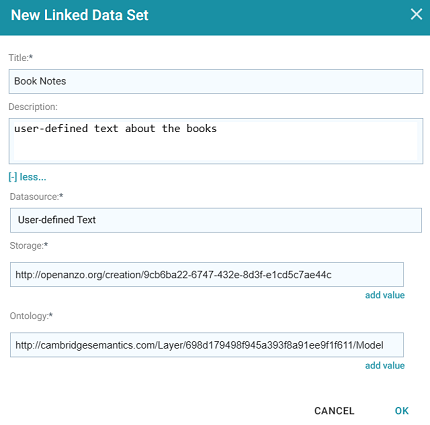
- Specify a title for the new LDS and add an optional description. Then click the [+] more link to expose the following additional settings.
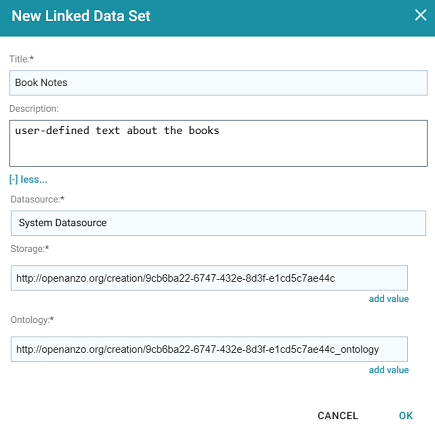
- Complete the required fields:
- Datasource: Click this field and select the volume to save the LDS in. This is the volume that you created in Create a Volume for Storing User Input.
- Storage: This field lists the system-generated URI for the LDS and dataset storage graph. Cambridge Semantics recommends that you do not change this value.
- Ontology: Replace this value with the URI of the model that contains the writable properties. For the example shown above, the value is
http://cambridgesemantics.com/Layer/698d179498f945a393f8a91ee9f1f611/Model.
The image below shows the completed screen:
- Click OK to save the LDS configuration and create the LDS. The LDS is added to the Datasets catalog and it is shown on the Column Editor Configuration screen. Additional editor properties are made available on the screen. For example:
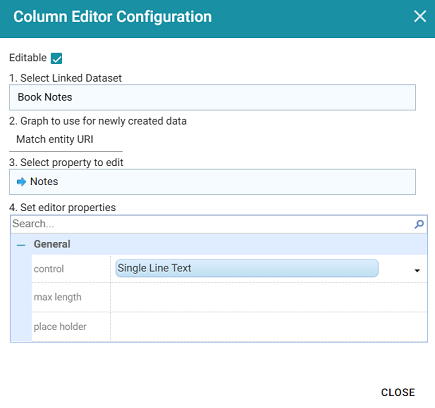
- Under Set editor properties, you have the option to modify the constraints for the editable property.
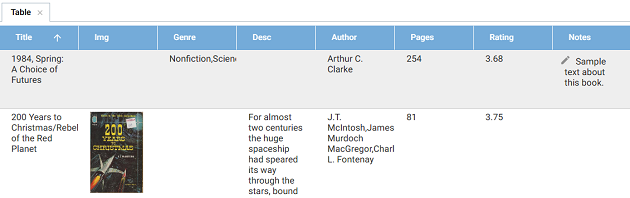
- When you are finished setting any constraints, click Close and then click Save in the Designer. The lens is now configured to display the editable field. Hovering over a row in the table shows an edit icon (
 ) in the field. For example:
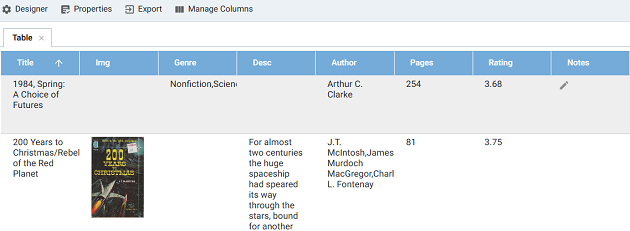
- Repeat steps 3 – 9 for any additional properties that you added to the model and want to make editable.
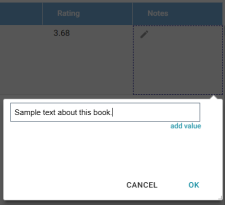
- To add text in the lens, double-click an editable field to open the text editor, as shown in the image below.
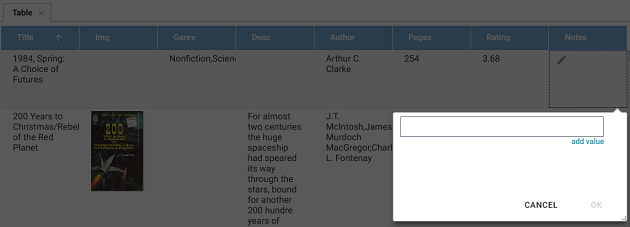
Add text in the provided field, and then click OK to add the text to the dashboard.
The text is displayed in the table:
You can edit the text by double-clicking the field. You can also add another text entry by opening the text editor and clicking add value. Click OK after making changes or adding values.
- Finally, save the dashboard and proceed to the next task.
Share the LDS and Add it to the Graphmart
In order for other users to be able to add values to the dashboard, they need to have permission to modify the LDS. Follow the steps below to share the LDS and then add it to the graphmart.
- In the Datasets catalog, open the LDS that is associated with the dashboard you configured in the previous task. Then click the Sharing tab to configure the permissions.
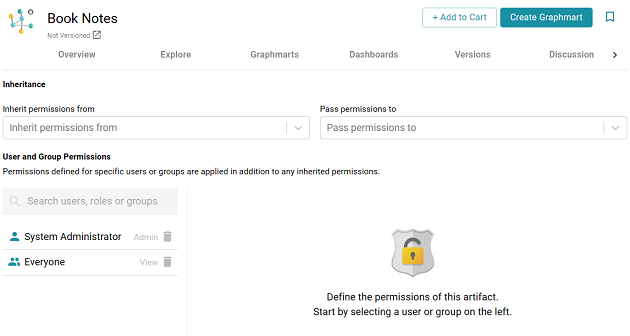
- On the Sharing tab, share the dataset with the appropriate users and/or groups. For information about configuring permissions, see Share Access to Artifacts.
- Next go to the graphmart and click the Datasets tab.
- On the Datasets tab, click Add Dataset. Then select the dataset that you shared and click Add to add the dataset to the graphmart. For more information about adding a dataset to a graphmart, see Adding a Dataset to a Graphmart.
- Refresh the graphmart to load the dataset to AnzoGraph.
The graphmart, linked dataset, and dashboard are now configured to allow and save user-defined values.