Creating an Unstructured Pipeline
Follow the instructions below to create and run a new unstructured pipeline.
Create the Pipeline
- In the Anzo application, expand the Onboard menu and click Unstructured Data. Anzo displays the Pipelines screen, which lists any existing unstructured pipelines. For example:
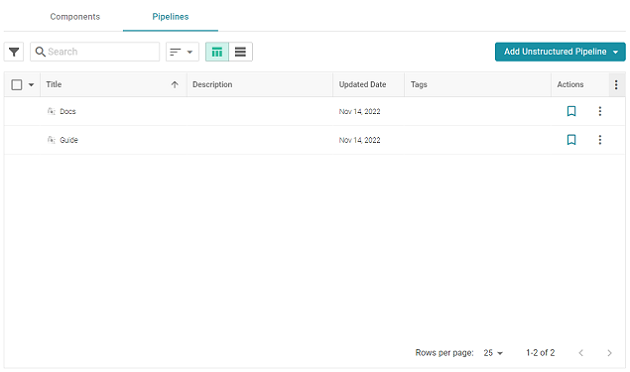
- Click the Add Unstructured Pipeline button and select Distributed Unstructured Pipeline. Anzo opens the Create Distributed Unstructured Pipeline dialog box. For example:
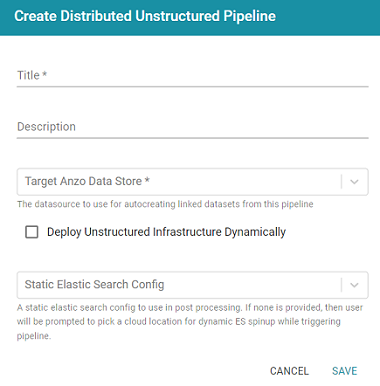
- In the Title field, type a name for the pipeline.
The title serves as a key to identify this pipeline and its corpus in multiple contexts. Specify a title that is unique and stable. The pipeline's corpus dataset name is derived from this value.
- Type an optional description for the pipeline in the Description field.
- If necessary, click the Target Anzo Data Store field and select the Anzo Data Store for this pipeline.
- If the environment is configured for dynamic Kubernetes-based deployments of the infrastructure, select the Deploy Unstructured Infrastructure Dynamically checkbox and leave the Static Elasticsearch Config field blank.
- If necessary, click the Static Elasticsearch Config field and select the Elasticsearch connection to use for this pipeline. If you use dynamic deployments to deploy Elasticsearch instances on-demand, leave this field blank. Anzo prompts the user to choose a Cloud Location when the pipeline is run.
- Click Save to create the pipeline. Anzo displays the pipeline Overview screen. For example:
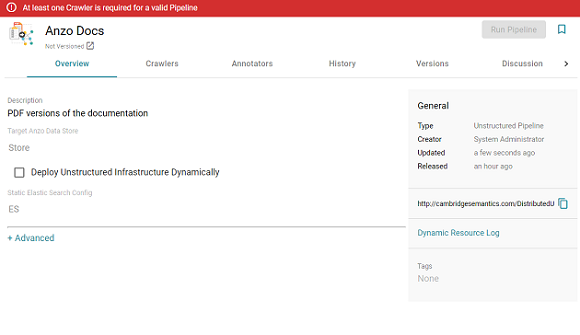
A pipeline saves automatically and constantly undergoes validation to make sure that it is valid based on the current configuration. Anzo displays validation issues in red on the top of the screen. The warnings will disappear as you add components to the pipeline.
- If necessary, click Advanced to configure the advanced pipeline settings. For details about the advanced settings, see Pipeline Settings Reference.
- Next, follow the instructions in Add Crawlers to the Pipeline to add one or more crawlers to the pipeline.
Add Crawlers to the Pipeline
After creating a pipeline, the next step is to add one or more crawlers. Crawlers determine what text to process.
- In the pipeline, click the Crawlers tab.
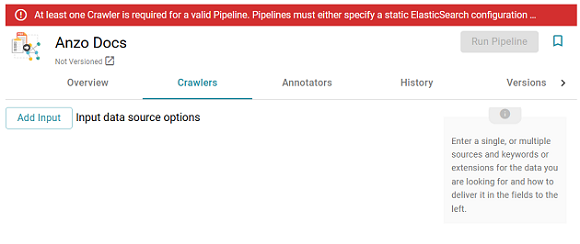
- Next, click the Add Input button. Anzo displays the Add Component dialog box. The New tab is selected and lists all available crawlers. The Existing Components tab lists crawlers that have been previously configured for other pipelines.
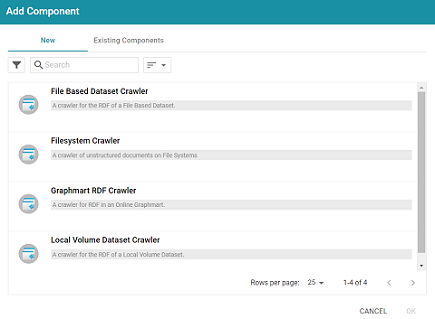
- To add a new crawler, select the crawler. To add an existing crawler, click the Existing Components tab and select a crawler. The list below describes each of the crawlers:
- File Based Dataset Crawler: Include this crawler to process data from a file-based linked data set (FLDS) on a file store.
- Filesystem Crawler: Include this crawler to process documents, such as email messages, PDF, XML, PowerPoint, Excel, OneNote, or Word files, and images, that are available on a file store.
- Graphmart RDF Crawler: Include this crawler to process RDF in an online graphmart or specific data layer.
- Local Volume Dataset Crawler: Include this crawler to process RDF data that is stored as a linked data set (LDS) in an Anzo journal.
- After selecting a crawler, click OK. Anzo opens the Create dialog box for that crawler so that you can configure it. Click a crawler name in the list below to view the details for that component:
File Based Dataset Crawler
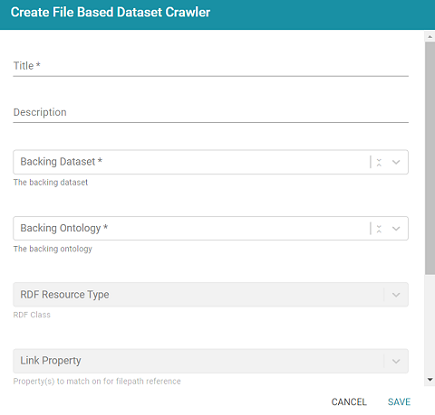
- Title: Required field that specifies the unique name for this crawler.
- Description: Optional field that provides a description of this crawler.
- Backing Dataset: Required field that specifies the Anzo dataset to crawl.
- Backing Ontology: Required field that specifies the model for the dataset.
- RDF Resource Type: Required field that specifies the resource type or class of data to target with this crawler.
- Link Property: Optional field that specifies any link properties to crawl. A link property is a property whose value identifies the location of a linked document. When linked properties are specified, the crawler will crawl the linked documents. For example, in the triples below, fileLocation is a link property:
<urn://someUnstructuredDocument> <urn://someProperty> "file metadata" ;
<urn://fileLocation> "/path/to/file.pdf" .
In typical use cases, this crawler is configured to define either a Link Property or a Content Property but not both.
- Content Property: Optional field that identifies any content properties to crawl. A content property is a property whose value is a string literal and you want the crawler to crawl and annotate those strings. For example, in the triples below, longDescription is a content property:
<urn://someUnstructuredDocument> <urn://someProperty> "file metadata" ;
<urn://longDescription> "this is some interesting, likely long, unstructured text with a lot of information, and I want it to be annotated" . - Base Path Connection: Required field whose value depends on whether you specified a Link Property or a Content Property:
- If a Link Property was specified, the Base Path Connection is the base path to use for resolving relative file paths in the Link Property values. For example, using the example triples:
<urn://someUnstructuredDocument> <urn://someProperty> "file metadata" ;
<urn://fileLocation> "/path/to/file.pdf" .
The
<urn://fileLocation>value of/path/to/file.pdfcould be a relative path to a location likes3://location/bucket/path/to/file.pdfor/opt/anzoshare/data/path/to/file.pdf. Therefore, the Base Path needs to be specified to resolve any relative paths and locate the linked documents. - If a Content Property was specified, the Base Path Connection is a directory on the file store where the crawler can save a copy of the Content Property strings for the Anzo Unstructured worker instances. Saving the content to a shared file location avoids the overhead of sending the strings to the workers over the network.
- If a Link Property was specified, the Base Path Connection is the base path to use for resolving relative file paths in the Link Property values. For example, using the example triples:
Filesystem Crawler
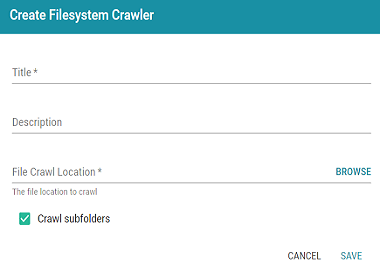
- Title: Required field that specifies the unique name for this crawler.
- Description: Optional field that provides a description of this crawler.
- File Crawl Location: Required field that specifies the file system crawl location. Click the field to open the File Location dialog box:

On the left side of the screen, select the storage location for the files to crawl. On the right side of the screen, navigate to the directory that contains the files. Select a directory, and then click OK.
- Crawl subfolders: Optional field that specifies whether to crawl the subdirectories under the VFS Crawl Location. To crawl the subdirectories, select the Crawl subfolders checkbox. To ignore subdirectories, clear the Crawl subfolders checkbox.
Graphmart RDF Crawler
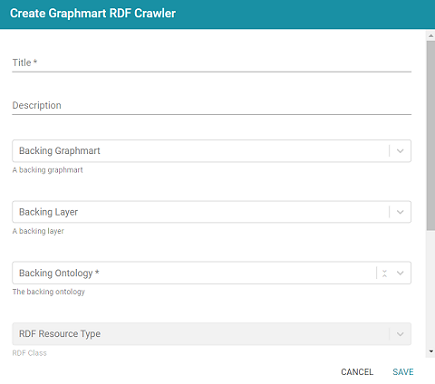
- Title: Required field that specifies the unique name for this crawler.
- Description: Optional field that provides a description of this crawler.
- Backing Graphmart: Optional field that specifies the graphmart to crawl. To configure the grawler to crawl at the graphmart level, select one or more graphmarts in the Backing Graphmart field and leave the Backing Layer field blank.
- Backing Layer: Optional field that specifies the data layer or layers that you want the pipeline to crawl. To crawl specific layers and not an entire graphmart, make sure that you leave the Backing Graphmart field blank and select the layers to crawl in the Backing Layer field. If you specify both a Backing Graphmart and a Backing Layer, the Backing Graphmart value supersedes the Backing Layer value, resulting in the entire graphmart being crawled.
- Backing Ontology: Required field that specifies the model for the Backing Graphmart or Data Layer.
- RDF Resource Type: Required field that specifies the resource type or class of data to target with this crawler.
- Link Property: Optional field that specifies any link properties to crawl. A link property is a property whose value identifies the location of a linked document. When linked properties are specified, the crawler will crawl the linked documents. For example, in the triples below, fileLocation is a link property:
<urn://someUnstructuredDocument> <urn://someProperty> "file metadata" ;
<urn://fileLocation> "/path/to/file.pdf" .
In typical use cases, this crawler is configured to define either a Link Property or a Content Property but not both.
- Content Property: Optional field that identifies any content properties to crawl. A content property is a property whose value is a string literal and you want the crawler to crawl and annotate those strings. For example, in the triples below, longDescription is a content property:
<urn://someUnstructuredDocument> <urn://someProperty> "file metadata" ;
<urn://longDescription> "this is some interesting, likely long, unstructured text with a lot of information, and I want it to be annotated" . - Base Path Connection: Required field whose value depends on whether you specified a Link Property or a Content Property:
- If a Link Property was specified, the Base Path Connection is the base path to use for resolving relative file paths in the Link Property values. For example, using the example triples:
<urn://someUnstructuredDocument> <urn://someProperty> "file metadata" ;
<urn://fileLocation> "/path/to/file.pdf" .
The
<urn://fileLocation>value of/path/to/file.pdfcould be a relative path to a location likes3://location/bucket/path/to/file.pdfor/opt/anzoshare/data/path/to/file.pdf. Therefore, the Base Path needs to be specified to resolve any relative paths and locate the linked documents. - If a Content Property was specified, the Base Path Connection is a directory on the file store where the crawler can save a copy of the Content Property strings for the Anzo Unstructured worker instances. Saving the content to a shared file location avoids the overhead of sending the strings to the workers over the network.
- If a Link Property was specified, the Base Path Connection is the base path to use for resolving relative file paths in the Link Property values. For example, using the example triples:
Local Volume Dataset Crawler
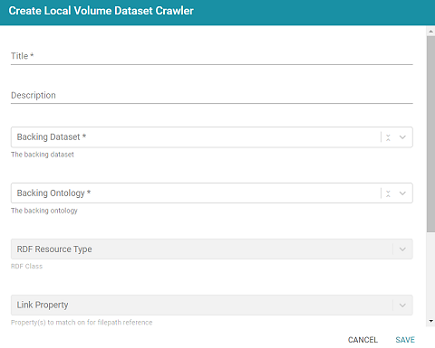
- Title: Required field that specifies the unique name for this crawler.
- Description: Optional field that provides a description of this crawler.
- Backing Dataset: Required field that specifies the Anzo dataset to crawl.
- Backing Ontology: Required field that specifies the model for the dataset.
- RDF Resource Type: Required field that specifies the resource type or class of data to target with this crawler.
- Link Property: Optional field that specifies any link properties to crawl. A link property is a property whose value identifies the location of a linked document. When linked properties are specified, the crawler will crawl the linked documents. For example, in the triples below, fileLocation is a link property:
<urn://someUnstructuredDocument> <urn://someProperty> "file metadata" ;
<urn://fileLocation> "/path/to/file.pdf" .
In typical use cases, this crawler is configured to define either a Link Property or a Content Property but not both.
- Content Property: Optional field that identifies any content properties to crawl. A content property is a property whose value is a string literal and you want the crawler to crawl and annotate those strings. For example, in the triples below, longDescription is a content property:
<urn://someUnstructuredDocument> <urn://someProperty> "file metadata" ;
<urn://longDescription> "this is some interesting, likely long, unstructured text with a lot of information, and I want it to be annotated" . - Base Path Connection: Required field whose value depends on whether you specified a Link Property or a Content Property:
- If a Link Property was specified, the Base Path Connection is the base path to use for resolving relative file paths in the Link Property values. For example, using the example triples:
<urn://someUnstructuredDocument> <urn://someProperty> "file metadata" ;
<urn://fileLocation> "/path/to/file.pdf" .
The
<urn://fileLocation>value of/path/to/file.pdfcould be a relative path to a location likes3://location/bucket/path/to/file.pdfor/opt/anzoshare/data/path/to/file.pdf. Therefore, the Base Path needs to be specified to resolve any relative paths and locate the linked documents. - If a Content Property was specified, the Base Path Connection is a directory on the file store where the crawler can save a copy of the Content Property strings for the Anzo Unstructured worker instances. Saving the content to a shared file location avoids the overhead of sending the strings to the workers over the network.
- If a Link Property was specified, the Base Path Connection is the base path to use for resolving relative file paths in the Link Property values. For example, using the example triples:
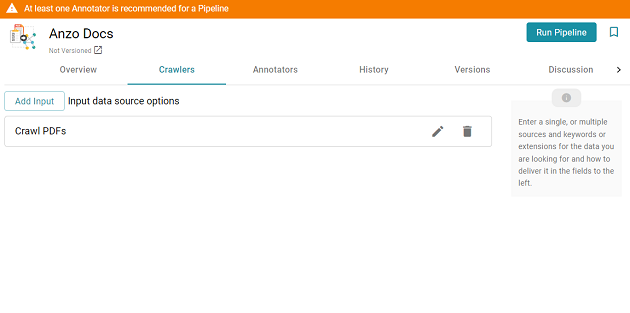
- When you have finished configuring the crawler, click Save. Anzo adds the crawler to the pipeline and returns to the Crawlers screen. For example:
- If you want to change the crawler configuration, click the Edit icon (
 ) for the crawler and modify the settings as needed. If you want to add another crawler to the pipeline, repeat the steps above.
 - When you have finished adding crawlers, follow the instructions in Add Annotators to the Pipeline to add one or more annotators to the pipeline.
Add Annotators to the Pipeline
After adding crawlers, the next step is to add one or more annotators. Annotators extract facts or references in the text as annotations.
- In the pipeline, click the Annotators tab.
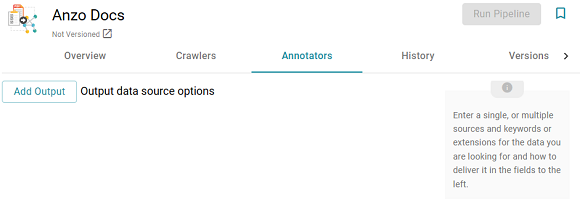
- Next, click the Add Output button. Anzo opens the Add Component dialog box. The New tab is selected and lists the available annotators and the Existing Components tab lists annotators that have been previously configured for other pipelines.
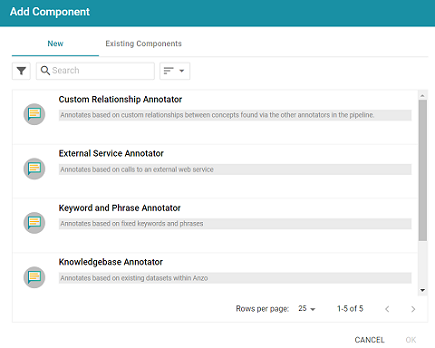
- To add a new annotator to the pipeline, click the annotator name to select it. To add an existing annotator to the pipeline, click the Existing Components tab, and then select an annotator. The list below describes each of the default annotators:
- Custom Relationship Annotator: Include this annotator to map relationships between annotations based on the number of characters between the annotations.
- External Service Annotator: Include this annotator to hit an HTTP endpoint that provides annotations.
- Keyword and Phrase Annotator: Include this annotator to create annotations based on the phrases that you specify.
- Knowledgebase Annotator: Include this annotator to link structured and unstructured data by finding instances in data layers, graphmarts, or Anzo linked datasets. Based on the names and aliases of entities present or patterns that are indicative of the entities, this annotator marks up the documents with the structured entities linked.
- Regex Annotator: Include this annotator to use regular expression rules to identify entities such as email addresses, URLs, phone numbers, or any other entity that can be matched using a regular expression.
- After selecting an annotator, click OK. Anzo opens the Create dialog box for the component. Complete the fields to configure the annotator. The list below provides details about the settings for the annotators that are typically used in pipelines. Click an annotator name to view the details for that component:
External Service Annotator
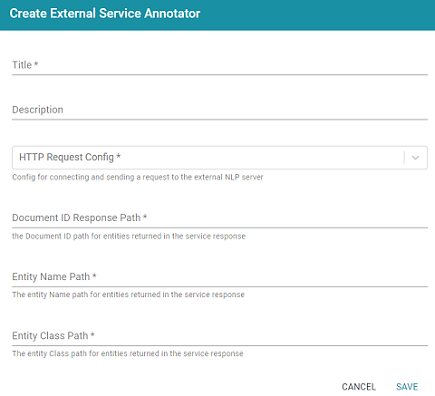
For information about the options that are presented when you edit an External Service Annotator, see Annotator Settings Reference.
- Title: Required field that specifies the unique name for this annotator.
- Description: Optional field that provides a description of this annotator.
- HTTP Request Config: Required field that specifies the HTTP source object that contains the URL and method to use when sending data for annotations.
- Document ID Response Path: Required field that specifies where to find the document ID in the response.
- Entity Name Path: Required field that specifies the annotation object name path.
- Entity Class Path: Required field that specifies the class URI for an annotation.
Keyword and Phrase Annotator

For information about the options that are presented when you edit a Keyword and Phrase Annotator, see Annotator Settings Reference.
- Title: Required field that specifies the unique name for this annotator.
- Description: Optional field that provides a description of this annotator.
- Phrase: Required field that specifies the terms or phrases to annotate. Type a word or phrase in the field and then click Add to add the phrase. You can add any number of phrases.
Knowledgebase Annotator
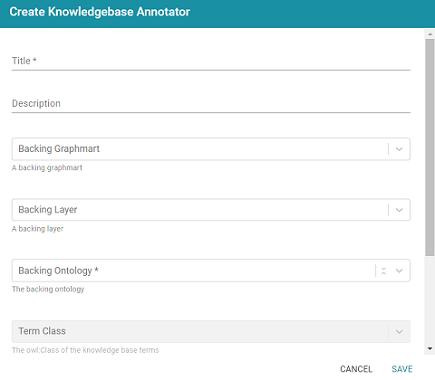
For information about the options that are presented when you edit a Knowledgebase Annotator, see Annotator Settings Reference.
- Title: Required field that specifies the unique name for this annotator.
- Description: Optional field that provides a description of this annotator.
- Backing Graphmart: Optional field that specifies the graphmart or graphmarts to annotate.
If you want the annotator to run against a linked dataset or Anzo knowledgebase instead of a data layer or graphmart, leave the Backed Layer and Backed Graphmart fields blank. After saving the pipeline, you can edit the pipeline and specify a Backed Dataset at that time.
- Backing Layer: Optional field that specifies the data layer or layers to annotate.
The Backing Layer and Backing Graphmart fields are treated independently. Layers that you select do not have to be part of the graphmart that you specify in Backing Graphmart. And specifying a layer does not mean that you must select a Backing Graphmart. However, any layers or graphmarts that you select must contain classes and properties from the Backing Ontology or the data will not be annotated.
- Backing Ontology: Required field that specifies the model for the backing data layers and/or graphmart. Click the field and select a model from the drop-down list.
- Term Class: Required field that specifies the class of data for the annotations.
- Term Label Property: Required field that lists the primary name or label property of the resources.
- Term Identifying Properties: Required field that specifies the properties that contain names, aliases, or other identifiers to use for identifying the resources.
Regex Annotator
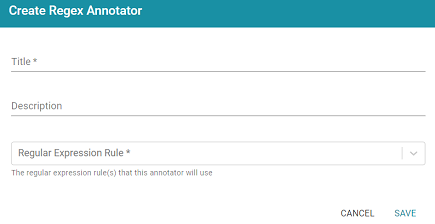
For information about the options that are presented when you edit a Regex Annotator, see Annotator Settings Reference.
- Title: Required field that specifies the unique name for this annotator.
- Description: Optional field that provides a description of this annotator.
- Regular Expression Rule: Required field that lists the regular expression rules for this annotator. To add a rule, click drop-down field and select Create New. Anzo opens the Create Regular Expression Rule dialog box where you can define the rule:
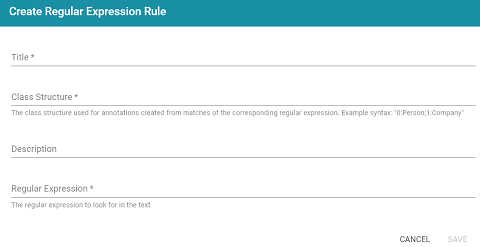
- Title: Required field that specifies the name of the rule.
- Class Structure: Required field that specifies the class in the model that should be created for this rule. The value should be in the format
group_number:class_name, wheregroup_numbercorresponds to a group in the regex capture. Each rule should start with group0. Include groups1and higher if needed to represent parts of the expression that are contained in parentheses. Theclass_nameis a label that describes the type of data the rule will find. For example, for a rule that finds hyphenated words0:Hyphens. - Description: Optional field that describes the rule.
- Regular Expression: Required field that specifies the regular expression to use for finding matching entities.
- When you have finished configuring the annotator, click Save. Anzo adds the annotator to the pipeline and returns to the Annotators screen. For example:
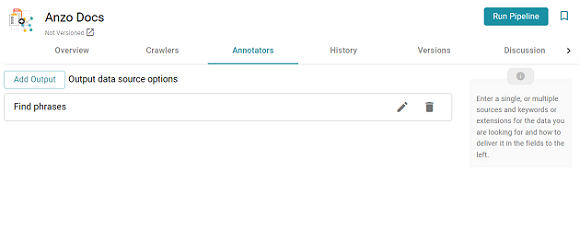
- If you want to change the annotator configuration, click the Edit icon () for the annotator and modify the settings as needed (see Annotator Settings Reference for information about settings). If you want to add another annotator to the pipeline, repeat the steps above.
- When you have finished adding annotators to the pipeline, proceed to Run the Pipeline below.
Run the Pipeline
When you are ready to run the pipeline, click the Run Pipeline button on the top right of the screen. For example:

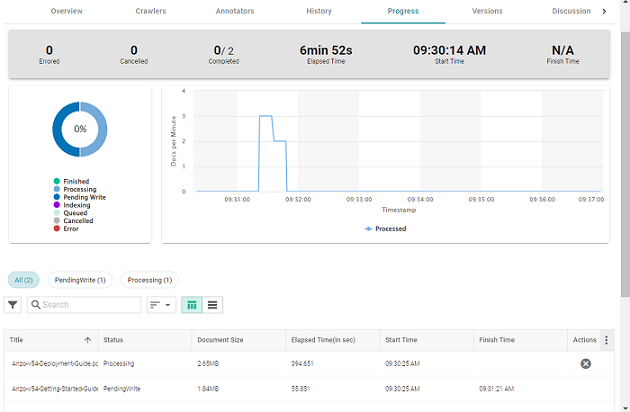
The process can take several minutes to complete. You can click the Progress tab to view details such as the pipeline status, runtime, number of documents processed, and errors. For example:
When the pipeline finishes, a new dataset becomes available in the Datasets catalog. From the catalog, you can create a graphmart from the dataset so that you can explore and analyze the data. For instructions, see Creating a Graphmart from a Dataset. You can also add the dataset to an existing graphmart by following the steps in Adding a Dataset to a Graphmart.