Using Third-Party Visualization Tools
A variety of graph visualization applications can be used to access data in AnzoGraph via the SPARQL endpoint (see Accessing AnzoGraph Using HTTP Protocol for information). For demonstrations, Cambridge Semantics utilizes two third-party applications:
- Apache Zeppelin: Cambridge Semantics offers an Apache Zeppelin Docker image for download. The Zeppelin image includes a custom SPARQL interpreter for securely connecting to AnzoGraph.
- Jupyter Notebook: Existing Jupyter Notebook or JupyterLab environments can run queries against the AnzoGraph SPARQL endpoint.
This topic provides information about integrating Zeppelin with AnzoGraph. It also provides instructions for accessing AnzoGraph from your existing Jupyter installation.
Zeppelin Notebook Integration
This section provides instructions for deploying the Cambridge Semantics Apache Zeppelin image with Docker, connecting to AnzoGraph, and optionally downloading and running the tutorial notebook. The Zeppelin deployment includes an integrated SPARQL interpreter that enables users to make a secure, authenticated connection to AnzoGraph using gRPC protocol.
RHEL/CentOS Tarball Deployments: Zepellin uses gRPC protocol to connect to AnzoGraph, which requires a username and password for authentication. RHEL/CentOS deployments are not pre-configured with a gRPC user. Before deploying Zeppelin, create a username and password to use for the connection. How do I generate a gRPC username and password for RHEL/CentOS tarball deployments?
For information about installing Docker, see Docker Installation and Configuration Requirements.
Deploying Zeppelin
| Tip | If you use Docker on Linux, you might want to follow the steps in Post-installation steps for Linux to make sure that a non-root user can run Docker commands and you do not need to include "sudo" in the commands below. |
- If necessary, start Docker for Linux or the Docker Desktop application for Mac or Windows. If you are on Mac, open the Terminal app. If you are on Windows, open PowerShell.
Note Docker caches images on the docker host. If you have deployed a Zeppelin container previously, that image is cached on the host and will be used to redeploy Zeppelin. If you want to deploy the latest release, first pull the latest image. To do so, run the following command from the command line, and then proceed to the next step. docker pull cambridgesemantics/contrib-zeppelin:latest
You can deploy alternate Zeppelin versions by replacing the "latest" tag with any of the tags that are available on the Cambridge Semantics Zeppelin Docker Hub site.
- If you are deploying the Zeppelin container for the first time, Cambridge Semantics recommends that you create a directory on the local file system where Zeppelin notebooks can be saved. When you deploy Zeppelin, you can map the notebook directory in the container to the notebook directory on the local file system. This way the notebooks are shared, and if you remove the Zeppelin container, the local file system retains a copy of any notebooks you created. If you redeploy Zeppelin later, the new container can be mapped to the same local directory and access the existing notebooks. To create the directory, navigate to a location on the host and run the following command to create a notebook directory in the current directory:
mkdir $PWD/notebook
Note On Mac and Linux, Docker is configured by default to allow local directories to be shared with containers. On Mac, the /Users, /Volumes, /private, and /tmp directories are shared. If necessary, you can configure additional locations in Docker Preferences > Resources > File Sharing. On Windows, Docker is not configured to share local directories by default. Configure sharing by going to Docker Settings > Resources > File Sharing and selecting the C checkbox to share the C drive. Then click Apply & Restart to apply the change. - The command that you run to deploy Zeppelin depends on whether you want only the base application that is empty of notebooks or the version of the image that contains several Cambridge Semantics-supplied sample notebooks that demonstrate AnzoGraph's Data Science functions. Click one of the headings below to view the instructions for deploying Zeppelin according to that option.
 Deploy Zeppelin without Sample Notebooks
- Run the following Docker command to deploy the Zeppelin container. The command instructs Docker to start Zeppelin and configure HTTP access to the application by mapping the container port to the HTTP port on the local host. In addition, the
-v $PWD/notebook:/notebookstatement creates the bridge between the notebook directory you created on the local file system and the container’s /notebook directory:docker run -p http_host_port:8080 --name=container_name \ -v $PWD/notebook:/notebook \ -e ZEPPELIN_NOTEBOOK_DIR='/notebook' \ -e ZEPPELIN_WEBSOCKET_MAX_TEXT_MESSAGE_SIZE=10240000 \ -d cambridgesemantics/contrib-zeppelin:tag \ /zeppelin/bin/zeppelin.sh
The list below describes each of the parameters:
- host_http_port is the port on the local host to use for HTTP access to the Zeppelin user interface. In the container, the user interface binds to port 8080 for HTTP access. Cambridge Semantics recommends that you specify 8080 to map the container's HTTP port to port 8080 on the local host. If port 8080 is in use, specify an alternate port for host_http_port.
- container_name is the short name to use to identify the Zeppelin container. For example, zeppelin.
- tag is the tag from the Cambridge Semantics Zeppelin Docker Hub site that identifies the version of Zeppelin to deploy. If you pulled an image in the first step, this tag should match the tag from the pull command. Usually the latest tag is specified so the most recent release is deployed.
For example:
docker run -p 8080:8080 --name=zeppelin \
  -v $PWD/notebook:/notebook \
  -e ZEPPELIN_NOTEBOOK_DIR='/notebook' \
  -e ZEPPELIN_WEBSOCKET_MAX_TEXT_MESSAGE_SIZE=10240000 \
  -d  cambridgesemantics/contrib-zeppelin:latest \
  /zeppelin/bin/zeppelin.sh
Note Windows PowerShell will not run the command above in its current format. Copy the command and paste it into a text editor. In the editor, remove the line breaks and \ characters. Then paste the edited version into PowerShell and run it. When the prompt returns the container ID, the container is running. For example:
6c67e9f111cb55fb9a44208ce1802256acf459acbce1e0250b70646492d32642
- Zeppelin is now installed and ready to use. On Mac and Windows, you can open the Zeppelin user interface from the Docker Dashboard, or you can open a browser and go to the following URL:
http://127.0.0.1:port
Where port is the HTTP port that you specified in the Docker run command. Typically, it is 8080.
On Linux, open a browser and go to the following URL:
https://host_IP_address:port
Where host_ip_address is the IP address of the host server, and port is the HTTP port that you specified in the Docker run command. Typically, it is 8080.
Note If you are using Docker locally on a Linux machine or you have the AnzoGraph and Zeppelin containers in the same Docker instance and need to know the IP address of the Zeppelin container, you can run the following command: docker inspect container_name | grep '"IPAddress"' | head -n 1
For example:
docker inspect zeppelin | grep '"IPAddress"' | head -n 1
"IPAddress": "172.17.0.3"
If you are running Docker locally on a Windows computer, you can run the following command:
docker inspect zeppelin | select-string '"IPAddress"'
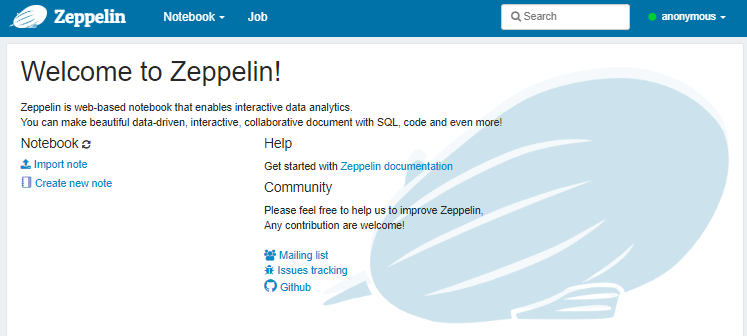
Zeppelin opens and displays the Welcome page. For example:
Connect Zeppelin to your AnzoGraph deployment by following the instructions in Connecting to AnzoGraph below. If you want to get started with a sample notebook, see Downloading the AnzoGraph Tutorial Notebook.
Deploy Zeppelin with Sample Notebooks Included- Run the following Docker command to deploy the Zeppelin container. The command instructs Docker to start Zeppelin and configure HTTP access to the application by mapping the container port to the HTTP port on the local host. In addition, the
-v $PWD/notebook:/notebookstatement creates the bridge between the notebook directory you created on the local file system and the container’s /notebook directory:docker run -p http_host_port:8080 --name=container_name \ -v $PWD/notebook:/notebook \ -e ZEPPELIN_NOTEBOOK_DIR='/notebook' \ -e ZEPPELIN_WEBSOCKET_MAX_TEXT_MESSAGE_SIZE=10240000 \ -d cambridgesemantics/contrib-zeppelin:tag \ /bin/bash /docker-entrypoint.sh
The list below describes each of the parameters:
- host_http_port is the port on the local host to use for HTTP access to the Zeppelin user interface. In the container, the user interface binds to port 8080 for HTTP access. Cambridge Semantics recommends that you specify 8080 to map the container's HTTP port to port 8080 on the local host. If port 8080 is in use, specify an alternate port for host_http_port.
- container_name is the short name to use to identify the Zeppelin container. For example, zeppelin.
- tag is the tag from the Cambridge Semantics Zeppelin Docker Hub site that identifies the version of Zeppelin to deploy. If you pulled an image in the first step, this tag should match the tag from the pull command. Usually the latest tag is specified so the most recent release is deployed.
For example:
docker run -p 8080:8080 --name=zeppelin \
  -v $PWD/notebook:/notebook \
  -e ZEPPELIN_NOTEBOOK_DIR='/notebook' \
  -e ZEPPELIN_WEBSOCKET_MAX_TEXT_MESSAGE_SIZE=10240000 \
  -d  cambridgesemantics/contrib-zeppelin:latest \
  /bin/bash /docker-entrypoint.sh
Note Windows PowerShell will not run the command above in its current format. Copy the command and paste it into a text editor. In the editor, remove the line breaks and \ characters. Then paste the edited version into PowerShell and run it. When the prompt returns the container ID, the container is running. For example:
6c67e9f111cb55fb9a44208ce1802256acf459acbce1e0250b70646492d32642
- Zeppelin is now installed and ready to use. On Mac and Windows, you can open the Zeppelin user interface from the Docker Dashboard, or you can open a browser and go to the following URL:
http://127.0.0.1:port
Where port is the HTTP port that you specified in the Docker run command. Typically, it is 8080.
On Linux, open a browser and go to the following URL:
https://host_IP_address:port
Where host_ip_address is the IP address of the host server, and port is the HTTP port that you specified in the Docker run command. Typically, it is 8080.
Note If you are using Docker locally on a Linux machine or you have the AnzoGraph and Zeppelin containers in the same Docker instance and need to know the IP address of the Zeppelin container, you can run the following command: docker inspect container_name | grep '"IPAddress"' | head -n 1
For example:
docker inspect zeppelin | grep '"IPAddress"' | head -n 1
"IPAddress": "172.17.0.3"
If you are running Docker locally on a Windows computer, you can run the following command:
docker inspect zeppelin | select-string '"IPAddress"'
Zeppelin opens and displays the Cambridge Semantics index page, which lists the sample notebooks that are included in the image. For example:
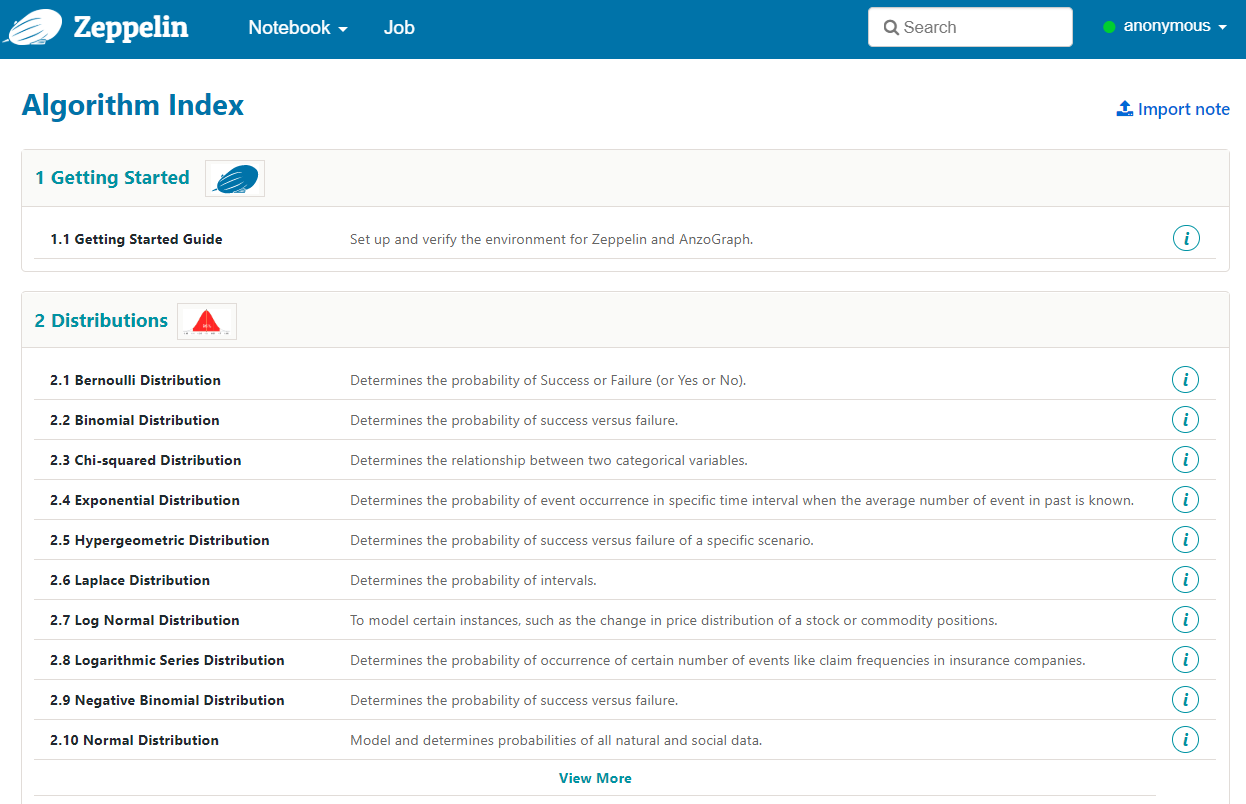
Each notebook provides details and example usage for one of the AnzoGraph Data Science functions. You can click a notebook name to open the file. It might take some time to load all of the contents. To run the queries in a sample notebook or write and run your own queries run against AnzoGraph, connect Zeppelin to AnzoGraph by following the instructions in Connecting to AnzoGraph below.
For more information about the data science functions, see Additional Data Science Functions (PREVIEW). For information about using Zeppelin, see the Zeppelin Documentation.
- Run the following Docker command to deploy the Zeppelin container. The command instructs Docker to start Zeppelin and configure HTTP access to the application by mapping the container port to the HTTP port on the local host. In addition, the
Connecting to AnzoGraph
To connect Zeppelin to AnzoGraph, you first choose an interpreter for Zeppelin to use to connect with AnzoGraph and then specify the connection parameter settings needed to establish the interpreter connection with the AnzoGraph database.
| Important | To connect to an AnzoGraph database, you must first have installed AnzoGraph, and the database must be accessible by the Zeppelin Docker container. For more information, see AnzoGraph Supported Platforms and Deployment Options. |
- On the top right of the Zeppelin screen, click the anonymous drop-down list and select Interpreter. The Interpreters screen opens.
- In the Search interpreters field at the top of the screen, type "sparql" and find the SPARQL interpreter. For example:
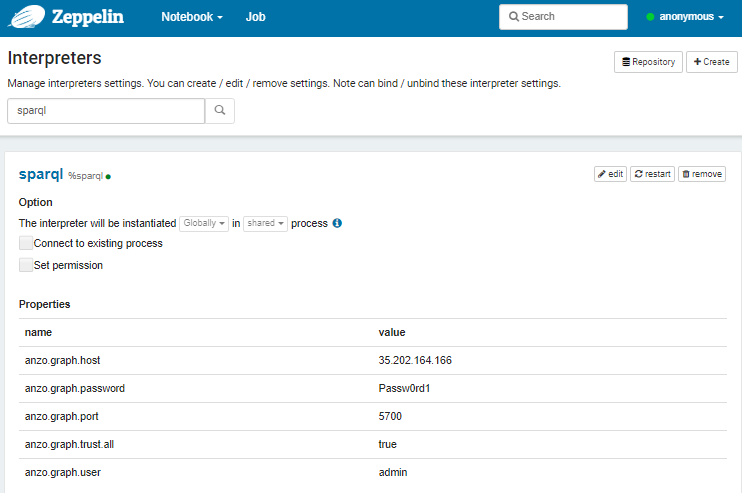
- Click the edit button and modify the interpreter to enter your AnzoGraph deployment details and make a secure connection to the database. The list below describes each interpreter setting:
- anzo.graph.host: The IP address of the AnzoGraph host. If AnzoGraph is running in the same Docker instance as Zeppelin, run the following command to return the AnzoGraph container IP address:
docker inspect container_name | grep '"IPAddress"' | head -n 1
For example:
docker inspect anzograph | grep '"IPAddress"' | head -n 1
This command returns the IP address of the AnzoGraph Docker container as shown below:
"IPAddress": "172.17.0.2",
Note If you are running Docker locally on a Windows computer, you can run the following command:
docker inspect anzograph | select-string '"IPAddress"'
- anzo.graph.password: The password for the user in the anzo.graph.user field. On Docker deployments, specify Passw0rd1.
RHEL/CentOS Tarball Deployments: Zepellin uses gRPC protocol to connect to AnzoGraph, which requires a username and password for authentication. RHEL/CentOS deployments are not pre-configured with a gRPC user. Before deploying Zeppelin, create a username and password to use for the connection. How do I generate a gRPC username and password for RHEL/CentOS tarball deployments?
- anzo.graph.port: The gRPC port for AnzoGraph. The default value is 5700. Do not change this value.
- anzo.graph.trust.all: Instructs Zeppelin to trust the AnzoGraph SSL certificates. Accept the default value of true.
- anzo.graph.user: The username to use to log in to AnzoGraph. On Docker deployments, specify admin.
- anzo.graph.host: The IP address of the AnzoGraph host. If AnzoGraph is running in the same Docker instance as Zeppelin, run the following command to return the AnzoGraph container IP address:
- When you finish adding the connection details, click Save at the bottom of the screen. Zeppelin displays a dialog box that asks if you want to restart the interpreter with the new settings. Click OK to configure the connection.
- When the interpreter restart is complete, click the Zeppelin logo at the top of the screen to return to the index screen.
Downloading the AnzoGraph Tutorial Notebook
If you deployed the Zeppelin image that does not contain sample notebooks and you want to import a notebook to get started with, follow the instructions in this section to download and import the AnzoGraph Tutorial Notebook.
- Click the link below to download the AnzoGraph Tutorial Notebook to your computer.
Download the AnzoGraph Tutorial Zeppelin Notebook
- Extract the downloaded notebook ZIP file on your computer. The ZIP file contains AnzoGraph-Zeppelin-Tutorial.json.
- On the Zeppelin Welcome or the Algorithm Index screen if you have the sample notebooks, click Import note. Zeppelin displays the Import New Note screen.
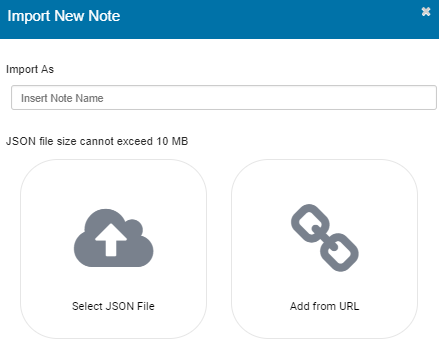
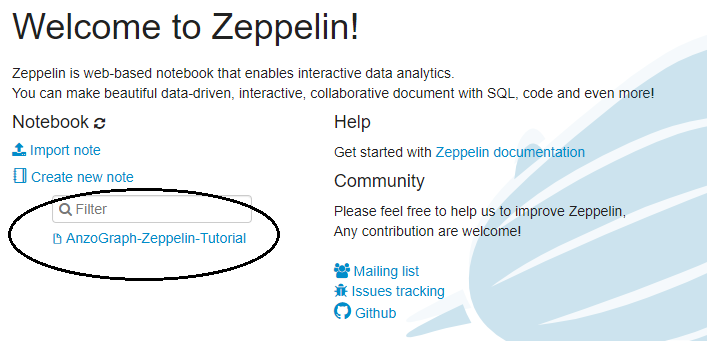
- On the import screen, click Select JSON File, and then select the AnzoGraph-Zeppelin-Tutorial.json file to import. Zeppelin imports the note and lists the new file under the filter text box on the home page or in the Notebook menu. For example:
Click the link to open the notebook. It might take some time to load all of the contents. To run a query in the file, click the run (
 ) button for the paragraph. For more information about using Zeppelin, see the Zeppelin Documentation.
Jupyter Notebook Integration
This section provides information about accessing AnzoGraph with your existing Jupyter Notebook or JupyterLab installation. If you do not have Jupyter Notebook or JupyterLab installed, follow the instructions in Installing Jupyter on the Jupyter website to install Jupyter Notebook and its prerequisites.
Accessing AnzoGraph from a Jupyter Notebook
- Since AnzoGraph runs SPARQL queries, make sure that the Jupyter SPARQL kernel is installed. To install the kernel, run the following commands:
pip install sparqlkernel
jupyter sparqlkernel install --user
- Connect to the AnzoGraph SPARQL endpoint by adding the following text to a cell in the notebook and then running the cell.
%endpoint http://hostname/sparql
%auth basic admin Passw0rd1
Where hostname is the IP address of the AnzoGraph instance. If AnzoGraph is running in a Docker container on the same server as Jupyter, you can run the following command to return the container IP address:
docker container inspect container_name | grep IP
For example:
docker container inspect anzograph | grep IP
Once the notebook is connected to the AnzoGraph endpoint, you can run SPARQL queries against AnzoGraph.