Upgrading a License
By default, new AnzoGraph DB deployments have an embedded "Free Edition" license that does not expire but is limited to operation on a single server using a maximum of 8 GB RAM. You can increase the memory limit or remove all limitations by registering with Cambridge Semantics and generating a new license key. This topic provides instructions for upgrading a license using the AnzoGraph DB user interface and the command line interface.
Upgrading a License from the User Interface
- Follow the appropriate instructions below to open the AnzoGraph DB console user interface:
- Docker Desktop for Mac or Windows: You can use the Docker Dashboard to open the AnzoGraph DB container in a browser, or open a browser and go to the following URL:
http://127.0.0.1
If you specified a port other than 80 for the host HTTP port when you deployed AnzoGraph DB, include that port in the URL. For example, http://127.0.0.1:8888.
- Docker on Linux: If you are accessing Docker on a remote Linux host, note the IP address of the host, and then open a browser and go to the following
URL:
https://host_IP_address
If you mapped the container's HTTPS (8443) port to port 443 on the host when you deployed AnzoGraph DB, you do not need to specify a port. If you specified a port other than 443, include the port in the URL. For example,
https://10.100.0.1:8888.If you are using Docker locally on a Linux machine and need to know the IP address of the AnzoGraph DB container, you can run the following command:
sudo docker inspect container_name | grep '"IPAddress"' | head -n 1
For example:
sudo docker inspect anzograph | grep '"IPAddress"' | head -n 1
"IPAddress": "172.17.0.2"
- Kubernetes with Helm deployments: Using the AnzoGraph DB Cluster IP or External IP obtained from
the
kubectl get servicecommand, open a browser and go to the following URL:https://IP_address
- RHEL/CentOS Installer deployments: Use the following URL to access the Console:
https://host_IP_address:https_port
- Docker Desktop for Mac or Windows: You can use the Docker Dashboard to open the AnzoGraph DB container in a browser, or open a browser and go to the following URL:
- The browser displays the AnzoGraph DB console login screen. On the login screen, specify admin as the user name and Passw0rd1 as the password. Then click Sign In. The End User License Agreement (EULA) is displayed.
- Review the EULA and click Accept to proceed. The Query Console is displayed.
- Click the Admin tab at the top of the screen. The console displays general information about the deployment, including the license status. For example:
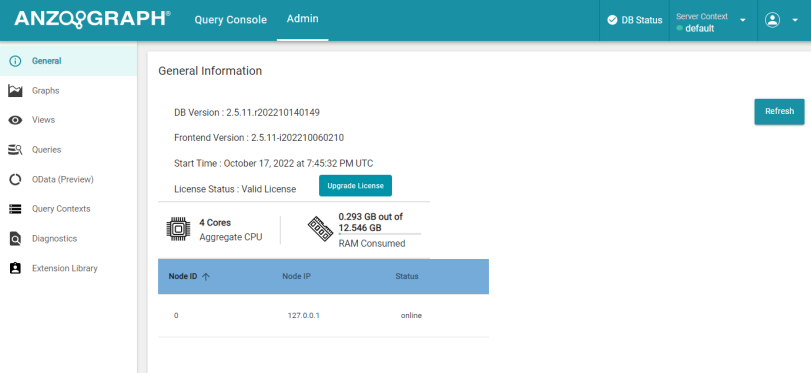
- Click the Upgrade License button. The AnzoGraph License Offerings web page is displayed:
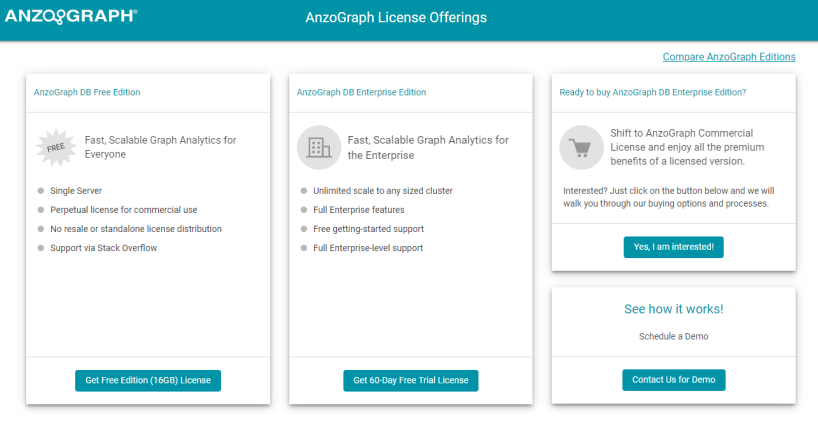
- On the License Offerings page, review the options and click the Get...License button for the type of license that you want to upgrade to. The Register for a License page is displayed.
- If you have not previously registered and therefore do not have a License Center account, type a valid email address on the left side of the screen and click Submit. If you have an account, click the Login button on the right side of the screen and log in to the License Center. The Cambridge Semantics Software Licensing page is displayed.
- On the Create License screen, the product field is populated with the type of license you registered for. And the Server ID field is populated with the unique server ID for your AnzoGraph DB instance. For example:
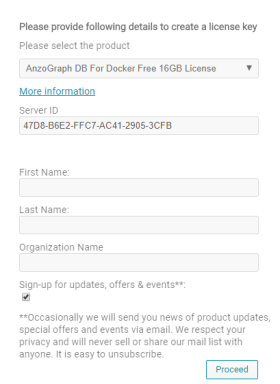
Provide the rest of the requested information on the form, and then click Proceed. The Software License Agreement dialog box is displayed.
If you get an error message that says the Server ID is not unique, follow the steps below to work around the issue and generate a new Server ID. Duplicated Server IDs can be assigned on image based operating deployments if the image contains a machine-id.
- As the root user, run the following command to unset the machine-id:
cat > /etc/machine-id < /dev/null
- Reboot the Virtual Machine (VM). A new, unique machine-id will be assigned.
- Start AnzoGraph DB if necessary. If services are set up (as described in Set up the AnzoGraph Services), AnzoGraph DB starts automatically when the VM restarts.
- Repeat the steps above to retrieve a license key using the new Server ID.
- As the root user, run the following command to unset the machine-id:
- On the Software License Agreement dialog box, click the I Agree checkbox. Then click OK.
- If you submitted your email address and were not previously registered, the License Center creates your account and displays a Registration Complete message. Instructions on signing in to the licensing center and collecting your key are emailed to you. Follow the instructions in the email to log in to the License Center.
- If you are logged in to the License Center, the new license details are displayed.
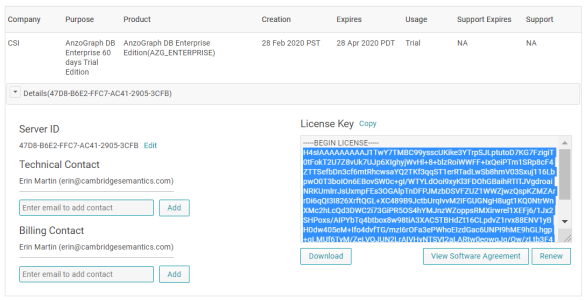
- On the License Details page, copy the license key by clicking the Copy link next to the License Key field. For example:
- Return to the Admin tab in the AnzoGraph DB console user interface. On the top right of the screen, click the user drop-down menu and select Product License.
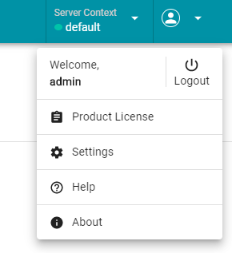
The Product License screen opens and displays details about the current product license. For example:
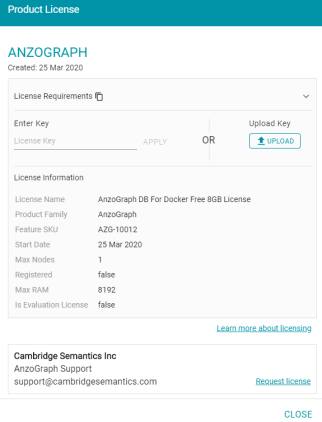
- In the License Key field, paste the license key that you copied from the licensing center, and then click Apply. AnzoGraph DB displays a "License was updated successfully" message and the screen is refreshed to display the details for the new license.
- Click Close to close the Product License dialog box and return to the General tab.
The license change will NOT be reflected in the general details until AnzoGraph DB is restarted. The new memory limit can only be applied during the startup process.
- Reintialize AnzoGraph DB to configure the database with the updated license. Reinitializing the database requires running the following system manager (azgctl) command on the file system. If you are using a cluster, run the command on the leader node. How do I access the AnzoGraph DB file system with Docker?
If necessary, run the following command to stop the database:
<install_path>/bin/azgctl -stop
Then run this command to reinitialize the database:
<install_path>/bin/azgctl -start -init
AnzoGraph DB is now configured according to the specifications of the new license key.
Upgrading a License from the Command Line
- Run the following command to display your current deployment's license information:
<install_path>/bin/azgctl -getlicenseid
AnzoGraph returns a number of attributes associated with the current license, including a property_license.id value. For example:
property_license.id: 2191-680E-178F-3D28-1535-D0F1
The property_license.id value will be used as the Server ID when upgrading your license.
If AnzoGraph DB is stopped, you can run the following command to return the server ID:
<install_path>/bin/azg_get_server_id
- Copy the property_license.id value, then open a web browser and go to the following URL, where you can view the licensing options: https://customercenter.cambridgesemantics.com/products/anzograph/license.html

- On the License Offerings page, review the options and click the Get...License button for the type of license that you want to upgrade to. The Register for a License page is displayed.
- If you have not previously registered and therefore do not have a License Center account, type a valid email address on the left side of the screen and click Submit. If you have an account, click the Login button on the right side of the screen and log in to the License Center. The Cambridge Semantics Software Licensing page is displayed.
- On the Create License screen, the product field is populated with the type of license you registered for. For example:
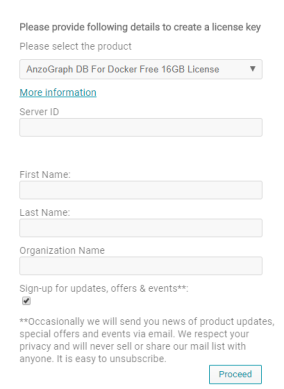
- In the Server ID field, paste the property_license.id value that you copied in step 2.
- Provide the rest of the requested information on the form, and then click Proceed. The Software License Agreement dialog box is displayed.
If you get an error message that says the Server ID is not unique, follow the steps below to work around the issue and generate a new Server ID. Duplicated Server IDs can be assigned on image based operating deployments if the image contains a machine-id.
- As the root user, run the following command to unset the machine-id:
cat > /etc/machine-id < /dev/null
- Reboot the Virtual Machine (VM). A new, unique machine-id will be assigned.
- Start AnzoGraph DB if necessary. If services are set up (as described in Set up the AnzoGraph Services), AnzoGraph DB starts automatically when the VM restarts.
- Repeat the steps above to retrieve a license key using the new Server ID.
- As the root user, run the following command to unset the machine-id:
- On the Software License Agreement dialog box, click the I Agree checkbox. Then click OK.
- If you submitted your email address and were not previously registered, the License Center creates your account and displays a Registration Complete message. Instructions on signing in to the licensing center and collecting your key are emailed to you. Follow the instructions in the email to log in to the License Center.
- If you are logged in to the License Center, the new license details are displayed.
- On the License Details page, copy the license key by clicking the Copy link next to the License Key field. For example:
- After retrieving the new license key, apply the key to your deployment using one of the following options:
- If AnzoGraph DB is stopped: Open in a text editor the license.pem file located in the
<install_path>/configdirectory on the leader node. In the license.pem file, replace the existing contents with the new license key that you copied in the previous step. Then save and close the file. - If AnzoGraph DB is running, you can use the system manager to import the license key. On the leader node, run the following command to import the key and update the license.pem file:
<install_path>/azg/bin/azgctl -license license_key_text
For example:
/opt/anzograph/bin/azgctl -license H4sIAAAAAAAAAG2RT0vDQBDF7/kUC54ELfsnu00LAautRRB7aC/qQaabSV2abMLuplo/v...
- If AnzoGraph DB is stopped: Open in a text editor the license.pem file located in the
- Reintialize AnzoGraph DB to configure the database with the updated license. If necessary, stop the database by running the following command:
<install_path>/bin/azgctl -stop
Then run the following command to reinitialize the database:
<install_path>/bin/azgctl -start -init
AnzoGraph DB is now configured to validate against the new license key.