Managing Users and Groups
Users and groups are typically managed in an external directory server that is connected to Anzo. The groups from the directory server are added to Anzo roles, and access to Anzo applications and features is controlled by the roles. For instructions on connecting to a directory server, see Connecting to a Directory Server. For information about roles, see Managing Roles.
This topic provides information about creating and modifying local Anzo user accounts that are stored in Anzo's internal LDAP server.
Adding an Internal Anzo User
Follow the instructions below to create a new internal Anzo user account.
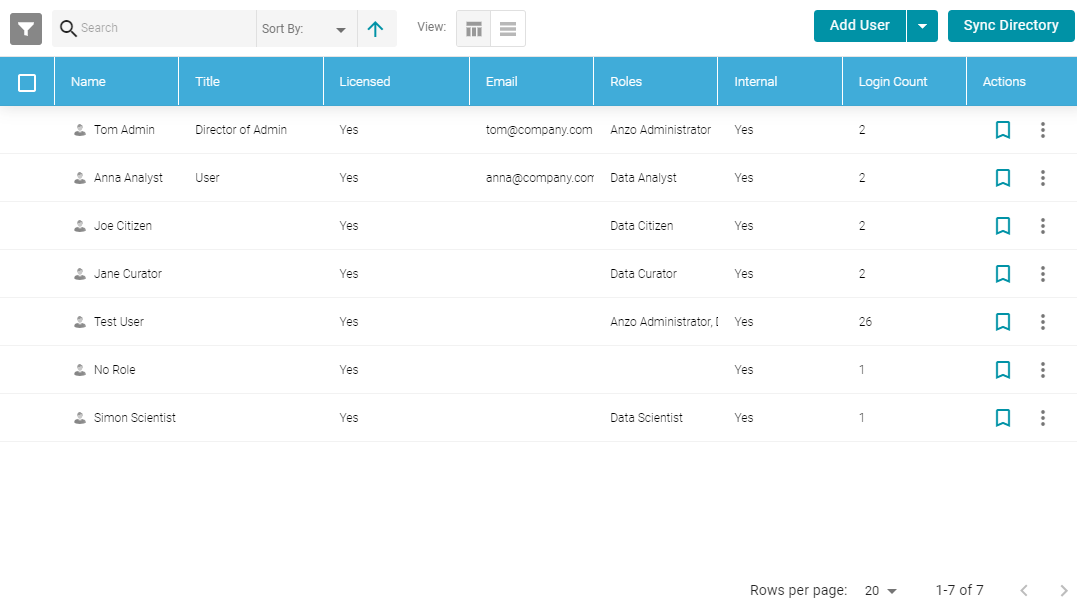
- In the Anzo application, expand the Administration menu and click System Users, Groups, and Roles. Then click the Users tab. Anzo displays the Users screen, which lists the existing users. For example:
- On the Users screen, click the Add User button and select Add User. Anzo opens the Add User dialog box.
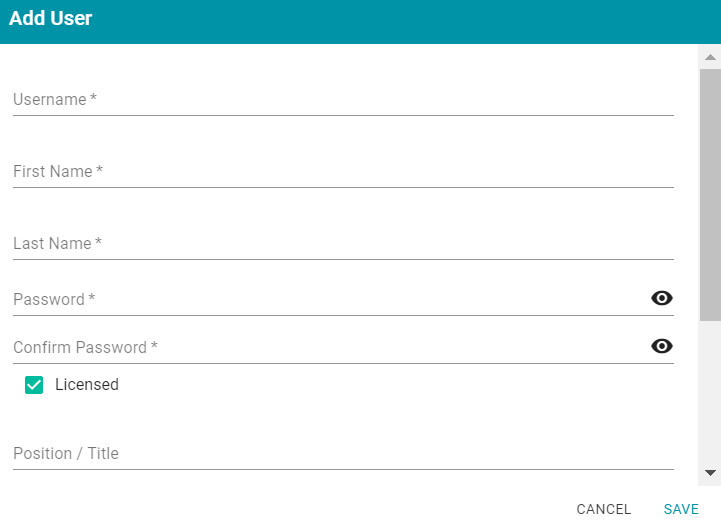
- Complete the required fields and enter any optional user details:
- Username: The user name that the user will use to log in to Anzo.
- First Name: The user's first name.
- Last Name: The user's last name.
- Password and Confirm Password: Type a password for the user.
- Licensed: Select the Licensed checkbox to enable this user to log in to the Anzo applications. If you want to add this user to the system but do not want to give him or her access to Anzo applications at this time, clear the Licensed checkbox.
- Position/Title: The user's job title or position.
- Email: The user's email address.
- Phone: The user's phone number.
- Roles: The role or roles that the user is a member of. The role defines the user's permissions. Click the Roles field and select a role from the drop-down list. Click the field again to select additional roles. For more information about roles, see Managing Roles. For a description of the default Anzo roles, see Default Anzo Roles and Permissions.
- Click Save to add the user to the system.