Managing Roles
This topic provides instructions for creating and managing roles. For information about the predefined Anzo roles, see Default Anzo Roles and Permissions.
Creating a New Role
- In the Anzo application, expand the Administration menu and click System Users, Groups, and Roles. Anzo displays the Roles screen, which lists the existing roles. For example:
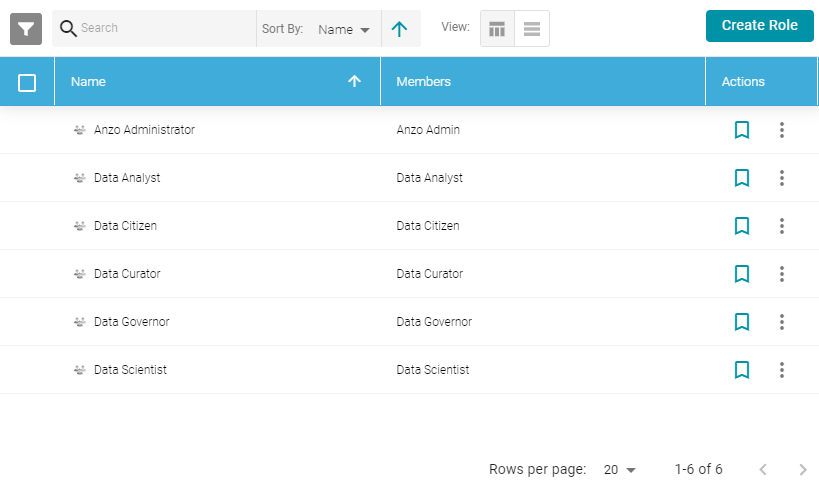
- On the Roles screen, click the Create Role button. Anzo displays the Add Role dialog box.
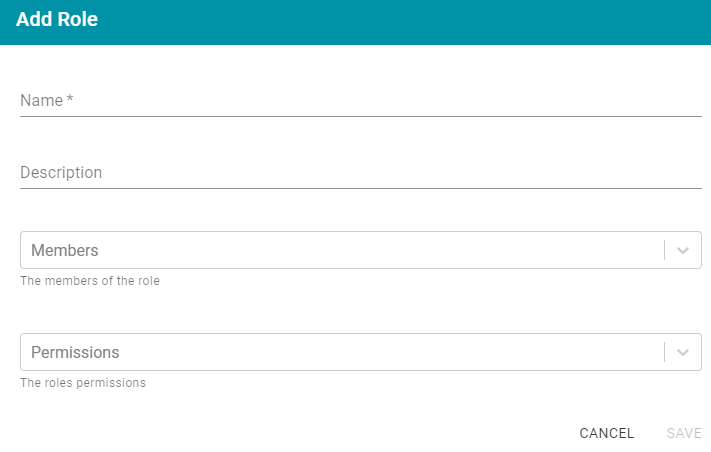
- Complete the required fields and enter any optional group details:
- Name: The name for the new role.
- Description: An optional description of the role.
- Members: The users or groups who are members of the role. Click the Members field to select a member. Click the field again to select additional members.
- Permissions: The list of Anzo features that this role has permission to access. Click the Permissions field and select a permission to add it to the list. Click the field again to select additional permissions. For details about each of the permissions, see the Permissions Reference.
- Click Save to add the role to the system. Anzo adds the new role to the list of roles on the Roles screen.
Adding Users or Groups to a Role
Follow the instructions below to add users and/or directory groups to a role.
- In the Anzo application, expand the Administration menu and click System Users, Groups, and Roles. Anzo displays the Roles screen, which lists the existing roles. For example:
- Click the name of the role that you want to add users or groups to. Anzo opens the Edit Role dialog box. For example:
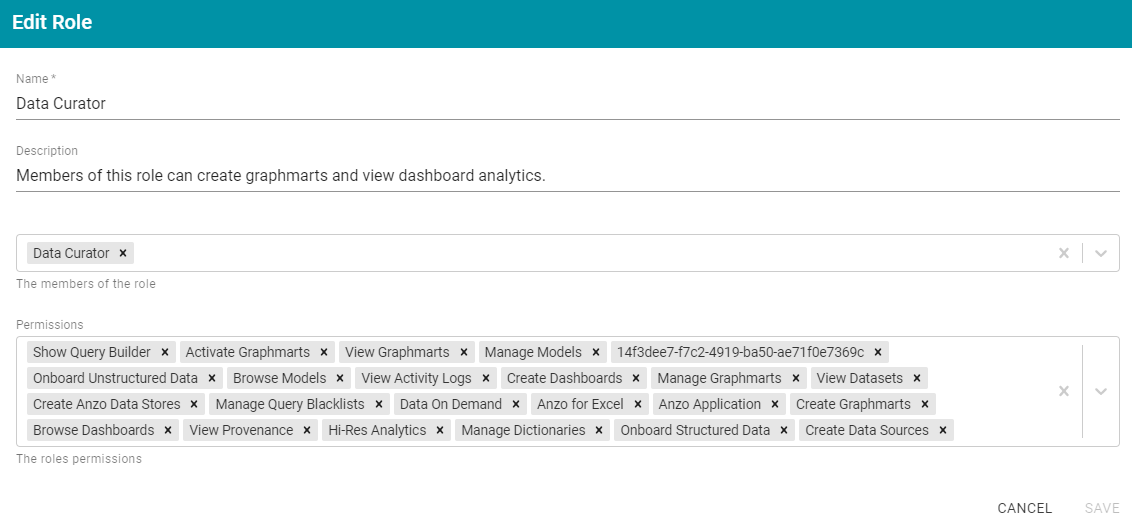
- Click the Members drop-down list to display the list of all available users and groups. You can also search for a user or group name by typing in the Members field. Click a name to add that user or group to the role. Click the field again to select additional members.
Note If you do not see users or groups that you expect to see, it is possible for Anzo to be out of sync with the directory server if groups have been altered or users have not logged into Anzo in a long time and their account has changed in the directory server. The Users and Groups screens in the User Management menu have Sync Directory buttons that you can click to synchronize with the directory server and update the data in Anzo if necessary. To remove a member from the role, click the X to the right of the name.
- When you have finished adding members, click Save to save the changes to the role.
Configuring Role Permissions
Follow the instructions below to add or remove permissions from a role. For details about each of the permissions, see the Permissions Reference.
- In the Anzo application, expand the Administration menu and click System Users, Groups, and Roles. Anzo displays the Roles screen, which lists the existing roles. For example:
- Click the name of the role for which you want to configure permissions. Anzo opens the Edit Role dialog box. For example:
- The Permissions field lists all of the permissions that are applied to the role. To remove a permission, click the X to the right of the permission name. To add a permission click the field to open the Permissions drop-down list. Click a name to add that permission to the role. Click the field again to select additional permissions.
- When you have finished changing permissions, click Save to save the changes to the role.