FAQ
This topic provides answers to frequently asked questions and includes references to more detailed information.
- What is an Anzo data store?
- What is the difference between a Dataset Pipeline and an ETL Pipeline?
- How do I update the data in Anzo if a file in my CSV data source changes?
- How do I duplicate a mapping?
- How do I associate a model with an existing data set?
- How do I download a model?
- How do I see which models are included in a graphmart?
- How do I find the URI for a graphmart?
- How do I find the graph URI for a layer in a graphmart?
- How do I find the URI for an LDS in the Dataset Catalog?
- How do I find the catalog entry URI for an LDS?
- What is the difference between the graphmart Reload and Refresh options?
- What happens to the existing data in an FLDS when I run an incremental ETL job?
An Anzo data store, also known as a graph data source, is a designated directory on the file store where Anzo can save the AnzoGraph load files that are generated during the ETL process. All installations require at least one graph data source. You can create one graph data source and configure all pipelines to write to that graph source (each ETL run automatically creates a new sub-directory under the graph data source) or you can create multiple graph data sources to use for different data sets. For information about creating graph sources, see Creating an Anzo Data Store.
Dataset pipelines are used to ingest data into Anzo. They produce new data sets in the Catalog and generate RDF files for loading data to AnzoGraph. All auto-ingested projects are dataset pipelines. For more information, see Creating a New Dataset Pipeline to Ingest Data into Anzo.
ETL pipelines do not ingest data into Anzo; they are used to ingest data into a file or another database. ETL pipelines do not generate a new data set entry in the Catalog or produce RDF load files for AnzoGraph. When you create mappings for ETL pipelines, you define a file schema or database as the target. For more information, see Creating a New ETL Pipeline to Move Data to a File or Database.
If the data in a CSV file changes, the way that you update the data set in Anzo depends on the type of changes that were made to the file and the file system where the file is hosted. The table below provides guidance on the steps to take to update Anzo based on the type of content updates and the file location.
| Note | The instructions below assume that the updated file has the same name and location as the file that was originally uploaded. |
| Update Type | File Location | Update Process |
|---|---|---|
| Added, deleted, or changed rows – Columns did not change | Uploaded from your Computer |
|
| Selected from the File Store |
|
|
| Added, deleted, or changed columns and rows | Uploaded from your Computer |
|
| Selected from the File Store |
|
Using the Anzo for Office Excel plugin, users can duplicate mappings to use as a template for a new mapping. Follow the instructions below to duplicate a mapping.
- In Excel, open the Anzo Mapper tool and connect to the Anzo server.
- In the Mapper menu, click the folder icon (
 ) to list the mappings that are available to open. By default, the mapping tool lists only the mappings that you created. To display additional mappings, such as auto-generated files, type a term in the Search field, and then click the cog icon (
 ) to display the files. For example:
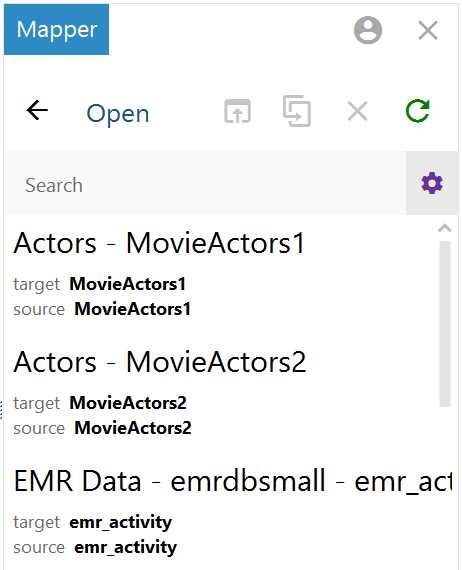
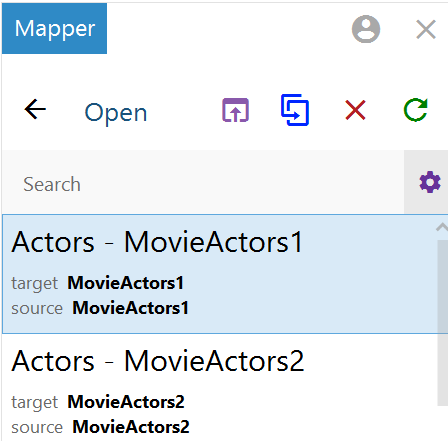
- Click the mapping that you want to duplicate. Selecting a mapping activates the buttons at the top of the screen. For example:
- Click the Duplicate icon (
 ) to copy the selected mapping. Anzo displays the Duplicate Mapping dialog box. For example:
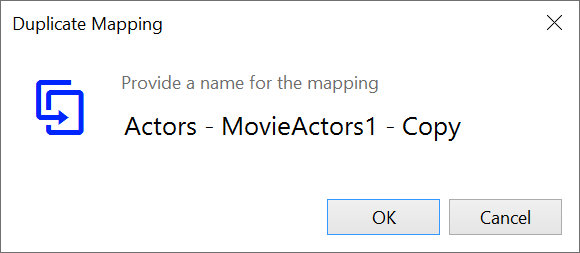
- Edit the mapping name and then click OK to create the duplicate. The new mapping is added to the list of mappings that are available to open.
Follow the instructions below to associate a model that is in Anzo with an onboarded data set.
- In the Anzo console, expand the Blend menu and click Datasets. Anzo displays the Dataset catalog, which lists the existing data sets.
- Click the data set that you want to add a model to. Anzo displays the Overview screen for the data set. For example:
- On the Overview screen under the Description field, click Advanced to display the advanced options. For example:
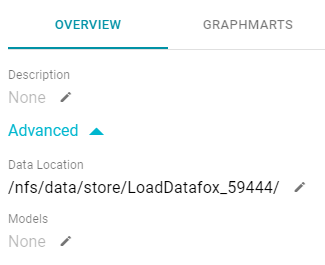
- Click the Edit icon (
 ) next to Models to open the Models drop-down list, and then select the model that you want to use for this data set. To include a system model, select the Include System Data checkbox. To select multiple models, click the drop-down list again and select another model.
 - When you have finished selecting models, click the checkmark icon (
 ) to save the change and associate the model or models with the data set.
Follow the instructions below to download a data model to your computer.
- In the Anzo console, click Model. Anzo displays the Manage Data Model Working Set screen. For example:

- On the Manage Working Set screen, select the checkbox next to the model that you want to export, and then click OK. Anzo opens the selected model in the editor. For example:

- Open the model menu by clicking the menu icon (
 ) to the right of the model name. Then select Download Model.
Anzo displays the Download Model dialog box:

- In the Download Model dialog box, select the format to save the model in. By default Anzo saves models in TRIG format. If you want to save the file in OWL format, select the OWL radio button. Then click Download.
Anzo downloads the model to your computer in the selected format.
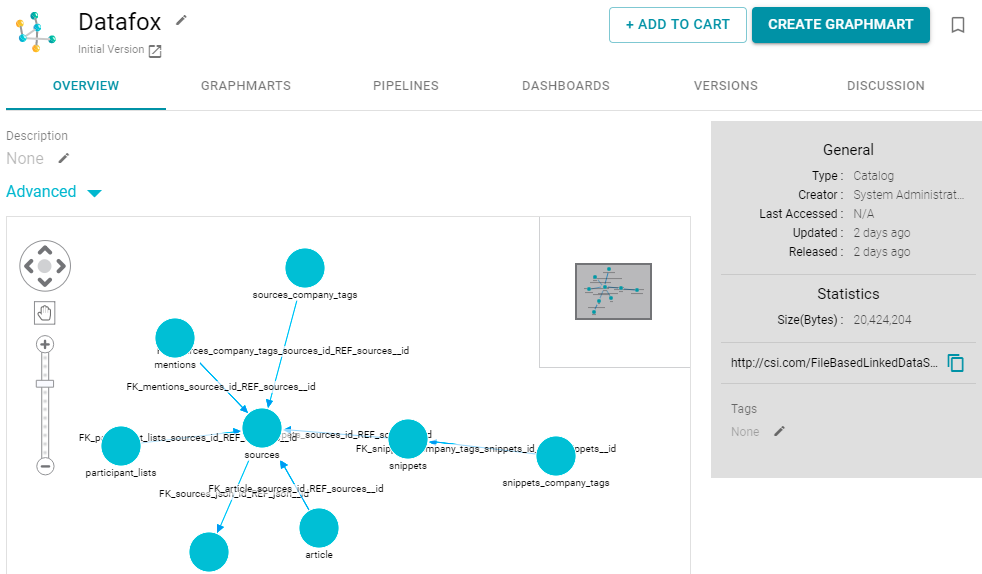
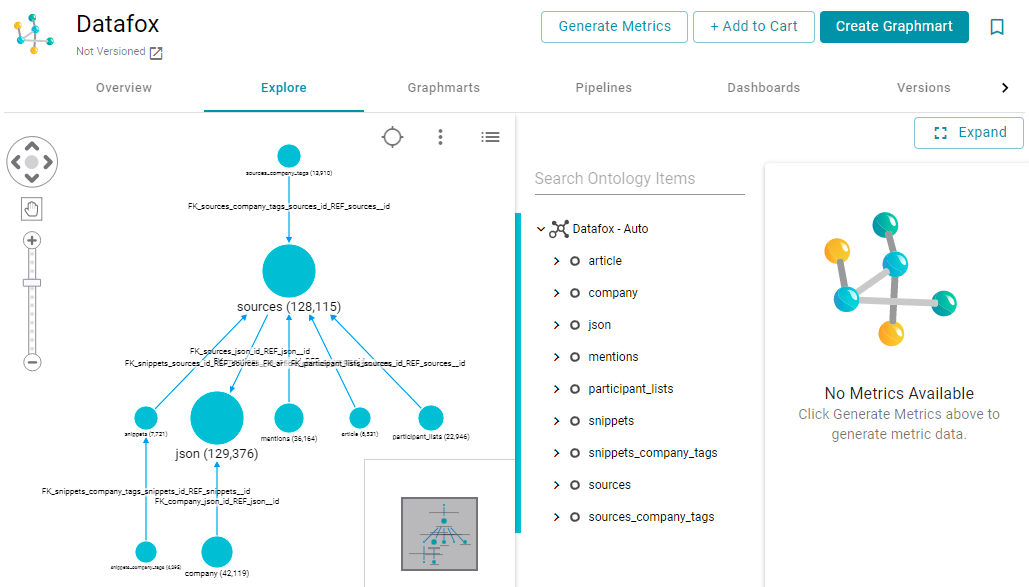
Anzo displays graphmart details, such as a list of the models in the graphmart, on the Overview screen for the graphmart. Follow the steps below to view the list of models in a graphmart.
- In the Anzo console, expand the Blend menu and click Graphmarts. Anzo displays the Graphmarts screen, which lists the existing graphmarts.
- In the list of graphmarts, click the name of the graphmart for which you want to view the included models. Anzo displays the graphmart overview. For example:

In the bottom right corner of the graph view in the center of the screen, there are three icons:

- To view the associated models, click the contents icon (
 ) on the right. Anzo displays the list of models. For example, the image below shows a graphmart with two models:
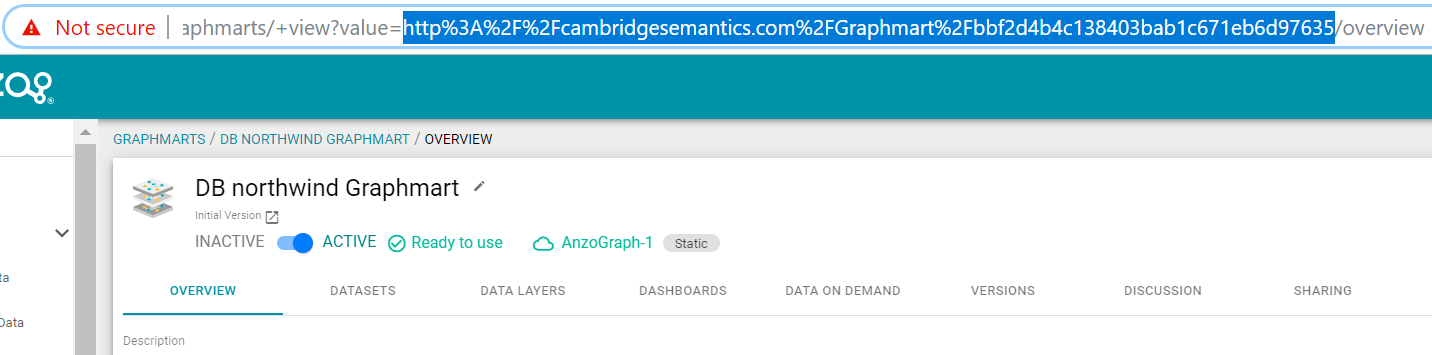
Anzo displays graphmart details, such as a graphmart's URI, on the Overview screen for the graphmart. Follow the steps below to view and copy a graphmart URI.
- In the Anzo console, expand the Blend menu and click Graphmarts. Anzo displays the Graphmarts screen, which lists the existing graphmarts.
- In the list of graphmarts, click the name of the graphmart for which you want to view or copy the URI. Anzo displays the graphmart overview. For example:

- View the graphmart URI in the statistics section on the right side of the screen. For example:
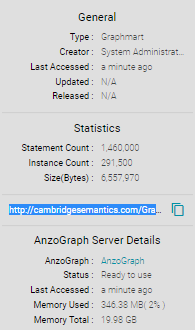
You can click the clipboard icon (
 ) to copy the graphmart URI to your clipboard.
You can also copy a URL-encoded version of the graphmart URI from the address bar in the browser when viewing the graphmart overview screen. For example:
You can retrieve a graph or data layer URI on the Data Layers screen for a graphmart. Follow the steps below to copy a graph URI.
- In the Anzo console, expand the Blend menu and click Graphmarts. Anzo displays the Graphmarts screen, which lists the existing graphmarts.
- In the list of graphmarts, click the name of the graphmart that contains the graph or data layer for which you want to copy the URI. Anzo displays the graphmart overview.
- Click the Data Layers tab. Anzo displays the data layers in the graphmart. Each data layer is a graph. For example:
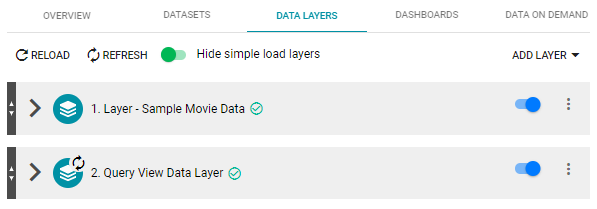
- To copy the URI for a layer to your clipboard, click the menu icon (
 ) on the right side of the layer and click Copy URI.
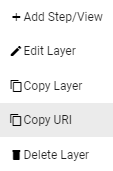
Follow the steps below to view and copy the URI for a linked data set (LDS) in the catalog.
- In the Anzo console, expand the Blend menu and click Datasets. Anzo displays the Dataset catalog, which lists the data sets that have been onboarded to Anzo.
- In the list of data sets, click the name of the data set for which you want to copy the URI. Anzo displays the Explore tab. For example:
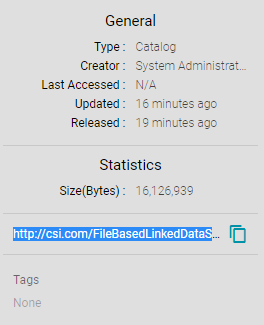
- Click the Overview tab to view the general information for the data set. For example:

- In the statistics section on the right side of the screen, click the clipboard icon () to copy the LDS URI to your clipboard. For example, the image below shows the URI highlighted:
To query from a remote client (such as over the SPARQL endpoint) a linked data set (LDS) that is stored in a local volume, you need to specify the catalog entry URI for that LDS as the target data set. The catalog entry URI uniquely identifies an LDS because it encodes both the LDS and its data source (local volume) in the URI. Follow the steps below to find the catalog entry for an LDS.
- First, retrieve the URI for the LDS whose catalog entry URI you want to find. For instructions, see How do I find the URI for an LDS in the Dataset Catalog? above.
- Next, open the Find tab in the Query Builder. In the Anzo application, expand the Access menu and click Query Builder. Then click the Find tab. The Find screen opens and the System Datasource is selected as the target data source.
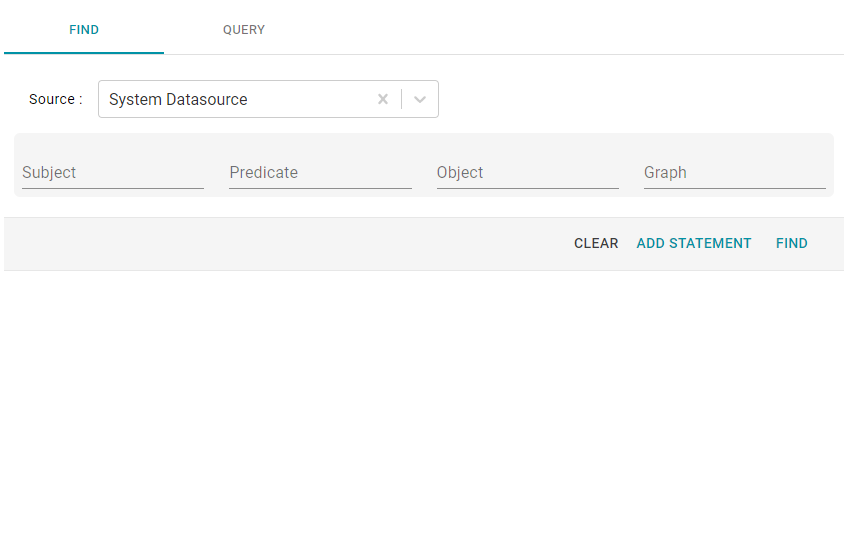
- If the LDS is in a different volume, click the Source drop-down list and select the appropriate volume. Typically, linked data sets are stored in the system volume.
- Paste in the Object field the LDS URI that you copied in the first step. Then click Find. Anzo returns the set of quads for which the LDS URI is the object. For example:

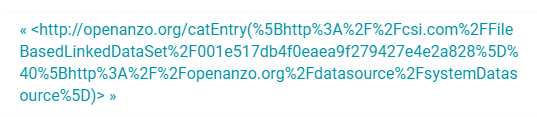
- In the Subject field in the results, look for a URI that begins with http://openanzo.org/catEntry. The entire value is the catalog entry URI for the LDS. For example:
- Copy the entire URI. This is the URI to use as the target data source for SPARQL endpoint queries against the LDS. For more information about the SPARQL endpoint, see Accessing Data via the SPARQL Endpoint.
When you make modifications to data layers in a graphmart, Anzo displays Reload and Refresh buttons on the top of the Data Layers screen. For example:
The Refresh option becomes available when changes have been made to one or more data layers. Clicking Refresh resets (deletes from AnzoGraph) and reloads only the data layers that have changed. Clicking Reload resets and reloads the entire graphmart to AnzoGraph, including the data layers that have not changed.
When you publish a pipeline that includes a job that onboards data incrementally, Anzo preserves the previously onboarded data by moving the existing RDF files to a hidden directory within the FLDS. The new RDF files for the current pipeline are then written to the FLDS. Since hidden directories are not loaded to AnzoGraph, only the most current data is loaded into memory. For information about onboarding data incrementally, see Creating an Incremental Schema.