Sharing Access to Artifacts
All Anzo artifacts—data sources, schemas, models, mappings, pipelines, graphmarts, etc.—that you create can be shared with other groups (or users) from the Sharing tab in the Anzo application. This topic provides an overview of the Sharing tab and basic instructions for configuring artifact permissions.
For specifics about sharing multifaceted artifacts like graphmarts that include multiple data layers and steps and dashboards that include multiple lenses, seeGraphmart, Data Layer, and Step Sharing and Dashboard and Lens Sharing.
Sharing Tab Overview
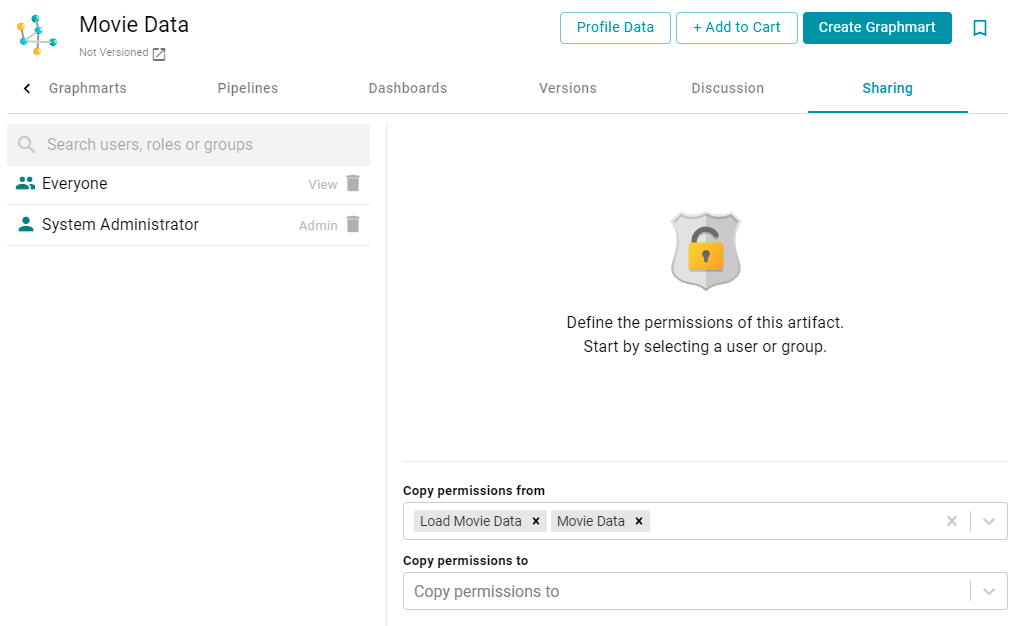
Access the Sharing tab by navigating to an artifact in the Anzo application and clicking Sharing. For example, the image below shows the Sharing tab for a data set in the Datasets catalog.
User, Role, and Group List
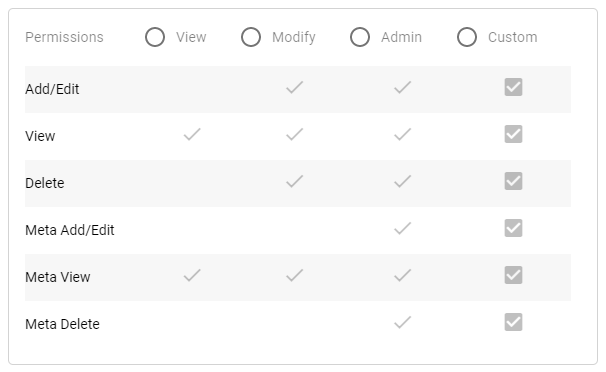
The left side of the screen lists the users, groups, or roles that this artifact has been shared with. The current level of access is listed next to each name: View, Modify, or Admin. View, Modify, and Admin are predefined permission sets. Each predefined set selects a certain combination of six permissions. You also have the option to create a Custom set of permissions.
Selecting a user or group from the list displays the following permissions table on the right side of the screen:
Typing a value in the Search users, roles or groups field finds and displays the users or groups that you can add to the list.
Permission Settings
The table below lists the predefined permission sets and describes the privileges that are granted for each permission that is part of the predefined set:
| Set | Permission | Allows a user to: |
|---|---|---|
| View | View |
|
| Meta View |
|
|
| Modify | In addition to the View and Meta View permissions described above, the Modify set includes the Add/Edit and Delete permissions described below. | |
| Add/Edit |
|
|
| Delete |
|
|
| Admin | In addition to the View, Meta View, Add/Edit, and Delete permissions described above, the Admin set includes the Meta Add/Edit and Meta Delete permissions described below. | |
| Meta Add/Edit |
|
|
| Meta Delete |
|
|
Permission Inheritance
The bottom of the screen displays the permission inheritance settings:
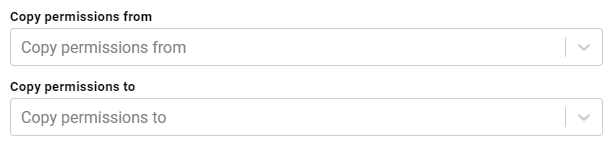
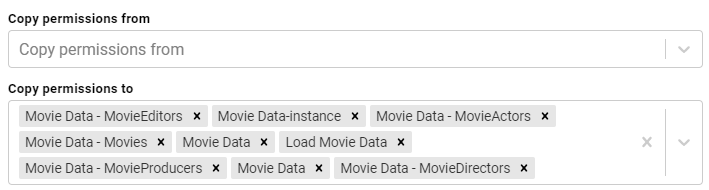
You can configure an artifact to inherit its permissions from another artifact or artifacts by choosing the artifacts to Copy permissions from. For example, this sample data set artifact shown below is configured to copy permissions from the Load Movie Data pipeline and Movie Data data source.

Permissions are additive. Copying permissions from multiple artifacts with differing permission levels results in the super set being acquired by the artifact that is inheriting the permissions. In addition, any permissions that are configured in the table at the top of the screen are also added to the set.
You can also configure an artifact to Copy permissions to other artifacts. For example, by default graphmarts are configured to copy their permissions to their data layers and steps.

For more conceptual information about permission inheritance, see Permission Inheritance.
Sharing an Artifact
Follow the instructions below to share access to an artifact.
- In the Anzo application, navigate to the artifact that you want to share access to. Then click the Sharing tab. For example, the image below shows the Sharing screen for a data source:
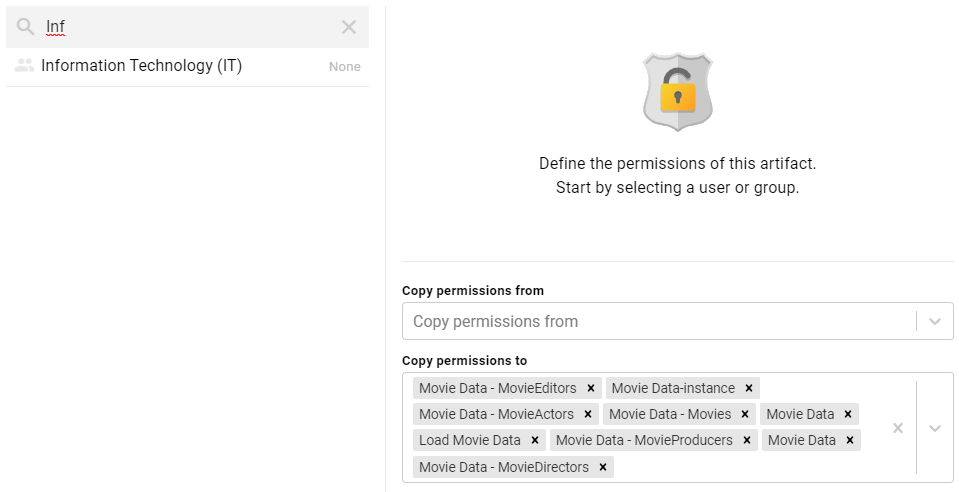
- To share access to this artifact with a user or group, type a value in the Search users, roles or groups field to find and display the user or group. The resulting list shows the current permission level that is set for each user or group in the search results. For example, the image below shows the current permissions for the IT group (None):
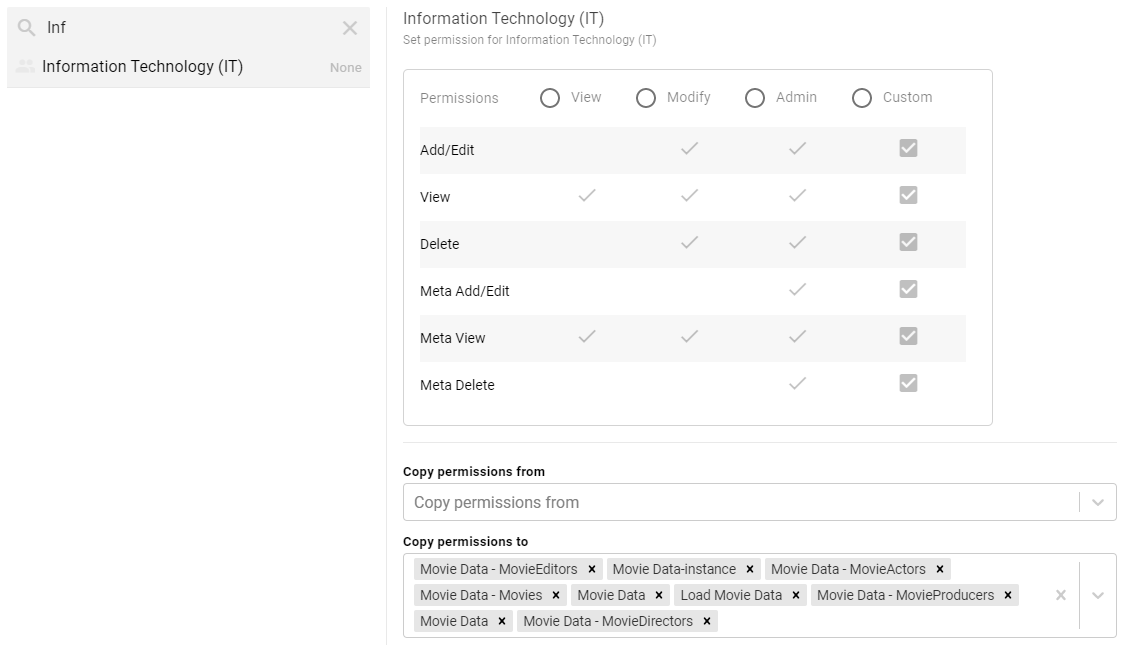
- Select the user or group for which you want to configure permissions. The permissions settings are displayed on the right side of the screen. For example:
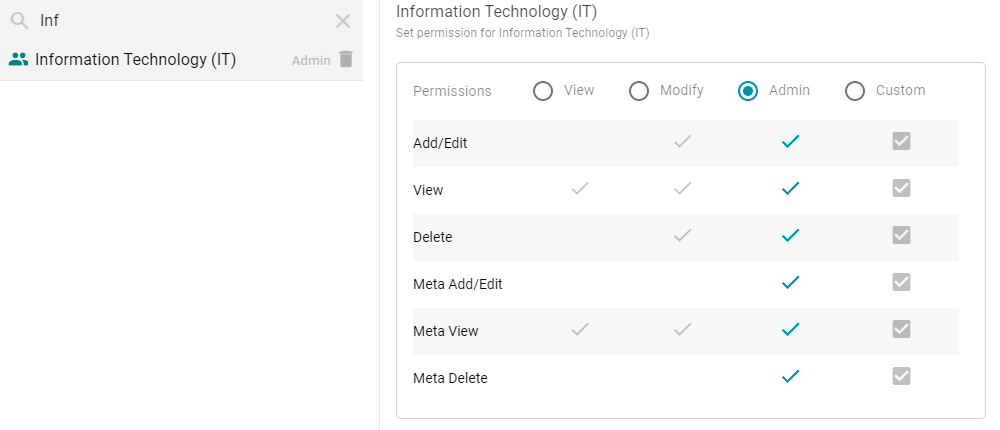
- To assign a predefined set of permissions, click the View, Modify, or Admin radio button to assign that level of access to the selected user or group. Refer to Permission Settings above for details about the permissions sets. For example, the image below gives Admin permissions to users in the IT group:
If you want to customize the permissions, click the Custom radio button and then select or deselect the permissions checkboxes. To clear permissions for a user or group, click the trashcan icon (
 ) next to the name.
 - If you want to change the inheritance for the artifact, use the fields below the permissions table:
- To apply all of the permissions from another artifact to this one, select the artifact to inherit from in the Copy permissions from field.
- To pass this artifact's permissions to other artifacts, select the artifacts to pass permissions to in the Copy permissions to field.
Permissions are additive. Copying permissions from multiple artifacts with differing permission levels results in the super set being acquired by the artifact that is inheriting the permissions. In addition, any permissions that are configured in the table at the top of the screen are also added to the set.
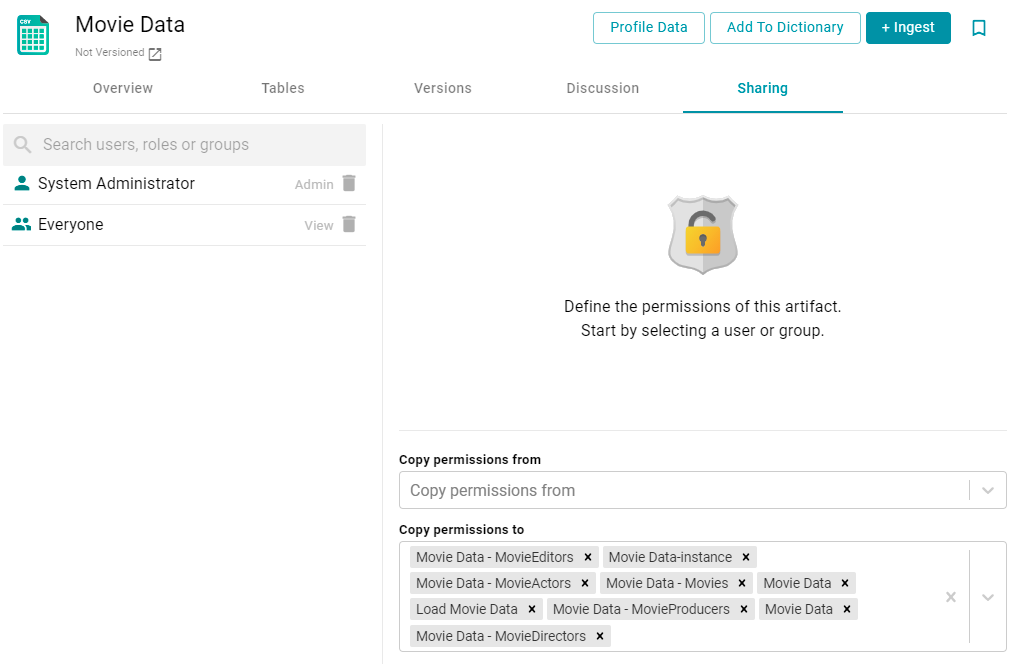
For example, the image below shows the inheritance for a data source. By default, the data source is configured to copy its permissions to all of the artifacts that were generated from the Ingest workflow:
Repeat the steps above to share the artifact with additional groups. Changes to permissions take effect immediately. Users do not need to log out of the application and log back in.