Creating a Metadata Dictionary (Preview)
Metadata dictionaries are similar to models in that they define the desired business meaning and structure of the data after it is onboarded to Anzo and converted to the graph model. Unlike models, though, Metadata dictionaries offer maximum flexibility for normalizing the data that comes from various sources and structures. A single dictionary can be used to link conceptually identical elements (columns) from many different schemas, independent of any models and mappings. The metadata dictionary structure becomes the basis for creating and reusing models and mappings. As model and mapping artifacts are generated, deleted, and recreated over time, the growing body of information about business meaning and the concepts that link source schema elements to properties in the model remain available in the metadata dictionaries.
The Metadata Dictionary functionality is a Preview release. Features are considered "Preview" when the implementation has recently been incorporated into the product and significant development may still be underway. Cambridge Semantics recommends that you do not plan to use metadata dictionaries in a production environment.
This topic provides instructions for creating and managing metadata dictionaries.
- Creating a Metadata Dictionary from a Schema
- Creating a Metadata Dictionary from Scratch
- Defining Concepts in a Metadata Dictionary
Creating a Metadata Dictionary from a Schema
Follow the instructions below to create a new metadata dictionary from a schema.
The steps below start with viewing a Schema and then adding that Schema to a new dictionary. That method allows for flexibility in choosing which Schema tables are added to the dictionary. However, you can also create a dictionary first and then add an entire Schema to it. To do so, select Metadata Hub from the Onboard menu. On the Dictionaries screen, click the Create button and select From Schema. In the Create Metadata Dictionary dialog box, select the Schema to add to the new dictionary.
- In the Anzo application, expand the Onboard menu and click Structured Data. Anzo displays the Data Sources screen, which lists any existing sources. For example:

- On the Data Sources screen, click the name of the Data Source for which you want to create a dictionary. Anzo displays the Tables screen for the source. For example:
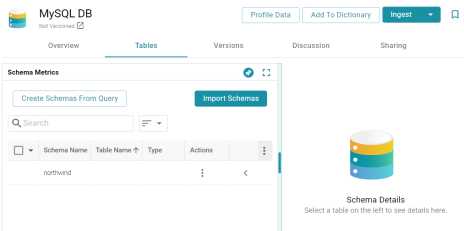
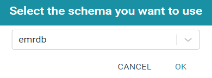
- Click the Add To Dictionary button. If the source has more than one schema, Anzo displays the select schema dialog box. In the drop-down list, select the schema to add to the dictionary, and then click OK. For example:
Anzo opens the Create Metadata Dictionary From This Schema dialog box.
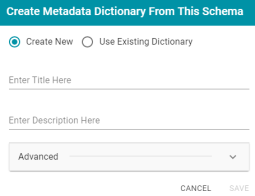
- In the dialog box, leave the Create New radio button selected.
- Enter a name for the dictionary in the Title field and specify an optional description in the Description field.
- To configure additional options, such as limiting the schema tables that are added to the dictionary, click Advanced to display the advanced options. The list below describes each option.
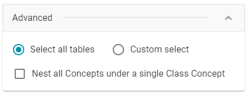
- Select all tables: Select this option if you want to include all of the schema tables in the dictionary. Each table becomes a class concept, and each column in the table becomes a property concept under the class.
- Custom select: Select this option if you want to include a subset of the schema tables in the dictionary. Clicking Custom select displays the list of schema tables. Select the checkbox for each table that you want to add to the dictionary.
- Nest all Concepts under a single Class Concept: If all of the schema tables contain the same type of properties and could belong in the same class, you can select this option to merge all of the properties from all of the tables into a single class concept. For example, if the source is multiple CSV files where each file (table in the schema) contains the data for a single study in a group of studies, enabling this option would merge all of the properties from each file into one class. Anzo uses one of table names as the name for the class concept in the dictionary.
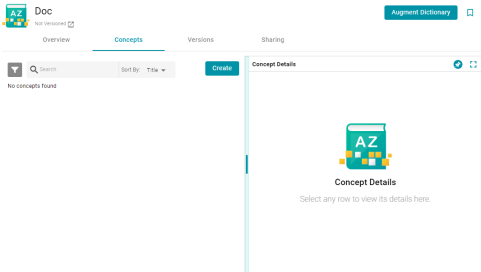
- Click Save. Anzo creates the dictionary and displays a message that asks if you want to view the new dictionary. Click Go to Dictionary to open the dictionary in the Metadata Hub. The Concept tab is displayed. For example:
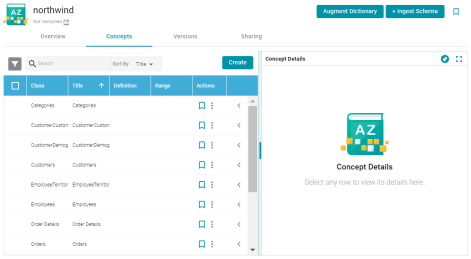
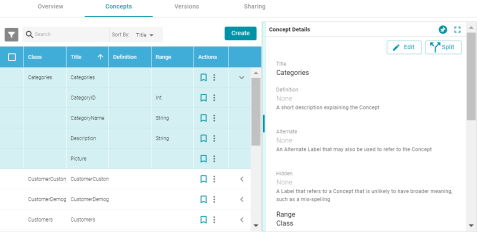
- Click a row in the list of concepts on the left to view the concept details on the right side of the screen. Click the < character in the table to expand a class concept and view its property concepts. For example:
Create and edit concepts as needed. See Defining Concepts in a Metadata Dictionary below for information about working with concepts.
Creating a Metadata Dictionary from Scratch
Follow the instructions below to create a metadata dictionary from scratch.
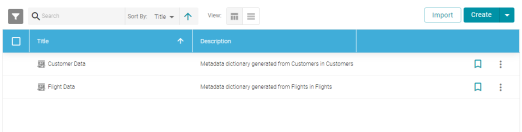
- In the Anzo application, expand the Onboard menu and click Metadata Hub. Anzo displays the Dictionaries screen. For example:
- Click the Create button at the top of the screen, and select Manual. Anzo displays the Create Metadata Dictionary dialog box.
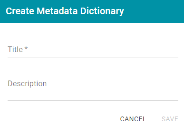
- Type a name for the dictionary in the Title field and supply an optional description in the Description field.
- Click Save to create the new dictionary. Anzo saves the dictionary and displays the empty Concepts tab. For example:
Create and edit concepts as needed. See Defining Concepts in a Metadata Dictionary below for information about working with concepts.
Defining Concepts in a Metadata Dictionary
This section provides examples and instructions for defining the concepts in a data dictionary.
Merging Concepts
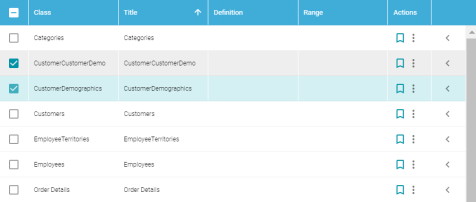
It is common for schemas, especially relational database schemas, to have multiple tables with foreign key relationships. When the schema is added to a dictionary, each table becomes a class concept, resulting in a dictionary that includes multiple concepts with different names but the same meaning. To simplify the data model, similar concepts can be consolidated into one concept. For example, the concept list below has a "CustomerCustomerDemo" class and a class called "CustomerDemographics."
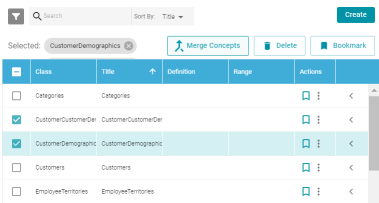
The two customer demo concepts share properties such as CustomerID and CustomerTypeID, which are foreign key relationships across the tables/classes. The classes can be merged into a single concept, creating one class in the model that contains all of the customer demographics-related properties.
To merge concepts
- Select the checkbox next to each concept that you want to merge, and then click the Merge Concepts button above the table. For example:
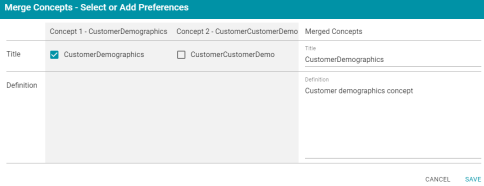
Anzo displays the Merge Concepts dialog box, which lists the classes to merge and enables you to specify the title and description of the new, merged class. For example:
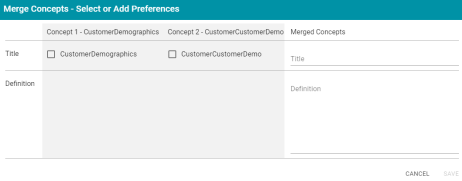
- On the Merge Concepts screen, if you want to name the merged class with one of the existing class names, select the checkbox next to that class. The Title field on the right is populated with that name, and you have the option to edit it. If you do not want to use any existing titles, type a new title in the Title field.
- In the Definition field, type an optional description for the class. For example:
- Click Save to merge the concepts. Anzo displays a confirmation dialog box that lists the concepts that will be merged and asks if you want to proceed. Click OK to complete the merge.
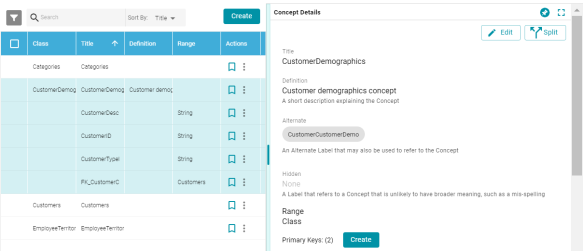
- When the merge is complete, the concept list is displayed with the changes. You can select the merged class to view and modify concept details on the right side of the screen. For example, the image below shows the details for the merged CustomerDemographics concept. The names of the concepts that were merged to CustomerDemographics are listed in the Alternate field. Sources that include those labels, "CustomerDemographics" and "CustomerCustomerDemo," will be mapped to "CustomerDemographics" in the model. You can edit the Alternate field to add other labels that might come from future source schemas.
Creating a Concept
Follow the instructions below to create a new class or property concept in a data dictionary.
- To add a new concept, click the Create button on the right side of the screen. Anzo displays the Create New Concept screen.
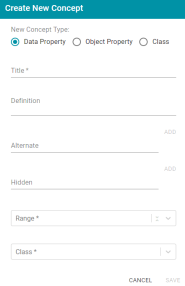
- Under New Concept Type, select the radio button for the type of concept to create:
- Data Property: A data property has an object that is a literal value. For example, a property like FirstName is a data property. Its object has a value such as "Jane."
- Object Property: An object property has an object that relates a class to another class. These types of relationships are usually foreign keys in the source. For example, a property like CustomerID might relate the Customers class to the Orders class.
- Class: A class concept contains a group of related properties, such as a table name from a source schema.
- Depending on the type of concept you are creating, specify the appropriate required and optional details:
- Title: The name for this class or property concept.
- Definition: An optional description for the new concept.
- Alternate: An optional list of labels that should map to this new class or property concept.
- Hidden: An optional list of labels that should be hidden in the data model that is generated from this dictionary.
- Range: For property concepts, this required field specifies the data type for the property.
- Class: For property concepts, this required field lists the class or classes the property belongs to.
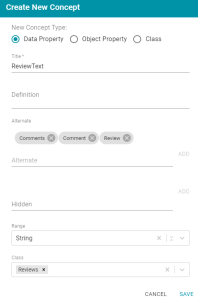
For example, the image below creates a data property for reviews of orders. The new property is named ReviewText and "Comment," "Comments," and "Review" are included as Alternate labels so that those properties in source schemas are mapped to ReviewText in the model when the data is onboarded.
- Click Save to add the new concept to the dictionary.
Splitting a Concept
If you determine that one concept should be separated into multiple concepts, you can quickly split the concept and create an additional one by moving any of the original concept's elements to a new concept. Follow the instructions below to split a concept.
- In the list of concepts, select the row for concept that you want to split and then click the Split button in the Concept Details. Anzo displays the Split Concept screen, which lists the original concept on the left and the new concept on the right. For example:
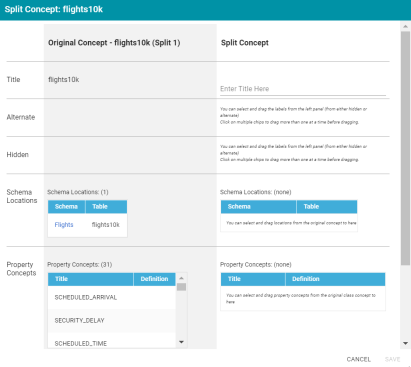
- Under Split Concept, type a name for the new concept in the Title field.
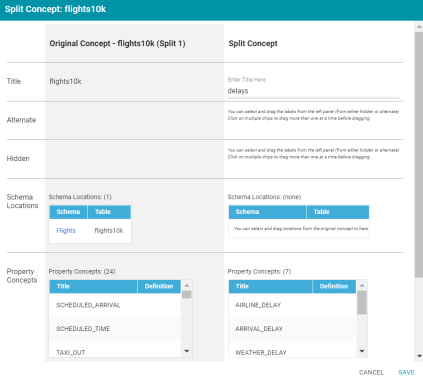
- For the rest of the fields, you can drag elements from the Original Concept to the Split Concept. For example, the image below creates a new Delays class concept and moves the delay-related properties from the original concept to the new concept.
- When you are finished configuring the new concept, click Save. Anzo displays a confirmation dialog box that lists the concepts that will be split and asks if you want to proceed. Click OK to complete the split and return to the Concepts screen.
For instructions on onboarding data using a data dictionary, see Ingesting a Data Source with a Metadata Dictionary.
If you make changes to a dictionary after the schema has been ingested, you must re-ingest the schema to incorporate the dictionary changes. You can click the Ingest Schema button at the top of the dictionary screen. Or you can follow the instructions in Ingesting a Data Source with a Metadata Dictionary to re-ingest the data with the modified dictionary.