Creating a Migration Package
Follow the instructions below to create a new Migration Package, add artifacts to the package, and configure the export options.
There are two permissions that control access to export, modify, and import migration packages: Manage Migration Packages and Perform Migration Package Operations As Sysadmin. If a user has only the Manage Migration Packages permission, they cannot modify, export, or import artifacts in packages unless they have the appropriate permissions on the artifacts. If a user has Perform Migration Package Operations As Sysadmin, that means they can modify, export, and import migration packages that include artifacts they may not otherwise have permission to operate on.
- In the Administration application, expand the Tools menu and click Migration Packages. Anzo displays the Migration Packages screen, which lists any existing packages. The image below shows the Migration Packages screen on an environment without any existing packages.

- Click the Create Package button. The Create Migration Package dialog box is displayed.
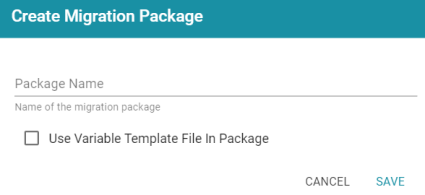
- On the Create Migration Package screen, type a name for the package in the Package Name field.
- Next, determine whether you want to add a Variable Template File to the package. A Variable Template File is a TriG file that contains statements for all of the properties that have replaceable values for each artifact included in the package. Properties with replaceable values are objects such as file paths and Anzo Data Store locations, which might differ on the source and target Anzo servers. The template that is generated has placeholder text that you replace with the desired values for the target server. To generate a Variable Template File with the package, select the Use Variable Template File In Package checkbox. Leave the checkbox blank if you do not want to generate the file.
- Click Save to save the package. Anzo creates the package and displays the Details tab where you can add artifacts and configure additional options. For example, the image below shows a new package called All Graphmarts.

- First, determine the artifacts to add to the package. Click Add Artifacts under Core Members. The Add Core Artifact dialog box is displayed:
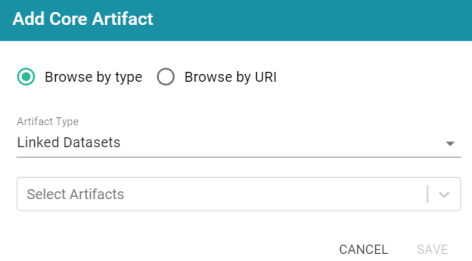
- By default, the dialog box is set to Browse by Type of artifact, such as Linked Dataset, Data Source, Mapping, or Graphmart. To choose a type, click the Artifact Type drop-down list and select a type to filter by. The Select Artifacts list is filtered to show only the selected type of artifact.
If you have a list of artifacts that you want to find by URI, you can select the Browse by URI radio button and then specify a URI.
- Click Select Artifacts and select an artifact from the list. Repeat this step to select multiple artifacts of the same type.
All related entities for the selected artifact are automatically added to the package. You do not need to find and select each related artifact individually. If you change the Artifact Type, any selections will be cleared from the Select Artifacts field.
- When you have finished selecting artifacts, click Save to add the artifacts to the package. The artifacts are added to the list at the bottom of the screen. For example, the package shown in the image contains three Graphmarts. The Included Artifacts column shows the total number of artifacts that are related to the core member and are also included in the package.
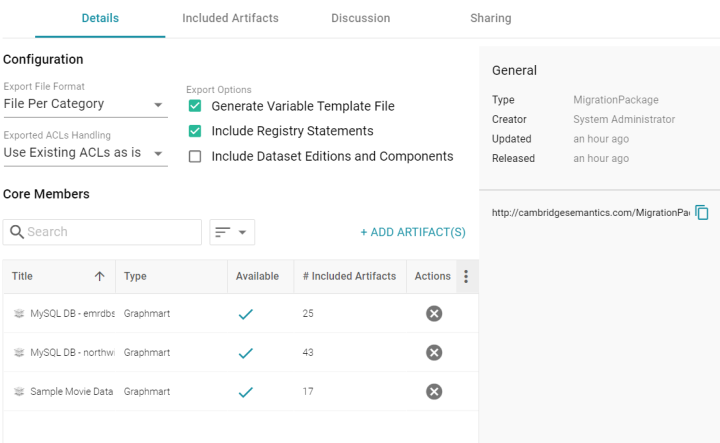
You can view specifics about the included artifacts on the Included Artifacts tab. More information about the tab is included in Editing Migration Package Template Files.
- Once the desired artifacts have been added to the package, review the export options at the top of the screen and make adjustments as needed. For details about each of the settings, see Export Configuration Settings Reference.
Once the Migration Package includes the desired artifacts and the export options are configured, the package can be exported. For instructions, see Exporting a Migration Package.