Creating or Changing Foreign Keys
Follow the instructions below to edit a schema to add foreign keys. For instructions on designating primary keys, see Assigning Primary Keys in an Onboarded Schema.
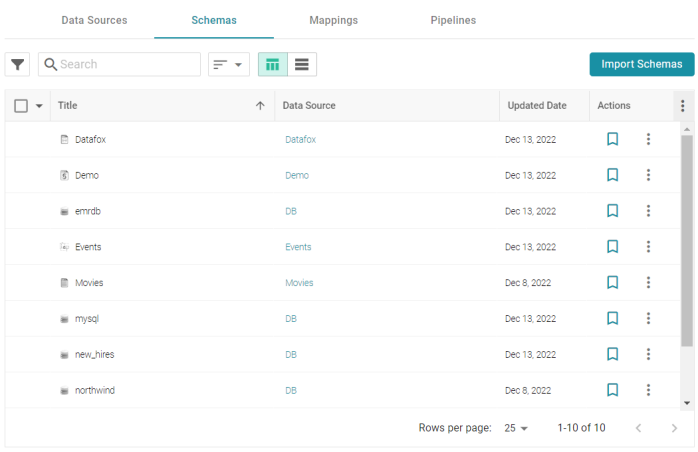
- In the Anzo application, expand the Onboard menu and click Structured Data. Anzo displays the Data Sources screen, which lists any existing sources. For example:

- Click the Schemas tab to view the list of all schemas. (You can also access a schema by selecting the data source that contains the schema.) The image below shows a view of the Schemas tab:
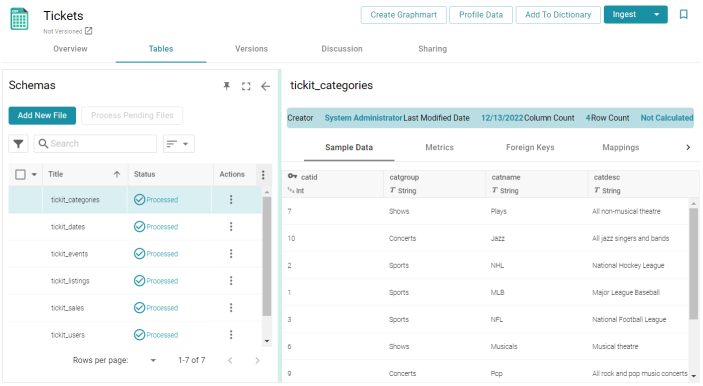
- Click the schema for which you want to assign foreign keys. Anzo displays the Tables tab for the data source that contains the schema. For example:
- Click the Foreign Keys tab on the right side of the screen. The tab lists any existing active foreign keys. For example:
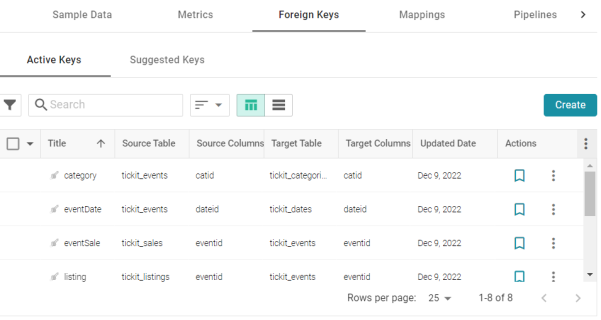
The Suggested Keys tab is populated with foreign key suggestions after a data profile has been generated for the schema. For information about data profiling, see Generating a Source Data Profile.
- To change an existing key, click a row in the table to open the Edit Foreign Key dialog box. To create a new key, click the Create button to open the Create Foreign Key dialog box.
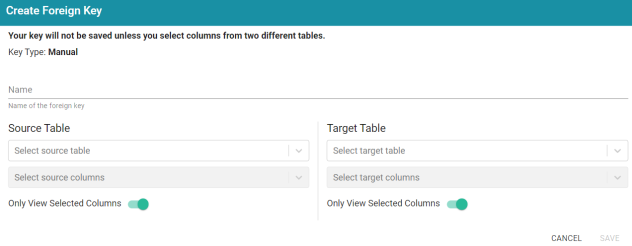
- On the Create Foreign Key screen, specify a name for the key in the Name field.
- Specify the source and target tables for this key.
- Source Table: The source table is the table where the new foreign key is created. This table refers to the primary key from the Target Table. Click the Source Table drop-down list and select the schema table where the foreign key should be created.
- Target Table: The target table is the table that contains the primary key to be referenced by the Source Table. Click the Target Table drop-down list and select the schema table that will pass values to the source table.
- Specify the source and target columns for this key:
- Source Columns: The source column is the column that becomes the foreign key to the target table's primary key. Click the Select Source Columns drop-down list and select the source column. To create a composite key by selecting an additional column, click the Select Source Columns drop-down list again and select a column.
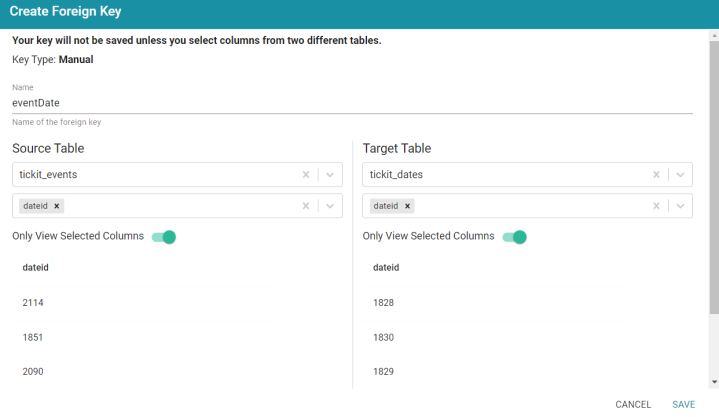
By default the screen shows sample values from the selected source column. If you want to view sample values from all columns in the source table, you can disable the Only View Selected Columns option by sliding the slider to the left.
- Target Columns: The target column is the primary key column in the target table. Click the Select Target Columns drop-down list and select the target column. To create a composite key by selecting an additional column, click the Select Target Columns drop-down list again and select a column.
By default the screen shows sample values from the selected target column. If you want to view sample values from all columns in the target table, you can disable the Only View Selected Columns option by sliding the slider to the left.
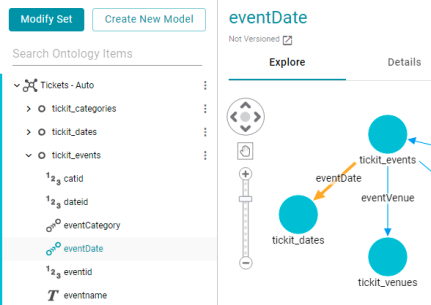
For example, the image below creates a relationship called eventDate where the dateid column in the tickit_events table becomes the foreign key and references the values from the primary key column, dateid, in the tickit_dates table.
- Source Columns: The source column is the column that becomes the foreign key to the target table's primary key. Click the Select Source Columns drop-down list and select the source column. To create a composite key by selecting an additional column, click the Select Source Columns drop-down list again and select a column.
- When you have finished supplying values, click Save to create the new key and return to the Foreign Key list. To create additional keys. Repeat this process to create additional keys.
When you ingest the data using this schema, the foreign keys become RDF OWL object properties in the data model. For example, the image below shows a portion of the model that was generated after ingesting the schema that has the foreign key in the example above. In the model, eventDate is an object property in the tickit_events class: