Uploading a Model
This topic provides instructions for uploading an existing model to Anzo. Follow these instructions if you have a model that was created outside of Anzo or was downloaded from Anzo as described in Downloading a Model. Anzo accepts model files in OWL (.owl), RDF (.rdf), TriG (.trig), TTL (.ttl), and XML (.xml) format.
When uploading a model to Anzo, follow the requirements and guidelines defined in Model Requirements.
If you want to import a version of a model that was exported from Anzo (as described in Exporting an Artifact), follow the instructions in Importing Exported Versions of Artifacts to import the model.
One of the following outcomes will occur if two users upload the same data model:
- If the second user does not have permission to modify the model that the first user uploaded, the second user receives an access denied error and cannot upload the model.
- If the second user does have permission to modify the model that the first user uploaded, Anzo overwrites the existing model with the version from user two.
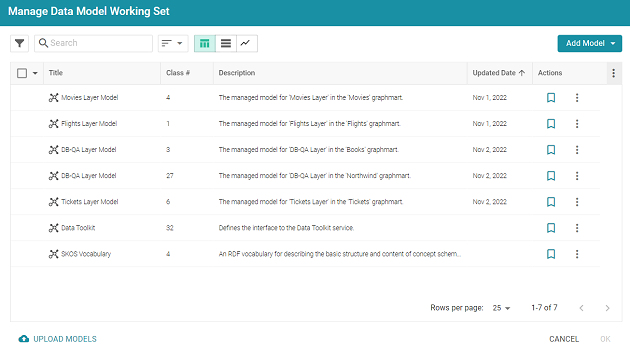
- In the Anzo application, click Model. Anzo displays the Manage Data Model Working Set screen. For example:
- On the bottom left corner of the screen, click Upload Models. The Upload Data Models dialog box opens.
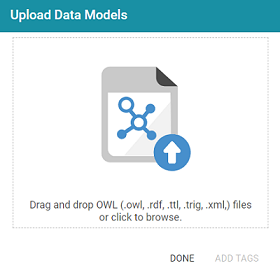
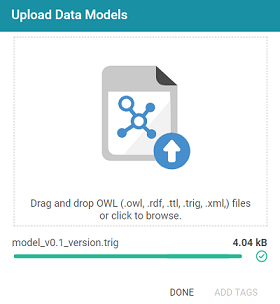
- To upload a model, drag and drop the file onto the dialog box or click the text to browse and select the file on your computer. Anzo uploads the model that you selected and displays the file name and size. For example:
If you want to upload additional models, you can repeat the process and drag and drop or select files on the Upload Data Models dialog box.
- If you want to add a tag or edit the tag that was specified in the uploaded model, you can click Add Tags and specify the tag in the dialog box. Then click OK.
- Click Done when you finish uploading models. The new models become available on the Manage Data Model Working Set screen.
For information about editing models using the model editor, see Editing a Custom Model.