Creating a Data on Demand Endpoint
This topic provides instructions for creating a Data on Demand endpoint for a graph or view. When you create an endpoint, the Data on Demand service generates a service root URL that you can use to connect to the endpoint programmatically or from applications.
The Data on Demand service is included in the AnzoGraph front end, and endpoints must be created from the Query & Admin Console. For instructions on deploying the front end if it is not installed, see Deploying the AnzoGraph Frontend Console Container.
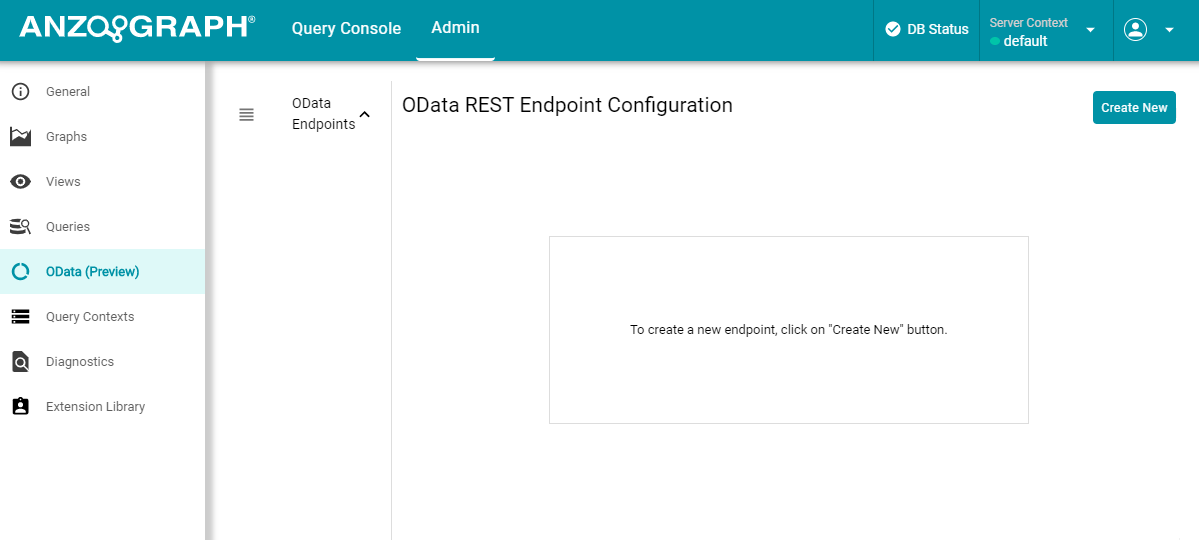
- In the Query & Admin Console, click the Admin tab. Then click the OData (Preview) menu item. The OData REST Endpoint Configuration screen is displayed. For example:

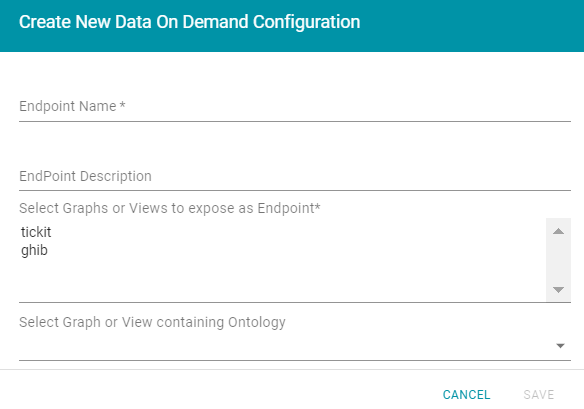
- Click the Create New button at the top of the screen. The Create New Data On Demand Configuration dialog box is displayed. For example:

- Configure the Data on Demand endpoint by specifying the following options:
- Endpoint Name: Required field that specifies the name of this endpoint. This value is added to the service root URL that is generated for the endpoint.
- Endpoint Description: Optional field that lists a short description of the endpoint.
- Select Graphs or Views to Expose: Required field that specifies the graph or view to expose in the endpoint. You can press Ctrl and click to select multiple graphs or views.
- Select Graph or View Containing Ontology: Optional field that specifies the graph or view that contains the ontology that you want to expose in the endpoint.
If an ontology does not exist, leave the field blank. The Data on Demand service automatically generates one when you save the configuration.
- When you have finished configuring the endpoint, click Save to create the endpoint. The service generates an ontology, if needed, and then displays the endpoint details. For example:

The Data on Demand endpoint is ready for access via OData protocol.
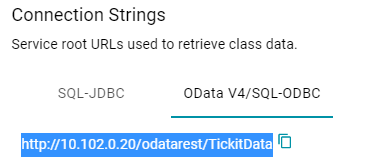
- To get the connection string for the entire graph or view that was exposed, use the OData V4/SQL-ODBC service URL that is listed under Connection Strings. For example:
 The SQL-JDBC option will be available in a future release.
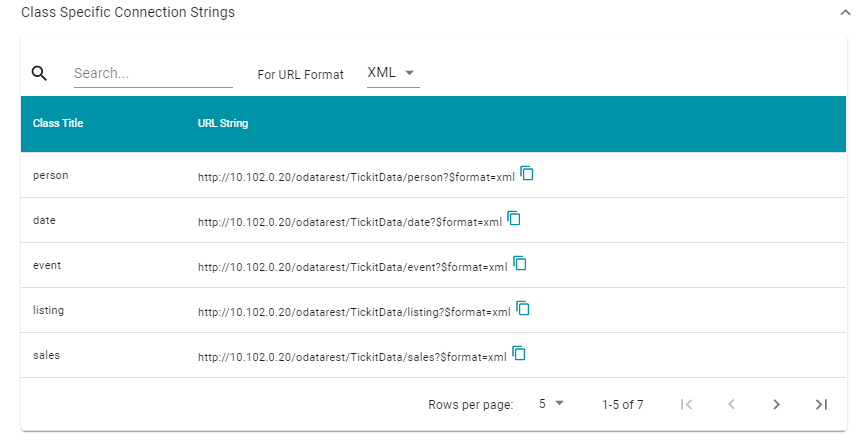
 - If your application requires you to view one table at a time or you are only interested in viewing a specific class, click Class Specific Connection Strings to expand the field and view the connection strings for each class in the ontology. For example:

For convenience, the class-specific connection strings include the format parameter for specifying the output format. You can click the For URL Format drop-down list to set the output format to CSV, JSON, or XML.
For information about accessing OData endpoints, see Accessing a Data on Demand Endpoint.