Deploy the Frontend Container
This topic provides instructions for deploying the frontend container with Docker for Linux and then connecting the frontend to your existing cluster. For information on installing the frontend using the RHEL/Rocky installer, see Enterprise Linux 9 Deployments.
Follow the instructions below to deploy the Graph Lakehouse frontend console on Docker for Linux.
You might want to follow the steps in Post-installation steps for Linux to make sure that a non-root user can run Docker commands and you do not need to include "sudo" in the commands below.
- If necessary, start Docker with
sudo systemctl start docker.Docker caches images on the Docker host. If you have deployed a front end container previously, that image is cached on the host and can be used to redeploy the front end console. If you want to deploy the latest release, first pull the latest image. To do so, run the following command, and then proceed to the next step.
docker pull cambridgesemantics/anzograph-frontend:latest
You can deploy alternate front end console versions by replacing the "latest" tag with any of the tags that are available on the Graph Lakehouse Frontend Docker Hub site.
- Run the following Docker command to deploy the Graph Lakehouse front end container image. The command instructs Docker to start the container and configure HTTP and HTTPS access to the application by mapping the container ports to the HTTP and HTTPS ports on the local host:
docker run -d -p host_http_port:8080 -p host_https_port:8443 --name=container_name cambridgesemantics/anzograph-frontend:tag
The list below describes each of the parameters:
- host_http_port is the port on the local host to use for HTTP access to the Graph Lakehouse console user interface. In the container, the user interface binds to port 8080 for HTTP access. Altair recommends that you specify 80 to map the container's HTTP port to port 80 on the local host. If port 80 is in use, specify an alternate port for host_http_port.
- host_https_port is the port on the local host to use for HTTPS access to the Graph Lakehouse console user interface. In the container, the user interface binds to port 8443 for HTTPS access. Altair recommends that you specify 443 to map the container's HTTPS port to port 443 on the local host. If port 443 is in use, specify an alternate port for host_https_port.
- container_name is the short name to use to identify the Graph Lakehouse front end container. For example, anzograph-frontend.
- tag is the tag from the Graph Lakehouse Frontend Docker Hub site that identifies the version of the front end console to deploy. If you pulled an image in the first step, this tag should match the tag from the pull command. Usually the latest tag is specified so the most recent release is deployed.
For example:
docker run -d -p 80:8080 -p 443:8443 --name=anzograph-frontend cambridgesemantics/anzograph-frontend:latest
When the prompt returns the container ID, the container is running. For example:
7ad7a2c2b60c0b15e75af9f05d41edc665497c58939da561249c9067f04b59fc
- The front end console user interface is now installed and ready to use. To open the console, open a browser and go to the following
URL:
https://IP_address
Where IP_address is the IP address of the host server where Docker for Linux is installed. If you mapped the container's HTTPS port to port 443 on the host, you do not need to specify a port. If you specified a port other than 443, include the port in the URL. For example:
https://10.100.0.1:8888If you are using Docker for Linux locally on the same server as the Graph Lakehouse leader node and need to know the IP address of the front end console container, you can run the following command:
docker inspect container_name | grep '"IPAddress"' | head -n 1
For example:
docker inspect anzograph-frontend | grep '"IPAddress"' | head -n 1
"IPAddress": "172.17.0.2"
- The browser displays the Graph Lakehouse console login screen. On the login screen, specify the following credentials and then click Sign In.
- Username: admin
- Password: Passw0rd1
The End User License Agreement (EULA) is displayed.
- Review the EULA and click Accept to proceed. The front end console (also referred to as the Query and Admin Console) is displayed.
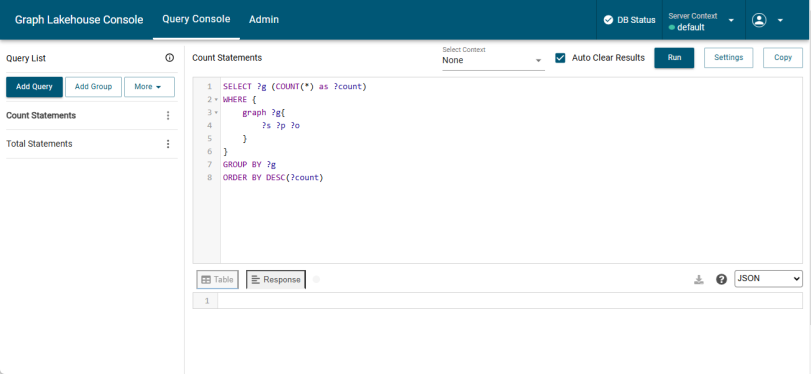
- The top right of the screen displays the Server Context. Because the user interface was deployed separately and is not associated with an Graph Lakehouse deployment, the Server Context is initially "None." Click the Server Context drop-down list and select MANAGE CONFIGURATION.

The Server Setting or Contexts screen is displayed:

- Authenticate users to access the front end console, while still using the Server Configuration context to access Graph Lakehouse.
- Configure Graph Lakehouse to both authenticate users and use LDAP group membership to authorize Graph Lakehouse to execute specific SPARQL queries and other statements.
By default, the Server Configuration context is used both for authenticating front end console users and providing access to an Graph Lakehouse deployment to execute SPARQL queries. Depending on settings in the Graph Lakehouse settings.conf configuration file, the LDAP Configuration option provides the capability to do the following:
See Configure Graph Lakehouse for LDAP Authentication and Create and Manage Roles from the Console for information on setting up Graph Lakehouse to use LDAP directory services for Console and Graph Lakehouse authentication and authorization.
Updating the Server Context
To configure or update settings for the Graph Lakehouse server configuration context:
- Select the Server Configuration option and then click the menu icon (
 ) to the right of the default context and select Edit. The Edit Context screen is displayed:
- On the Edit Context screen, configure the connection to your Graph Lakehouse site deployment by supplying the values for the following required fields:
- IP: Specify the IP address for the Graph Lakehouse leader server. Even if this Docker container is installed on the Graph Lakehouse leader node, you must enter the routable IP address for the server.
- Management Port (gRPC): This port is the system management communications port. It is set to 5600 by default and is rarely changed. Accept the default value of 5600 unless you have changed the Graph Lakehouse sysmgr_port setting in
<install_path>/azg/config/settings.conf. - SPARQL Port (gRPC): This port is the secure, encrypted, gRPC-based protocol port used to send SPARQL queries and receiving results. It is set to 5700 by default and is rarely changed. Accept the default value of 5700 unless you have changed the anzo_protocol_port setting in
<install_path>/azg/config/settings.conf. - Bolt Port: This field is for future use. Accept the default value of 0.
- Concurrency Limit: This parameter specifies the maximum number of concurrent threads allowed per database context for the gRPC connection and queries executed from the Graph Lakehouse front end console user interface. The default value is 10.
- Username: This is the gRPC admin user name that you created for the connection.
- Password: This is the password that you created for the gRPC user.
- When you have supplied all of the connection details, click Test Connection at the bottom of the screen to ensure that the connection is valid. For example:

If the test fails, adjust the values as needed and test the connection again.
- Click Save to save the connection. At the top of the screen, click the Server Context drop-down list again and select default. The context is now green to show that the console user interface is now connected:
You can now use the front end console to query and manage your Graph Lakehouse deployment. For more information on using the console, see Use the Query & Admin Console.