Adding a CSV Data Source
Follow the instructions below to add a CSV data source and import the data from the files.
If your CSV Data Source is consistently updated with new or changed files, you can configure the Data Source to process the data incrementally. For details, see Configuring a CSV or Parquet Data Source for Incremental Processing.
For information about updating a CSV Data Source if a file changes, see How do I update Anzo if a file in my CSV data source changes?
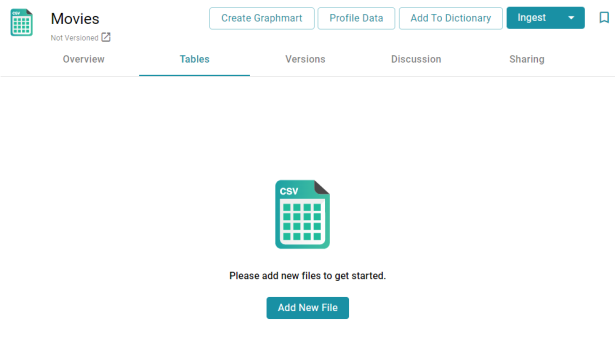
- In the Anzo application, expand the Onboard menu and click Structured Data. Anzo displays the Data Sources screen, which lists any existing sources. For example:

- Click the Add Data Source button and select File Data Source > CSV Data Source. Anzo opens the Create CSV Data Source screen.

- Specify a name for the source in the Title field, and type an optional description in the Description field. Then click Save. Anzo saves the source and displays the Tables tab.
- Click the Add New File button. Anzo displays the Add New File dialog box.
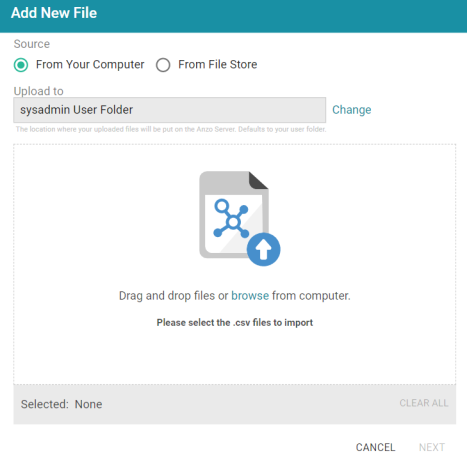
- Follow the appropriate steps below depending on whether the CSV files are on your computer or the shared File Store:
If the files are on your computer:
The From Your Computer option is a convenient way to do a one-time ingestion so you can quickly get started with your data. It should not be relied upon as part of a regular ingestion workflow unless the server is configured to store uploaded files on the shared File Store. For more information, see Setting the Default Base File Store Path for File Uploads. Data source files that are routinely updated and re-ingested should be hosted on a configured File Store.
- As a best practice, check the upload location that is listed in the Upload To field by hovering your pointer over the value to view the tooltip. Make sure the upload location is a directory on the shared file store and not in the server installation path. If the file is not uploaded to the shared file store it is not accessible by applications like AnzoGraph. In addition, other users cannot create graphmarts from the data source because they typically do not have access to the file location.
For example, viewing the Upload To location for the screen above shows that the file will be uploaded to the server installation path,
/opt/Anzo/Server/data...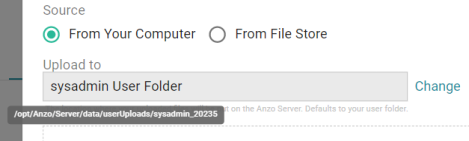
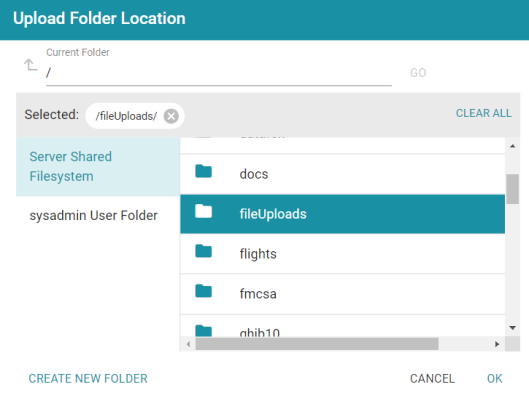
If your Upload To location is configured to upload the file to the server installation path, click Change and select an upload location that is on the shared file store. For example, the image below shows the Upload Folder Location dialog box that is presented after clicking Change. A folder called fileUploads is selected on the shared store.
- Drag and drop the files onto the screen or click browse to navigate to the files and select them. Anzo attaches the files and the Next button becomes active.
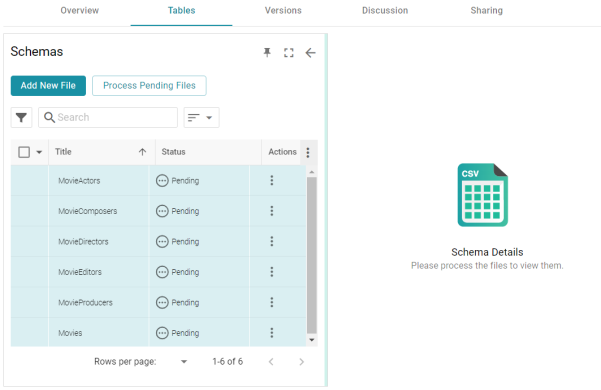
- Click Next. Anzo lists the uploaded files on the left side of the screen with a status of Pending. For example:
If the files are on the File Store:
- Click the From File Store radio button. Anzo displays the file selection dialog box.

- On the left side of the screen, select the File Store that hosts the CSV files. On the right side of the screen, navigate to the directory that contains the files to import. The screen displays the list of files in the directory.
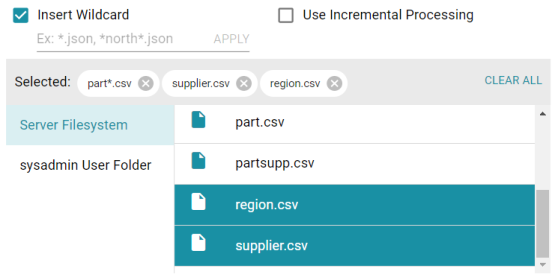
- Select each file that you want to import. If you have multiple files with the same schema— the files contain the same columns listed in the same order—and you want the files to be imported as if they are a single file, you can select the Insert Wildcard option. Then type a string using asterisks as wildcard characters to find the files with similar names. Files that match the specified string will be imported as one file and will result in one job being created in the pipeline to ingest all of the files that are selected by the specified string. After typing a string, click Apply to include that string in the Selected list.
The image below shows a directory with several CSV files. For this example, part.csv and partsupp.csv have the same schema and can be imported as one file. The Insert Wildcard option is selected, and part*.csv is specified to identify the two files.
- When you finish selecting files, click Next to close the dialog box. Anzo lists the uploaded files on the left side of the screen with a status of Pending. For example:
- As a best practice, check the upload location that is listed in the Upload To field by hovering your pointer over the value to view the tooltip. Make sure the upload location is a directory on the shared file store and not in the server installation path. If the file is not uploaded to the shared file store it is not accessible by applications like AnzoGraph. In addition, other users cannot create graphmarts from the data source because they typically do not have access to the file location.
- If you do not need to change CSV file options, click the Process Pending Files button to import all of the pending files. Anzo imports the data and updates the status to Processed.
If you do need to change CSV file options, click the menu icon (
 ) for that file and select Edit. To change the options for multiple files, select the checkbox next to each file, and then click the Edit button at the bottom of the table. Anzo displays the Edit CSV File screen. For example, the image below shows the Edit screen for a single file:
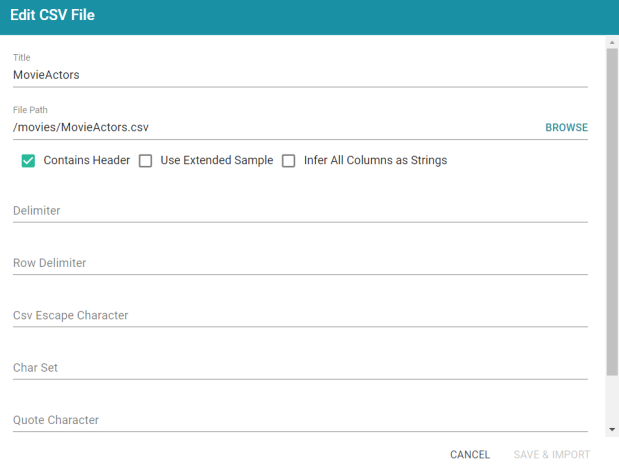
Change the options as needed and then click Save & Import to import the file or files. Anzo imports the data and updates the status to Processed.
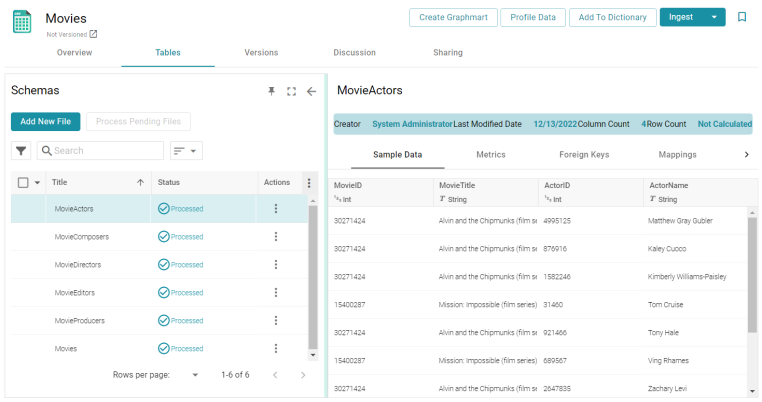
- Once the files are processed, you can click a table row on the left side of the screen to display the schema on the right side of the screen. For example:
For information about assigning primary keys and creating foreign keys, see Assigning Primary Keys in an Onboarded Schema and Creating or Changing Foreign Keys.
The source data can now be onboarded to Anzo. If you use the Spark ETL pipeline workflow, see Ingesting Data Sources via ETL Pipelines. If you do not use Spark, see Directly Loading Data Sources via Graphmarts for next steps.