Defining a Database Schema
This topic provides information about creating the schema to use when importing data from a database. The schema defines the source data to onboard. Anzo supports multiple options for defining the schema. You can import a predefined schema from the database, you can write a static SQL query that defines the data, or, if you want to import data incrementally, you can write an incremental SQL query.
You can import or create up to 5 Schemas per database Data Source. To include more than 5 Schemas, create another data source for the additional Schemas.
Select an option from the list below for instructions on creating that type of Schema:
Importing a Predefined Schema
Follow the steps below to import a predefined schema from the source database to Anzo.
By default, Anzo is configured to exclude Views from the list of available Schemas to import. For information about including Views as tables that can be imported, see Including Views as Schemas for Database Data Sources.
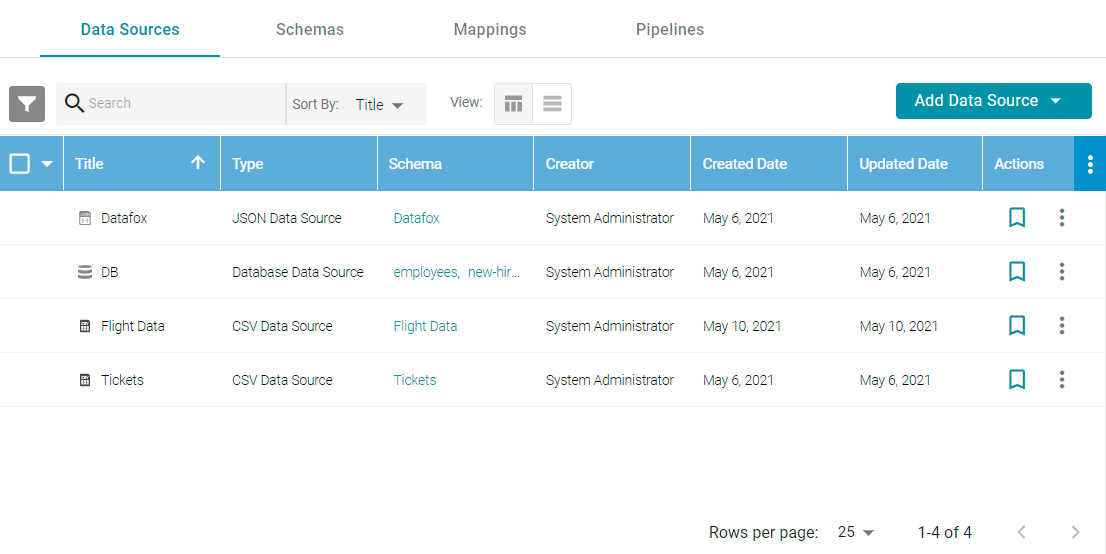
- In the Anzo application, expand the Onboard menu and click Structured Data. Anzo displays the Data Sources screen, which lists any existing Data Sources. For example:
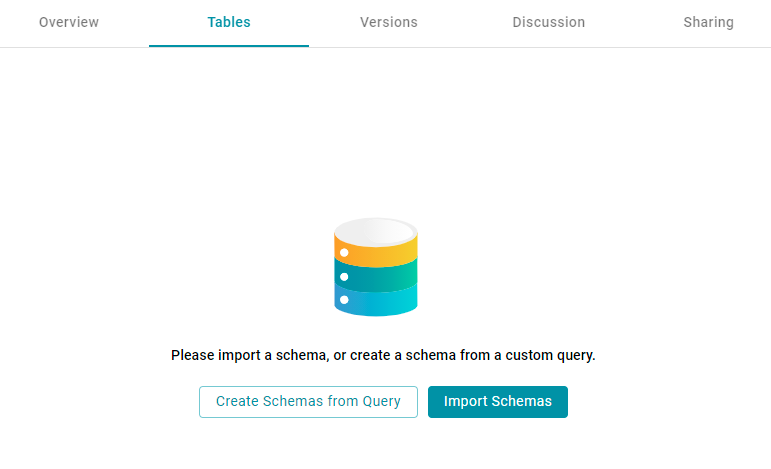
- Click the data source for which you want to import a schema. Anzo displays the Tables tab for the source. For example, the image below shows the Tables tab before any Schemas have been added for this data source:
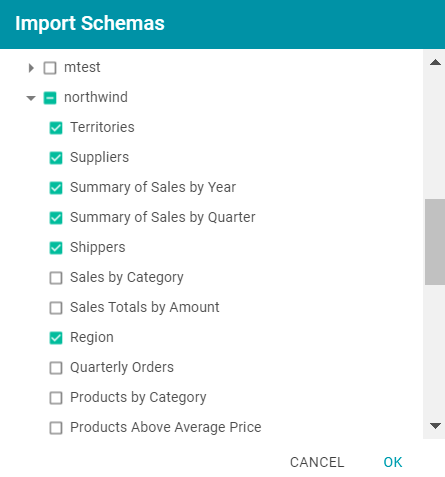
- Click the Import Schemas button. Anzo displays the Import Schemas dialog box, which lists any predefined Schemas in the database. For example:

If you do not see a schema that you expect to see, make sure that you have the necessary access to the data source.
- To import an entire schema or schemas, select the checkbox next to each schema that you want to import. If you want to import a subset of the tables in a schema, expand the schema and select the checkbox next to each table that you want to include. For example:
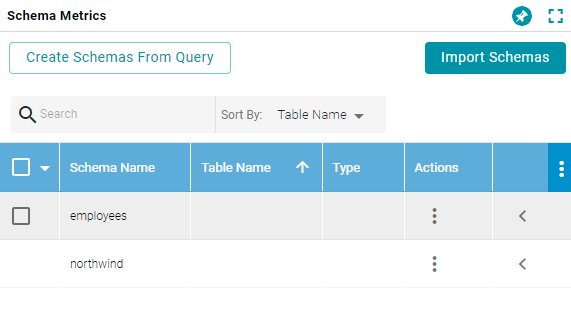
- When you have finished selecting schemas, click OK. Anzo imports the selected schema or schemas and lists the imported schemas on the Tables screen. For example:

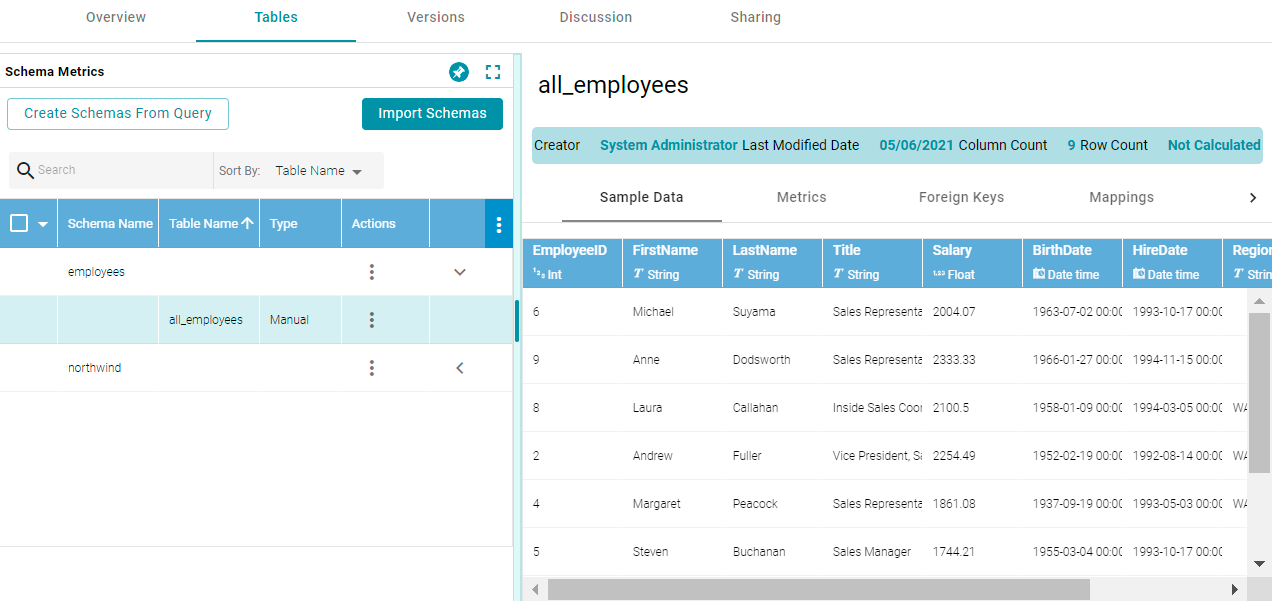
Once the Schema or Schemas are imported, they are listed on the left side of the screen. You can expand a Schema to view its tables. Selecting a row in the Schema displays the sample data on the right side of the screen. Now that a Schema has been defined, the source data can be onboarded to Anzo. For information about creating a Metadata Dictionary for this Data Source, see Creating a Metadata Dictionary. For instructions on onboarding the data by automatically generating the Model, Mappings, and ETL Pipeline, see Ingesting a New Data Source.
Creating a Schema from an SQL Query
Follow the instructions below to create a Schema by writing an SQL query that defines the data to onboard. For information about writing a Schema query that onboards data from a database incrementally, see Creating an Incremental Schema.
For better ETL pipeline performance, it is beneficial to include joins and/or filters in schema queries rather than configuring those operations at the mapping level. For more information, see Performance Considerations for Database Pipelines.
- In the Anzo application, expand the Onboard menu and click Structured Data. Anzo displays the Data Sources screen, which lists any existing Data Sources. For example:
- Click the data source for which you want to create a schema. Anzo displays the Tables tab for the source. For example, the image below shows the Tables tab before any Schemas have been created for this data source:
- Click the Create Schemas From Query button. Anzo displays the Create Schemas dialog box:

- In the Create Schemas dialog box, specify a name for this schema in the Schema Name field.
- In the Table Name field, specify a name for the table in the schema that the query will create.
- Type the SQL statement in the text box. The statement can include any functionality that the source database supports. Anzo does not validate the SQL.
If the SQL query requires quotes around values, such as ‘2010-01-01’ or ‘TestValue’, make sure that you use single quotes ('). For example:
SELECT * FROM Movies WHERE production_day='2021-08-01'
Including double quotes (") in a schema query results in an error when the query is run.
The following example creates a schema named employees. A table named all_employees will be created in the schema, and the table will be created from the SQL query:
SELECT EmployeeID, FirstName, LastName, Title, Salary, BirthDate, HireDate, Region, Country
FROM northwind.Employees
WHERE EmployeeID

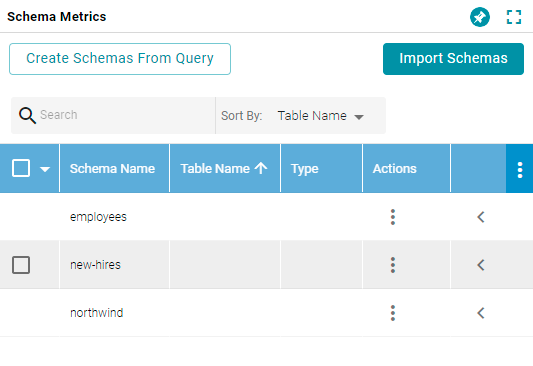
- Click Save to save the query. Anzo creates the new schema and adds it to the list of schemas on the Tables screen. For example:
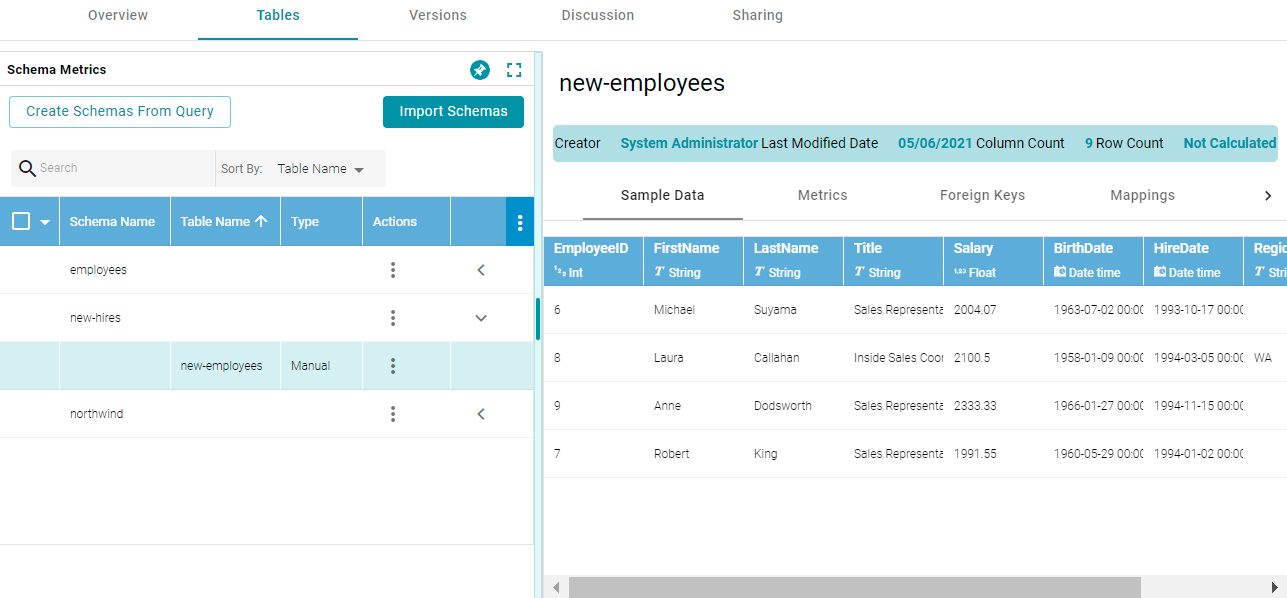
You can expand the schema to view its tables. Selecting a row in the schema displays the sample data on the right side of the screen. For example:
- If you want to create additional tables in the schema, follow these steps:
- Click the menu icon (
 ) in the Actions column for the schema name and select Add Table. For example:
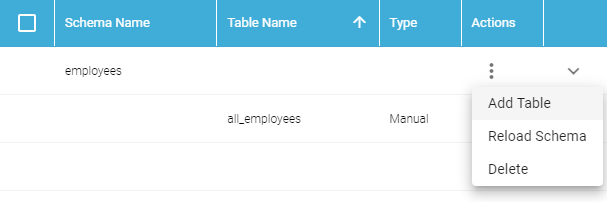
The Create New Table dialog box is displayed.
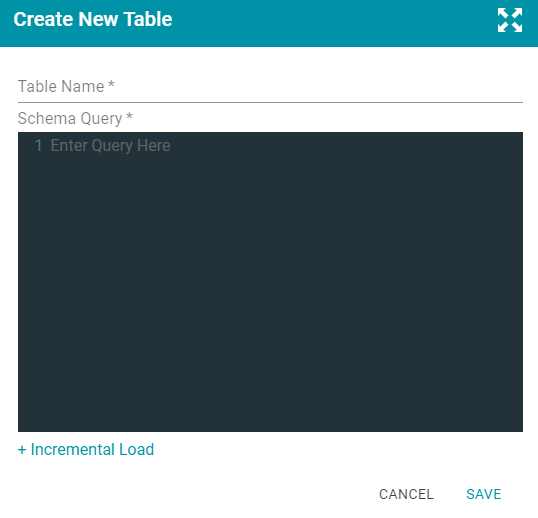
- In the Create New Table dialog box, specify a name for the new table in the Table Name field.
- In the Schema Query field, write the SQL query that defines the data for the new table.
- Click Save to add the table to the schema and return to the Tables screen.
- Click the menu icon (
Now that a schema has been defined, the source data can be onboarded to Anzo. For information about creating a metadata dictionary for this data source, see Creating a Metadata Dictionary. For instructions on onboarding the data by automatically generating the model, mappings, and ETL pipeline, see Ingesting a New Data Source.
Creating an Incremental Schema
Follow the instructions below to create a schema by writing an SQL query that defines a subset of the data to onboard in increments.
For better ETL pipeline performance, it is beneficial to include joins and/or filters in schema queries rather than configuring those operations at the mapping level. For more information, see Performance Considerations for Database Pipelines.
- In the Anzo application, expand the Onboard menu and click Structured Data. Anzo displays the Data Sources screen, which lists any existing Data Sources. For example:
- Click the data source for which you want to create an incremental schema. Anzo displays the Tables tab for the source. For example, the image below shows the Tables tab before any Schemas have been created for this data source:
- Click the Create Schemas From Query button. Anzo displays the Create Schemas dialog box:
- In the Create Schemas dialog box, specify a name for this schema in the Schema Name field.
- In the Table Name field, specify a name for the table in the schema that the query will create.
- At the bottom of the screen, enable the Include increment data option by sliding the slider to the right. Anzo displays additional settings. For example:

- Populate the following fields so that you can use the values as a guide for writing the schema query:
- Incremental Column Name: The source column whose value will be used to increment the data.
- Value: The value in the column to use as the stopping point for the first import process and the starting point for the next import.
Do not include quote characters in the Value field. If the SQL query requires quotes around values, such as ‘2010-01-01’ or ‘TestValue’, include the quotes around the {INCREMENTVALUE} parameter in the query and not in the Value field. For example, if the value to increment on is ‘2010-01-01’, specify 2010-01-01 in the Value field and add the quotes to the query like the following example:
SELECT * FROM Orders WHERE OrderData > '{INCREMENTVALUE}'In addition, make sure that you use single quotes (') in schema queries. Including double quotes (") in a schema query results in an error when the query is run.
- Comparator: The operator to use for comparing source values against the value above.
- In the query text field, type the SQL statement that will target the appropriate source data. The WHERE clause must include the incremental column name, the comparison operator, and an INCREMENTVALUE parameter that is substituted with the Value at runtime. For example, in the query below the incremental column name is EmployeeID, the comparator is > (greater than), and the {INCREMENTVALUE} parameter is specified after the comparator. {INCREMENTVALUE} will be replaced with the value in the Value field at runtime:
SELECT EmployeeID, FirstName, LastName, Title, Salary, BirthDate, HireDate, Region, Country
FROM northwind.Employees
WHERE EmployeeID > {INCREMENTVALUE}
Make sure that the query includes the INCREMENTVALUE parameter and uses the same Incremental Column Name and Comparator values as the fields below the query. For example:

- Click Save to save the query. Anzo creates the new schema and adds it to the list of schemas on the Tables screen. For example:
You can expand the schema to view its tables. Selecting a row in the schema displays the sample data on the right side of the screen.
- If you want to create additional tables in the schema, follow these steps:
- Click the menu icon () in the Actions column for the schema name and select Add Table. For example:
The Create New Table dialog box is displayed.
- In the Create New Table dialog box, specify a name for the new table in the Table Name field.
- In the Schema Query field, write the SQL query that defines the data for the new table.
- Click Save to add the table to the schema and return to the Tables screen.
- Click the menu icon (
Now that a schema has been defined, the source data can be onboarded to Anzo. For information about creating a metadata dictionary for this data source, see Creating a Metadata Dictionary. For instructions on onboarding the data by automatically generating the model, mappings, and ETL pipeline, see Ingesting a New Data Source.
See Incremental Pipeline Reference for important information about running a pipeline that includes an incremental schema.